I remember the first time I encountered this problem—my DIY enthusiasm had me tearing into a kitchen remodel, confident I knew everything. But then, a hidden leak beneath the sink started to warp the wood, and I realized I’d overlooked a crucial detail: the cabinet steam barrier. That lightbulb moment made me rethink how many of us skip this small but mighty step, often until it’s too late.
Today, I want to share my experience and show you how to prevent your cabinets from falling victim to moisture damage. We’ll delve into a simple yet often ignored fix that can save your wood and your wallet. Whether you’re installing a new dishwasher or just safeguarding your existing cabinets, understanding this barrier is key to long-term success.
Why Skipping the Cabinet Steam Barrier Can Lead to Ruined Cabinets
The cabinet steam barrier is a thin protective layer designed to block moisture from seeping into the wood, which can cause warping, molding, or rotting over time. Unfortunately, it’s a step many DIYers overlook because it seems insignificant at first glance. Trust me, I made this mistake early on and paid the price. The damage isn’t always immediately obvious, but the deterioration quietly progresses, often when you least expect it.
According to an industry study, moisture damage accounts for nearly 30% of all cabinetry failures in homes—a staggering number that underscores how crucial proper moisture control really is (source). The problem worsens if you use appliances like dishwashers without ensuring the barrier is airtight and effective. Missing this step can lead to deteriorating wood, mold growth, and even structural issues that compromise safety and aesthetics.
If you’ve ever faced a cabinet that looked fine but began to swell or rot just a year after installation, chances are moisture seeped in through unprotected areas. And here’s the thing—most of this damage isn’t covered by standard warranties, making prevention essential.
It’s a Small Step, But a Big Difference
After my own costly lesson, I learned that sealing the cabinet with a proper steam barrier is a straightforward action that pays dividends for years to come. It’s especially important when installing dishwashers or any appliance that causes significant moisture exposure. You can even find guides on how to properly prepare your kitchen for https://appliancedoctorz.com/how-to-prepare-your-kitchen-for-dishwasher-installation
Have you faced this issue? Did moisture damage creep in beneath your cabinets without warning? If so, you’re not alone. Next, I’ll walk you through the practical steps to create a reliable barrier that keeps your wood dry and your kitchen looking pristine for the long haul. Keep reading—preventing wood rot is easier than you think!
Choose the Right Material for Your Steam Barrier
Start by selecting a high-quality, moisture-resistant material such as foil-backed insulation or a specialized waterproof sealing tape. I once used standard painter’s tape and quickly regretted it when moisture seeped through, causing warping. For best results, opt for products designed specifically for moisture barriers, which are available at most hardware stores. This choice forms the foundation of a durable seal that prevents water ingress from appliances like dishwashers.
Prepare the Surface Before Applying Sealant
Ensure the cabinet surface is clean, dry, and free of dust or grease. Use a damp cloth with mild soap, then wipe with a dry towel. I once neglected this step and found that the tape wouldn’t stick properly, leading to gaps. Proper surface prep enhances adhesion, creating a tight, long-lasting barrier.
Precisely Cut the Barrier Material
Measure the dimensions of the area you need to seal, adding an extra inch on each side to ensure full coverage. Cut the material carefully with scissors or a utility knife. I recall struggling with an uneven cut, which left gaps—so take your time. Accurate sizing avoids overlaps or exposed edges that moisture can penetrate through.
Apply the Sealant with Firm Pressure
Position the material snugly against the cabinet, pressing firmly to eliminate air bubbles or wrinkles. Use your fingers or a seam roller for a smooth finish. During my last project, I noticed tiny air pockets under the barrier, which I later found were entry points for moisture. Proper application ensures the seal is airtight, vital for protecting your wood over time.
Seal the Edges for Extra Protection
Use waterproof tape or a sealant to secure the edges of the barrier, especially where it meets the cabinet walls and floor. Apply the tape with uniform pressure, pressing down to adhere well. I once skipped this step, and water seeped in through loose edges, causing delays and additional work. Sealing edges minimizes the risk of leaks and extends the lifespan of your moisture barrier.
Test Your Seal for Effectiveness
Once installed, run a small amount of water or activate the appliance to check for leaks. Observe the sealed area for a few minutes. I remember lightly misting the area with a spray bottle to ensure no water gets through. Confirming the integrity of your seal prevents future damage and gives peace of mind.
Remember, a proper steam barrier is the difference between a protected cabinet and costly damage down the line. With these concrete steps—careful material choice, precise measurement, proper application, and testing—you’ll prevent moisture intrusion effectively and extend your cabinetry’s life.
While many homeowners assume that manufacturer warranties and standard installation practices cover all eventualities, the reality is far more nuanced. A common misconception is that a simple DIY installation guarantees warranty coverage, but in truth, improper parts selection or neglecting specific setup steps can void your warranty altogether. For example, using generic or cheap replacement parts instead of OEM-certified components often leads to issues that aren’t covered when repairs are needed. Furthermore, overlooking manufacturer instructions during installation—such as not securing the high loop on the drain hose—can result in water damage outside warranty protections. Advanced homeowners know that understanding the fine print of warranty policies, like those detailed here, can prevent costly disputes later. A particularly overlooked aspect is that damages caused by incorrect parts or improper installation are frequently categorized as user damage, voiding warranty claims. Have you ever fallen into this trap? Let me know in the comments.
Another common mistake involves assuming all appliance repair parts are created equal. Many owners purchase parts from third-party sellers, risking compatibility issues or inferior quality that can cause further damage—sometimes beyond repair. Experts advise referring to detailed parts catalogs like here for authentic replacement parts. Remember, warranties often require that parts be installed correctly and meet manufacturer specifications; otherwise, repairs may fall outside covered issues. For advanced DIYers, knowing which components are essential for warranty compliance—such as those listed here—can save significant headaches.
It’s also worth noting that many often miss the importance of documenting each repair or modification. Keeping records of parts used, installation steps, and receipts can be invaluable when filing warranty claims or disputing denials. A professional approach involves photographing your installation process, as recommended here. This evidence can protect you if the manufacturer questions your repair or if a third party needs to verify proper maintenance.
Remember, the devil is in the details. Ensuring you select the right parts, follow installation instructions meticulously, and keep thorough records are key steps toward safeguarding your warranty rights. Making assumptions about coverage without understanding these nuances can lead to unexpected out-of-pocket expenses. Let’s dig deeper—what hidden pitfalls have you encountered? Share your experience below.
Keeping your dishwasher running smoothly over the years requires the right tools and a proactive maintenance mindset. In my experience, having specialized equipment on hand not only speeds up repairs but also ensures you’re addressing issues correctly the first time. For example, I swear by a high-quality digital multimeter, which allows me to quickly test electrical components like thermostats and sensors—vital for diagnosing problems without guesswork. Investing in a reliable strain gauge wrench set simplifies tightening connections without risking damage, especially when replacing or adjusting hose clamps. These tools are not just gadgets but essential to maintaining your appliance’s health efficiently.
Beyond tools, deploying specific software designed for appliance diagnostics can be a game-changer. Many modern dishwashers include smart features that generate error codes accessible via manufacturer apps or web portals. Familiarizing yourself with these diagnostic platforms enables swift troubleshooting and reduces downtime. For instance, I often consult the detailed error code explanations provided by manufacturers, which help me pinpoint issues like flow valve faults or drainage problems more accurately than generic troubleshooting steps.
Regular part inspection is equally essential. Keeping a well-organized parts inventory—including replacement filters, gaskets, spray arms, and inlet valves—allows for quick swaps before minor issues become costly repairs. I recommend a preventive approach: schedule quarterly checks for wear and tear, replacing parts proactively based on their expected lifespan. This strategy minimizes unexpected breakdowns and extends your dishwasher’s lifespan.
What’s the Future of Maintenance for Smart Dishwashers
Looking forward, I believe the trend points toward increased automation in appliance care. Future models may include self-diagnostic systems that alert you automatically about potential failures via your smartphone, possibly even ordering replacement parts when needed. Coupled with IoT integration, these innovations will make maintenance more intuitive, reducing the need for extensive DIY troubleshooting. Staying updated on these advancements will be crucial for proactive ownership.
How Do I Keep My Dishwasher Components in Peak Condition Over Time
Establishing a routine maintenance schedule is key. Regularly cleaning filters and spray arms prevents buildup that hampers performance. Using the right cleaning products designed for dishwashers preserves internal components and avoids corrosion. Additionally, inspecting hoses and connections for leaks or cracks can save you from water damage and costly repairs. For detailed guidance on choosing quality replacement parts, check out the comprehensive parts replacement guide.
When replacing parts, ensure compatibility by referencing the manufacturer’s specifications. Using OEM parts guarantees durability and helps maintain warranty coverage—more on that here. Keep a record of all replacements and repairs; documentation not only simplifies future troubleshooting but also supports warranty claims if needed. Remember, early detection and timely intervention are your best tools for extending your dishwasher’s service life.
If you haven’t already, try deploying a foam-based water inlet valve tester—an advanced tool that can detect valve malfunctions before water leakage occurs. This proactive step can save you money and avoid inconvenient repairs down the line.
By staying equipped with the right tools and maintaining a consistent inspection routine, you’ll be better prepared to handle potential issues and keep your dishwasher performing at its best for years to come. Invest in quality diagnostics and parts, and your appliance will reward your effort with long-term reliability.
The Hidden Power of a Simple Seal
One of the most eye-opening lessons I’ve learned is that a tiny, often-overlooked seal can make or break your dishwasher’s longevity. I used to dismiss those flimsy barriers as mere accessories, but after battling persistent leaks and warranty denials, I realized they’re the frontline defense against costly damage. Take it from me—paying attention to these small details can save you from a cascade of frustrations down the line.
Tools and Tactics That Changed My Approach
Over the years, I’ve curated a set of tools and tips that transformed my DIY repairs from guesswork into mastery. A quality digital multimeter helps me verify electrical issues reliably, while a proper high-loop installation technique—something I once misunderstood—keeps water where it belongs. This insight was crucial to maintaining warranty coverage and avoiding future mishaps. For comprehensive guidance, I highly recommend exploring this resource on dishwasher parts and installation.
How I Turned Mistakes Into Lessons for a Safer Kitchen
My biggest revelation came from an unintended leak that caused significant damage because I skipped sealing the cabinet properly. It was a costly lesson that underscored the importance of sealing edges and testing each connection thoroughly. Now, I approach every repair with a fresh perspective, understanding that patience and precision are the true keys to a long-lasting, warranty-compliant dishwasher. Remember, even small adjustments can have profound impacts, so don’t rush through your project.
My Go-To Inspiration for Better Maintenance
Staying motivated in appliance care means continually learning from experts and trusted sources. I’ve found [this comprehensive troubleshooting guide](https://appliancedoctorz.com/essential-parts-for-troubleshooting-dishwasher-installation-issues) to be invaluable in mastering the nuances of repairs and parts selection. Connecting with a community of DIY enthusiasts who share their experiences also keeps me inspired. Combining these resources boosts my confidence and ensures my dishwasher stays reliable for years.
The Final Nudge Toward Confident Repairs
If you’re committed to extending your dishwasher’s life and safeguarding your warranty, start embracing these insights today. Small steps—like selecting the right materials and testing your seals—can lead to big savings and peace of mind. Remember, every successful repair adds to your knowledge, empowering you to face future challenges with confidence. Ready to take that next step in your DIY journey? Your kitchen—and your wallet—will thank you.
What has been your biggest challenge with dishwasher maintenance or warranty issues? Share your story below and let’s learn together!
Related Posts
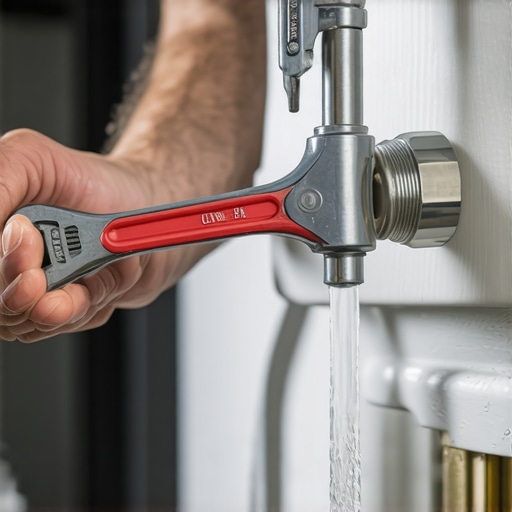
Stop Hand-Tightening Your Water Line: Use This Specific Tool
I remember the first time I installed a dishwasher and…
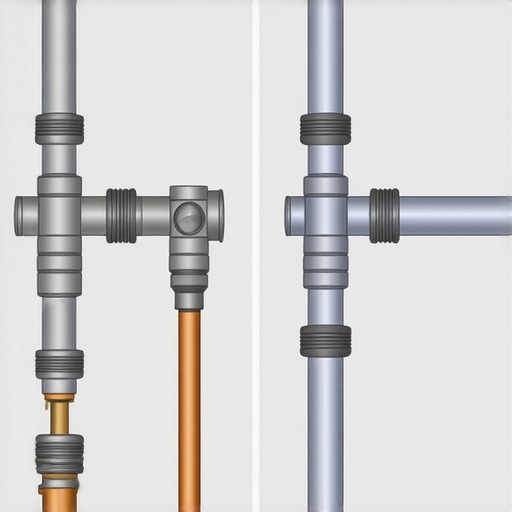
The Critical Difference Between High-Loop and Air-Gap Drainage
I remember the frustration vividly—my dishwasher started to leak unexpectedly,…

Why Your New Dishwasher Vibrates Your Entire Kitchen Floor
I'll never forget the first time I installed my brand-new…