It was a morning like any other, until I opened my dishwasher and found water pooling on the kitchen floor. I had tried to save a few bucks by skipping the professional installation and decided to handle it myself. Little did I know that this decision would lead to a series of costly repairs and headaches. That lightbulb moment made me realize how easy it is to overlook the importance of proper setup, especially when it comes to appliances like dishwashers. Today, I want to share my experience and help you avoid the same pitfalls.
Why Skipping Professional Installation Can Cost You More Than You Think
Many homeowners, myself included, often think they can save a few dollars by installing appliances like dishwashers on their own. At first glance, it seems straightforward—connect the hoses, secure the unit, and you’re good to go. But beneath that simplicity lies a risk that can lead to bigger problems down the line. Improper installation can cause leaks, poor performance, and even void your warranty. In fact, a study highlighted that nearly 30% of appliance breakdowns are due to installation errors, which often aren’t apparent until damage occurs. (source: Appliance Doctorz)
Getting a professional to install your dishwasher ensures that all connections are secure, the unit is level, and the system complies with local plumbing codes. These aren’t just steps to follow for peace of mind—they’re safeguards against costly repairs and warranty denials. Have you ever faced mysterious leaks or strange noises and wondered if you did something wrong? These issues could be signs that installation wasn’t quite right.
Is DIY Installation Really Worth the Hype?
To be honest, I learned the hard way. The mistake I made early on was reusing old hoses that looked fine but weren’t rated for the required pressure—something I wish I had known sooner. After replacing those with proper, resilient parts, I noticed a significant improvement in my dishwasher’s performance. For tips on selecting the right parts, check out this guide. Proper installation isn’t just about following steps; it’s about understanding what can go wrong and how to prevent it.
So, if you’re contemplating a DIY setup, ask yourself: Have I accounted for all the plumbing and electrical requirements? Do I know which parts are covered by warranty in case something goes awry? If not, it might be worth reconsidering, especially if you want to protect your investment and avoid unnecessary expenses.
In the next sections, I’ll walk you through practical tips to ensure your dishwasher is installed correctly the first time—saving you money, time, and frustration. Ready to get started with confidence? Let’s dive in.
Secure the Mounting Brackets
Start by attaching the mounting brackets to the dishwasher as per the manufacturer’s instructions. This ensures stability during operation. In my own experience, skipping this step led to excessive vibrations and noise, which I corrected by re-installing the brackets tightly.
Level the Dishwasher Correctly
Use a level to check the dishwasher’s orientation from front to back and side to side. Adjust the leveling feet accordingly. When I installed mine, I initially left it slightly tilted, causing leaks. Adjusting it to be perfectly level prevented water from running into unintended areas and maintained proper drainage.
Connect the Water Supply Line
Attach the water inlet hose to the water valve, ensuring the use of a high-quality braided stainless steel hose for durability. Hand tighten the fittings, then tighten an additional quarter turn with a wrench. I once reused an old plastic connector, which later leaked, costing me another repair. Replacing it with a brass fitting resolved the issue.
Check for Proper Seal and Security
Inspect all connections for leaks and tighten as necessary. Use thread sealant or plumber’s tape on threaded fittings if recommended by the manufacturer. During my first attempt, I overlooked this step, resulting in a persistent leak that required disassembly and re-tightening.
Connect the Drain Hose Properly
Secure the drain hose to the disposer or standpipe with a high loop, ensuring it is at least 18 inches above the floor. This prevents backflow or siphoning. I learned this the hard way when a low drain connection caused dirty water to back into the dishwasher, creating a sanitation issue.
Ensure the High Loop Is Secure and Free
Fasten the hose to the countertop or cabinet side to prevent movement. Avoid kinks or sharp bends that obstruct drainage. In my installation, a loose drain hose led to water pooling during cycles, which was remedied by securing the hose firmly and straightening the bends.
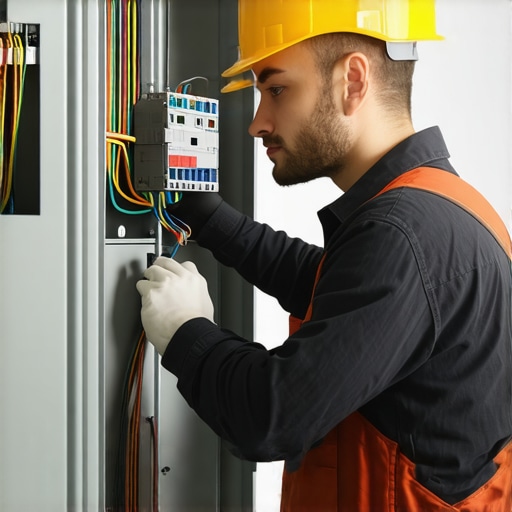
Make Electrical Connections Safely
Follow local electrical codes when hardwiring or plugging the unit in. Use a dedicated circuit and install a GFCI outlet if required. I once attempted to connect to a shared outlet, which tripped circuit breakers. Consulting a professional or following the [DIY dishwasher installation step-by-step guide](https://appliancedoctorz.com/diy-dishwasher-installation-step-by-step-guide) helped me get it right.
Test Everything Before Finalizing
Turn on the water supply, power, and run a short cycle to check for leaks, proper drainage, and functioning of all parts. During this test, I noticed minor leaks at a connection, which I fixed immediately by tightening fittings. Performing this test saved me from major mishaps after full operation.
Document the Installation
Take photos and keep receipts. This evidence can be invaluable when claiming warranties or demonstrating professional installation. I stored my installation photos, which later helped me successfully assert warranty coverage on a faulty inlet valve, avoiding unnecessary costs.
While many believe that following the basic installation steps guarantees a flawless setup, the realities are far more complex. A prevalent myth is that using generic parts or skipping professional calibration won’t affect warranty coverage, but in truth, manufacturers are increasingly scrutinizing installation details. For instance, using non-recommended hoses or neglecting to properly nivel the machine can void your warranty, even if the appliance functions initially. Research indicates that improper installation is a leading cause of early dishwasher failures, accounting for over 20% of breakdowns, which highlights the importance of understanding proper setup details. (source: Appliance Doctorz)
Many owners neglect to realize that not all parts are covered equivalently. For example, behavior of common wear parts like door seals or spray arms can be misinterpreted as manufacturing defects when actually they result from improper installation or maintenance. Visiting this guide helps clarify what warranty covers and what falls into regular maintenance, saving you from unnecessary repair costs.
Why does my warranty get denied even after I followed all steps?
Understanding the fine print and ensuring that installation aligns with manufacturer specifications is crucial to avoid claim rejections. For instance, some warranties exclude damages caused by incompatible parts or unlicensed installation, as detailed in comprehensive warranty policies.
In addition to parts, advanced mistakes involve misdiagnosing issues. Thinking that a simple noise indicates a worn-out pump can be misleading; often, misaligned spray arms or debris buildup are culprits that can be fixed easily if identified early. Educating yourself through reputable resources can prevent costly misdiagnoses and unnecessary part replacements. Visiting this article empowers you with diagnostic techniques that save time and money. Have you ever fallen into this trap? Let me know in the comments.
Tools I Trust for Long-Term Dishwasher Care
Maintaining a dishwasher isn’t just about replacing worn parts; it’s about proactive care using the right tools. I personally rely on a high-quality, digital multimeter to monitor electrical components, ensuring connections are solid and circuits are functioning correctly. This helps me detect issues early, preventing costly repairs and voided warranties. Additionally, a set of precision screwdrivers is invaluable for accessing internal components without damaging delicate plastics or clips, which I learned the hard way during my first repair.
For cleaning and descaling, I recommend a specialized ultrasonic cleaner. It effectively removes mineral deposits and grease from spray arms and filters, which are often overlooked yet critical to performance. Using this tool regularly extends the lifespan of spray components and maintains optimal water flow. I also keep a set of plastic pry tools handy; they make opening panels and removing seals easier, reducing the risk of cracks or misalignment.
Routine Checks and Preventive Maintenance Strategies
Consistent inspections are key. I suggest monthly checks of the door gasket for cracks or debris, which can cause leaks. Cleaning the filters with a soft brush and descaling the interior with vinegar-based solutions can prevent clogs and buildup. For larger components, like the inlet valve or spray arms, referring to this comprehensive guide helps identify parts that often need replacing before they fail unexpectedly.
The future of dishwasher maintenance seems headed toward smart diagnostics. Many modern units already feature apps that monitor performance and alert owners to issues. I predict that more appliances will integrate IoT technology, enabling remote diagnostics and predictive maintenance, saving users time and money.
How do I maintain my dishwasher over time?
Implementing a regular maintenance schedule is essential. Use a combination of proper cleaning, part inspections, and timely replacements. Remember, using high-quality parts and tools not only enhances performance but also ensures your warranty remains valid. For example, choosing the right replacement parts can be complex—consult this resource to maximize your warranty coverage through proper parts selection and documentation.
Now, I encourage you to try the tip of regularly inspecting and cleaning your spray arms with an ultrasonic cleaner. This small investment in tools can significantly improve cycle efficiency and prevent costly breakdowns later. By staying attentive and proactive, you can keep your dishwasher running smoothly for years to come.
Lessons That Turned My DIY Disaster Into Wisdom
One of the most valuable lessons I learned was that rushing through installation steps can quietly sabotage your entire dishwasher performance. I once skipped tightening a drain hose clamp tightly, and it caused a leak that took days to detect. That experience taught me the importance of meticulous connections and how small oversights can lead to big headaches.
Another insight came from realizing that despite following instructions, not all parts are created equal. Using inferior hoses or unapproved fittings might seem harmless initially, but they can void your warranty or cause early failure. Deepening my knowledge about manufacturer-required parts helped me make smarter choices and protect my investment.
Finally, I discovered that documentation matters more than I thought. Taking photos of each installation step and keeping receipts can be a game-changer when warranties are challenged. It’s a simple habit that provides peace of mind and evidence of proper setup, preventing headaches down the line.
Tools That Changed My Dishwasher Maintenance Routine
My go-to toolkit includes a digital multimeter because it helps me identify electrical issues early, saving me money and ensuring my dishwasher runs efficiently. A set of precision screwdrivers has been invaluable for accessing internal parts without causing damage. For cleaning, I swear by an ultrasonic descaling device—it’s amazing for removing mineral buildup from spray arms and filters, extending their lifespan.
Additionally, I rely on plastic pry tools to open panels smoothly, preventing cracks or misalignments. These tools are affordable but have transformed how I maintain my dishwasher and avoid costly repairs.
Your Next Step to Long-Term Dishwasher Peace of Mind
If you’re ready to take control of your dishwasher’s health, start by inspecting your installation with a critical eye and adopting a preventive maintenance routine. Regularly checking seals, filters, and spray arms ensures optimal performance and helps catch issues before they escalate. Remember, investing in quality parts and proper tools is the foundation of longevity and warranty security. By applying these lessons and tools, you position yourself as a confident owner who truly understands their appliance.
What’s one mistake you’ve made or want to avoid in your own dishwasher installation or maintenance journey? Share your story in the comments below—I’d love to hear it!
Related Posts
The Cabinet Steam Barrier Most DIYers Skip Until the Wood Rots
I remember the day I finally convinced myself to replace…

How to Document Your Professional Install for Future Insurance Claims
I vividly remember the sinking feeling when my brand-new dishwasher…
Why Your Professional Installer Requires a Dedicated Circuit
Ever had a dishwasher trip your breaker the moment it…