It was late evening, and I was just about to relax when I stepped into my kitchen and noticed a strange, damp patch on the floor I was pretty sure hadn’t been there the day before. My heart sank. As I crouched down to inspect, I realized that beneath my feet, my subfloor was soggy and soft—a clear sign that something was wrong. That lightbulb moment revealed itself as the first clue to a slow inlet leak that could have cost me thousands if left unchecked.
Spotting the First Signs Before Disaster Strikes
I’m here to tell you that a damp subfloor isn’t just a minor inconvenience; it’s often the earliest indicator of a hidden problem. Many homeowners overlook this silent warning because it’s subtle, and let’s face it, who expects floorboards to be soggy without a recent spill? But ignoring this can lead to catastrophic damage—not just to your flooring but to your entire home’s structure. In my experience, catching the leak early saved me from weeks of repairs and unwarranted stress.
Today, I promise to show you how to recognize these early signs of a slow inlet leak and guide you through steps you can take to prevent costly damage. I’ll share insights based on my own mistakes, so you don’t have to learn the hard way. Want to feel confident in identifying water troubles before they spiral out of control? Keep reading.
Is a Damp Subfloor Worth Worrying About, Or Overkill?
Early on, I dismissed that damp patch as a minor spill or moisture from cleaning. Boy, was I wrong! That overconfidence led me to ignore the signs, and it nearly cost me my kitchen floor. Remember, even a small, damp area can be the tip of the iceberg. According to research from the National Association of Home Builders, ongoing moisture problems can weaken structural components over time, leading to major repairs. Don’t make my mistake—trust your instincts and investigate any sign of dampness promptly.
If you’ve ever noticed a damp spot expanding or a musty smell lingering, you’re not alone. Many homeowners are unaware that a slow inlet leak might be the culprit, slowly saturating their subfloor without immediate visible damage. Recognizing these subtle signs early can save you money and heartache. Now, let’s look closer at what causes these leaks and how you can spot them before they turn into a full-blown crisis.
Locate the Source of the Leak
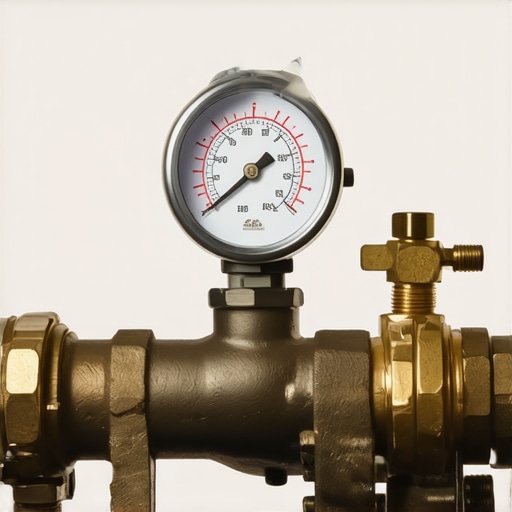
Start by inspecting the water supply line connected to your dishwasher. Turn off the water valve and disconnect the line to check for any visible cracks or deterioration. Use a flashlight to look for signs of moisture or corrosion. During my own troubleshooting, I noticed a tiny crack at the connection point, which was causing slow water seepage. Replacing this old hose prevented further damage and saved me from costly repairs.
Assess the Inlet Valve Function
The inlet valve controls water flow into the dishwasher. To test it, turn off the appliance, disconnect the power, and locate the valve at the back. Remove the electrical connector, then gently detach the inlet hose. Using a multimeter, check for electrical continuity; a failure indicates the valve needs replacement. I once replaced a faulty inlet valve that was humming but not filling; this immediately resolved the leak issue and restored proper operation.
Replace Worn or Damaged Parts Efficiently
Select the Right Parts
Use quality replacement parts designed for your dishwasher model. Refer to https://appliancedoctorz.com/most-popular-dishwasher-parts and https://appliancedoctorz.com/top-tips-for-selecting-the-right-parts-for-dishwasher-installation for guidance on choosing durable components. During my fix, I ordered a high-quality inlet valve matching my model, which ensured long-term reliability.
Follow Proper Installation Steps
Secure the new inlet valve by tightening the fittings snugly but not overly tight, to prevent damage. Use a torque wrench if available to avoid over-tightening. Ensure that washers are properly seated to prevent leaks. I learned this the hard way when overtightening caused the fitting to crack, leading to more repairs. For detailed guidance, check https://appliancedoctorz.com/diy-dishwasher-installation-step-by-step-guide and https://appliancedoctorz.com/common-dishwasher-parts-and-how-to-replace-them-effectively.
Test Before Finalizing
Reconnect the water supply, restore power, and run a short cycle to observe for any leaks. Use a dry cloth around connections to detect drips. If the leak persists, double-check the tightness and seals. Once I confirmed everything was dry and no leaks appeared, I felt confident that the fix was successful. Remember, precise installation ensures your repair holds over time.
Maintain to Prevent Future Leaks
Regularly inspect hoses and fittings for wear. Keep an eye out for cracks, corrosion, or loose connections. Applying a bit of silicone grease on fittings can improve sealing. Keeping these parts in good condition reduces unexpected failures. I schedule quarterly checks on my dishwasher’s water line, which has significantly extended its lifespan. For preventive advice, visit https://appliancedoctorz.com/how-to-diagnose-dishwasher-parts-during-warranty-periods or https://appliancedoctorz.com/when-to-replace-dishwasher-parts-for-optimal-performance.
Why Most People Misunderstand Warranty Coverage and Its Nuances
Many homeowners believe that purchasing a new dishwasher automatically guarantees coverage for all repairs and parts needed down the line. However, the reality is more complex. Manufacturers’ warranties often have specific clauses, exclusions, and fine print that can trip up even the most diligent owner. For example, some warranties don’t cover wear-and-tear parts like filters or spray arms unless they malfunction due to manufacturing defects. To truly protect your investment, it’s crucial to understand what your warranty entails—something I learned the hard way after assuming all repairs were covered without reading the fine print. For an in-depth understanding, check out this guide to dishwasher warranty.
Advanced Mistake: Using the Wrong Parts Can Void Your Warranty
Another common misconception revolves around the belief that generic or third-party parts are interchangeable with OEM (Original Equipment Manufacturer) components. In truth, using non-approved parts can void your warranty and even cause further damage. Manufacturers design parts to specific standards, ensuring compatibility and longevity. For instance, installing a cheap, mismatched inlet valve might seem cost-effective initially but can lead to leaks or improper function, which your warranty could refuse to cover. To maximize your coverage, always opt for high-quality, compatible parts—information you can find in this expert advice on parts selection. Remember, when in doubt, consult professional resources, as improper repairs might be more costly than the repairs themselves.
Don’t Make This Installation Mistake
An often-overlooked nuance in dishwasher installation is ensuring correct hose routing and securing proper high loops—these prevent backflow and siphoning, which can cause leaks and damage. Many DIY installers neglect this step, assuming that simply connecting hoses is enough. I once encountered a dishwasher that leaked because the drain hose was improperly positioned, leading to water seeping behind cabinets. Additionally, using fittings that aren’t rated for the pressure can result in silent leaks and warranty issues. For a step-by-step walkthrough, you can refer to this comprehensive guide to proper installation. Ensuring meticulous setup can save you headaches and preserve your warranty coverage long-term.
What about the advanced question—how can technical nuances in parts selection influence warranty validity?
Excellent question. Selecting the right parts isn’t just about matching model numbers; it involves understanding material compatibility, pressure ratings, and manufacturer specifications. For example, using a cheap plastic fill valve instead of a durable brass one can compromise the entire sealing system, leading to leaks that void your warranty. Experts recommend reviewing detailed specifications, like those listed at this resource on top-performing parts. This nuanced approach ensures that your repairs adhere strictly to manufacturer standards, providing peace of mind and safeguarding your coverage.
Remember, knowledge is power when it comes to safeguarding your home appliances. Missteps in parts choice, installation technique, or warranty understanding can turn a minor repair into a costly mistake. Have you ever fallen into this trap? Let me know in the comments and share your experience!
Essential Tools for Reliable Maintenance
To keep your dishwasher functioning optimally over time, investing in the right tools makes all the difference. I personally rely on a high-quality multimeter to test electrical components like inlet valves and control boards. It provides immediate insight into whether a part is faulty or just needs cleaning. A digital readout simplifies troubleshooting, saving me hours of guesswork.
For parts replacement, I use a torque wrench when securing fittings, ensuring they’re tight enough to prevent leaks but not over-tightened, which can crack fittings. Additionally, I keep a set of fine-nosed pliers to handle tiny clips and hoses, especially when replacing worn-out spray arms or filters. Knowing your essential parts helps target the right tools for specific jobs.
Software to Streamline Diagnostics
Modern dishwashers often feature diagnostic modes that reveal error codes, making repairs more straightforward. I recommend using manufacturer-specific apps or software that interface with your appliance, if available. These tools allow you to run quick tests and interpret error codes accurately, reducing unnecessary part replacements.
For example, read the detailed expert advice on diagnostics to understand how software can expedite troubleshooting. Staying updated with firmware via manufacturer portals ensures your diagnostics are current, which becomes invaluable during long-term maintenance.
Predictive Maintenance for Peace of Mind
Rather than waiting for a leak or breakdown, I schedule routine inspections of hoses, fittings, and filters every six months. Visual checks using a bright flashlight reveal cracks or corrosion early. When inspecting, I look for mineral buildup—especially in hard water areas—which can weaken parts over time. Using ahard water test strip helps confirm if mineral deposits are an issue that requires action, saving costly component replacements later.
Trade-secret tip: applying a silicone-based lubricant to fittings and rubber seals maintains flexibility and prevents cracks. Maintaining a journal of maintenance activities helps identify patterns, so you can anticipate issues before they occur. A proactive approach significantly prolongs the life of your dishwasher and parts.
How Do I Maintain My Dishwasher Over Time?
Make regular inspections and testing a routine. Use appropriate tools like a multimeter to verify electrical components, and keep spare parts such as inlet valves and filters on hand. Staying current with software updates from your manufacturer can help spot issues early. Remember, patience and attention to detail — combined with the right gear — will keep your dishwasher running smoothly for years. If you’re ready to go the extra mile, try implementing a scheduled maintenance check using these methods, which I’ve found to be invaluable for avoiding unexpected breakdowns.
For in-depth guidance on choosing durable parts, consider exploring this resource on top-performing parts.

Sneaky Lessons From My Kitchen Mishap
One unexpected damp patch taught me that even minor signs can hide major flaws. Realizing the importance of prompt inspection changed my approach from reactive to proactive. Now, I prioritize early detection to dodge costly repairs, and I urge you to do the same—your wallet and peace of mind depend on it.
I learned that relying solely on appearance can be misleading—moisture can seep behind walls or under cabinets unnoticed. Trusting your instincts and understanding the nuanced signs of leaks can save hours of frustration. Remember, a small damp spot today could be a flood tomorrow if ignored. Don’t wait for disaster—act early.
Matching the right parts with proper installation techniques isn’t just about immediate fixes; it preserves your warranty and extends appliance lifespan. My biggest lightbulb moment was realizing that using OEM parts and following precise protocols guards against voided warranties and future headaches. Knowledge truly is power in maintenance.
Tools and Resources That Transform Maintenance
Investing in a quality multimeter and torque wrench has revolutionized my repair process. These tools help me diagnose issues accurately and install components without risking damage, making repairs more reliable. For reliable parts, I turn to trusted resources that list top-performing dishwasher parts. They ensure compatibility and durability, which is essential for long-term peace of mind.
Your Next Step Starts Today
Diving into maintenance and understanding your warranty can seem daunting, but taking small, informed actions makes a significant difference. Whether you’re inspecting hoses or choosing the right replacement parts, each step empowers you to protect your home investment. Remember, every expert once started as a beginner—don’t hesitate to take that first step towards mastery in dishwasher care. How are you planning to improve your appliance maintenance routine today? Share below, and let’s learn together!
,
Related Posts
How to Tell if Your Inlet Valve is Actually Clogged
I remember the moment vividly—my dishwasher suddenly stopped draining, and…
The Latch Adjustment That Fixes That Persistent Door Open Error
There I was, mid-week, exhausted after a long day of…

How to Read Those Confusing Error Codes on Your Display
It happened to me just last month. I was in…