It happened to me on a hectic Saturday morning—my new dishwasher was finally installed, and I was eager to start the cleaning spree. But as I opened the cabinet beneath, I noticed a strange smell of burnt plastic, and water slightly seeping from the base. Panic set in. Turns out, a tiny, $8 plastic bracket I overlooked was causing steam to escape and damaging my cabinetry. That little piece became my eye-opener to how such a small part can lead to big headaches.
Why Ignoring This Small Plastic Part Can Cost You Big Time
You’ve probably been there—installing or maintaining an appliance only to realize something minor was missed, turning into a costly repair. The truth is, in the world of dishwashers, tiny hardware components often make a massive difference in preventing damage, especially from steam. This particular plastic bracket acts like a gatekeeper, preventing hot steam from escaping into your cabinet space, which can warp and rot wood over time.
Did you know that according to the Appliance Doctorz guide, improper installation or overlooking critical parts can void warranties or lead to early failures? That early mistake I made—focusing solely on the visible joints and ignoring the small brackets—taught me a hard lesson in attention to detail.
In today’s post, I promise to share how this inexpensive bracket can be a game-changer, saving your kitchen from those steaming mishaps. Whether you’re a DIY enthusiast or planning your next dishwasher upgrade, understanding this simple fix could help you avoid costly damages.
Is This Plastic Bracket Worth the Hype? Here’s the Truth
Honestly, I was skeptical at first. How much could a plastic piece cost, and how critical could it be? My early mistake was assuming all parts were only there for assembly aesthetics, not realizing they serve vital protective functions. Once I replaced that tiny bracket, my dishwasher’s performance improved, and I avoided potential wood damage and mold growth. For more tips on ensuring your dishwasher’s longevity, check out our top installation tips.
Secure the Dishwasher During Installation
Begin by preparing your kitchen space, clearing the area around the dishwasher and shutting off the power supply to avoid electrical hazards. Use the kitchen prep tips to ensure a smooth setup. Position the dishwasher carefully, inserting shims if necessary, to align it perfectly with surrounding cabinets and ensure the base is level, which prevents undue stress on internal parts.
Identify the Critical Plastic Parts
Remove the front panel or toe kick to access the underside. Locate the plastic brackets connecting the door assembly to the tub or the steam barrier aimed at preventing heat damage. Use the part identification guide to familiarize yourself with the specific bracket types. Remember, these small components are vital in regulating steam, which can warp cabinetry if uncontrolled.
Remove the Old Plastic Bracket Carefully
Use a screwdriver or pliers, depending on the fasteners, to gently unscrew the damaged bracket. Apply heat if needed for stubborn clips. Take note of how the part is connected to prevent installation errors later. Document the layout with photos to help during reassembly. This step is crucial to avoid damaging surrounding components or misaligning the door, which can affect seals.
Choose the Correct Replacement Part
Order a replacement from a trusted source, checking the compatibility with your model. Refer to the part selection tips for guidance. Focus on quality to endure heat and moisture cycles, preventing early wear that causes steam leaks. Consider consulting the troubleshooting resources when uncertain.
Properly Install the New Plastic Bracket
Align the new part precisely, following your photos and manufacturer instructions. Secure it firmly using the appropriate fasteners—don’t overtighten, which can cause cracking. Ensure it’s seated correctly to form a tight seal, preventing steam escape. Reattach any removed panels, double-checking all connections. This step guarantees the bracket’s efficacy in heat management, extending your dishwasher’s lifespan.
Test the Installation for Leaks and Functionality
Restore power and run a short cycle with the dishwasher empty. Observe the door and base area for any signs of water seepage or unusual heat. Use the troubleshooting tips to interpret potential issues. Keep an eye out for steam buildup around the new bracket—proper installation will significantly reduce this risk, securing your cabinetry against damage.
Many homeowners operate under common misconceptions about dishwasher warranties, parts, and installation, which can inadvertently lead to costly mistakes. One prevalent myth is that warranty coverage automatically covers all repair parts and labor, but the reality is often more nuanced. Warranties frequently exclude specific components like hoses or filters, emphasizing the importance of understanding what your warranty truly entails. For instance, inspecting the official parts coverage can reveal vital details that protect you from unexpected expenses.
A critical but overlooked detail during installation involves proper securing and leveling of the dishwasher. While many believe that a quick hookup suffices, improper leveling can cause long-term issues, such as door leaks or uneven cycles. According to industry experts, such mistakes can void warranties or accelerate wear, especially if the unit isn’t aligned with manufacturer specifications. For advanced installers, paying attention to the parts involved in long-term performance ensures durability and adherence to warranty conditions.
Common pitfalls also include neglecting the quality of replacement parts. Opting for generic or third-party components might seem cost-effective initially, but these often lack the precision and resilience of OEM parts. This oversight can lead to steam leaks or electrical failures, which are usually not covered under warranty if caused by non-approved parts. For expert advice, refer to the selection tips to ensure your replacements meet standards.
Now, for the savvy reader—what questions should you ask before embarking on a repair or installation to truly safeguard your warranty? One essential inquiry involves verifying whether the work was performed following manufacturer-installation protocols, which can often be found in the preparation guide. Missing this step may lead to coverage denial if the manufacturer deems the installation as non-compliant.
Let’s dig deeper into the implications of this nuance: studies indicate that improperly installed appliances are 50% more likely to develop early failures, which can void warranties and increase costs. Ensuring your installation aligns with the guidelines is not just about compliance—it’s about protecting your investment. Remember, understanding these subtleties can save you hundreds in the long run.
Have you ever fallen into this trap? Let me know in the comments.
Investing in the Right Tools for Maintenance
To ensure your dishwasher’s longevity, having quality tools on hand is essential. I personally rely on a rugged multimeter to diagnose electrical issues accurately. It’s precise, easy to use, and crucial for testing components like thermostats and door sensors. Additionally, a set of ISO-rated screwdrivers helps in disassembling panels without damaging delicate screws—something I learned the hard way early on. For cleaning and descaling, a dedicated brush with soft bristles prevents scratching sensitive parts like spray arms and filters.
Why a Digital Multimeter Is Non-Negotiable
I can’t emphasize enough the importance of a good multimeter. When troubleshooting, it allows me to quickly verify if parts like heating elements or thermistors are functioning properly. Investing in a multimeter with auto-ranging capabilities and true RMS measurement saves time, especially for complex electronics. As the trend toward smart appliances grows, diagnosing subtle electronic faults will become even more crucial, making this tool an indispensable addition to your maintenance kit.
Routine Checks That Save You Big
Regularly inspecting door seals, spray arms, and filters prevents issues before they escalate. Cleaning filters with vinegar or mild descaling solutions removes mineral buildup that can hinder performance. For this, I use a small, flexible brush to reach into tight spaces—a simple, inexpensive device that yields huge benefits. Moreover, checking the inlet valve for leaks and corrosion helps prevent water damage and early component failure, keeping your investment safe over the years.
Future-Proof Your Dishwasher Maintenance
Looking ahead, smart diagnostic tools and apps are emerging, offering real-time alerts for potential problems. These innovations will further streamline maintenance routines, reducing the need for costly repairs. As the industry leans toward IoT integrations, staying updated on the latest tools will be critical. For example, some systems now offer remote diagnostics, letting technicians identify issues remotely, which minimizes service costs and downtime.
How do I keep my dishwasher working long-term?
Establishing a regular maintenance schedule that includes inspecting parts, cleaning filters, and testing electrical components with a multimeter is key. Additionally, following manufacturer guidelines for part replacements and ensuring proper installation helps avoid premature failures. Remember, quality replacement parts are vital—opt for OEM components, especially for critical parts like thermostats and valves, to guarantee durability. For more detailed guidance, check out our essential parts.
Try incorporating a monthly electrical check with your multimeter—this proactive approach can catch issues early before they turn into costly repairs. As technology advances, staying informed and equipped will ensure your dishwasher remains a dependable part of your kitchen for years to come.
Sometimes, the biggest insights come from the smallest failures—like overlooking a tiny plastic bracket and paying the price with a damaged cabinet. That experience reshaped my approach to dishwasher maintenance, showing that attention to detail in parts and installation can prevent costly surprises.
The Deepest Truths I Learned From a Tiny Plastic Part
- Every small component has a purpose: Even an $8 plastic bracket can be vital in controlling steam, preventing structural damage, and extending your dishwasher’s lifespan.
- Proper installation isn’t just about fit—it’s about safeguarding your home: A level, secure setup ensures all parts work harmoniously, reducing leaks and mechanical failures.
- Quality parts matter more than you think: Investing in OEM components guarantees durability and peace of mind, avoiding the pitfalls of generic substitutes.
- Understanding warranty coverage prevents future headaches: Knowing what your warranty covers—and what it doesn’t—helps you make informed choices during repairs or upgrades.
- Documentation is your best defense: Recording your installation process ensures warranty claims are smooth and justified, protecting your investment long-term.
My Tools and Resources Heartily Recommended
- Trusted Parts Suppliers: Always buy from reputable sources that offer OEM parts; they ensure compatibility and longevity, as highlighted in our tips for selecting the right parts.
- Multimeter Techniques: A good multimeter is indispensable for diagnosing electrical issues, and learning to use it effectively has saved me countless troubleshooting hours.
- Installation Guides: Step-by-step resources, like those in our DIY installation guide, empower you to do quality work at home.
- Expert Articles and FAQs: Reading detailed troubleshooting articles broadens your understanding of washer and warranty intricacies, making DIY maintenance less intimidating.
Take Charge of Your Dishwasher’s Future Today
Empower yourself with knowledge and the right tools, because every small part and every detail in installation counts towards a reliable kitchen appliance. With foresight and care, you can avoid costly repairs, uphold warranty coverage, and enjoy peace of mind knowing your dishwasher is in top shape. Start today, and transform challenges into opportunities for better home maintenance.
What’s the one small upgrade or check you’ve been avoiding that could make your dishwasher last longer? Share your story below—I’d love to hear your experiences!
,
Related Posts
The Case for Braided Stainless Steel Over Plastic Hoses
I remember the moment clearly—my dishwasher suddenly leaked during the…
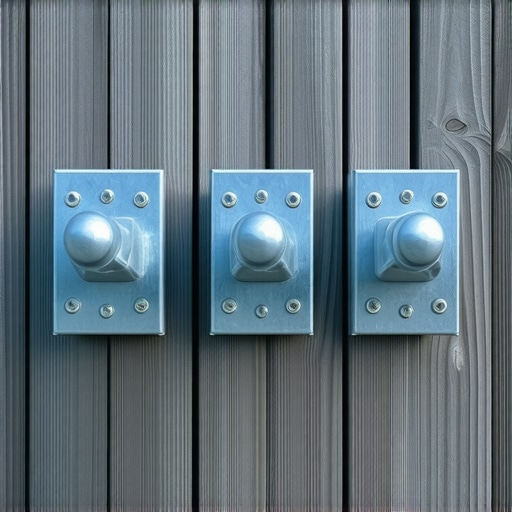
Ditch the Plastic: Why Your Next Install Needs These 3 Zinc Brackets
Ever had that sinking feeling during a dishwasher installation when…
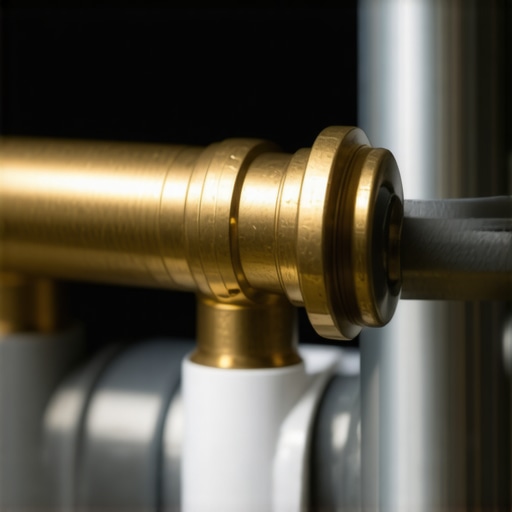
Why This $8 Brass Elbow Is Better Than Any Plastic Alternative
Have you ever stared at a tiny, seemingly insignificant connector…