It’s Saturday morning, and I remember the sinking feeling all too well—my dishwasher was dead, and I had just attempted a control board reset myself. Instead of rebooting smoothly, I ended up with a non-responsive machine, and the frustration was real. If you’ve ever hit that wall where a DIY reset backfires, you’re not alone.
Today, we’re going to tackle one of the most common headaches in appliance repair: what to do when a control board reset fails. I promise to guide you through the proven strategies to recover and even prevent it from happening again.
Why a Failed Control Board Reset Can Feel Like a Kitchen Catastrophe
When your dishwasher or washing machine acts up, a control board reset often seems like a quick fix. It’s tempting to think, “If I just reset it, everything will be back to normal.” But, as I learned the hard way, that isn’t always the case. A failed reset can leave you with a machine that refuses to respond, flashes error codes, or worse, makes no sound at all.
In my early days, I made a critical mistake—I rushed into the reset process without checking the warranty coverage or understanding the specific reset procedure. That misstep cost me time and money. To avoid similar pitfalls, it’s crucial to know what you’re doing.
**Have you ever faced this kind of appliance frustration?** You’re not alone, and the good news is, there’s a path back to normal. We’ll explore step-by-step what to do when a reset goes sideways and how to safeguard your appliance’s longevity.
But first, let’s address the common doubts that might be holding you back—like whether troubleshooting on your own is even worth it or if it might worsen the problem.
Ensure You Have the Right Parts and Warranty Knowledge
Before diving into repairs, confirm that your dishwasher’s control board is under warranty and that the issue isn’t covered by it. Review your warranty policy by visiting this guide on warranty policies. If your warranty covers control board issues, contact the manufacturer for a replacement instead of risking DIY damage. I learned this the hard way when I attempted a reset on my old model without verifying the warranty; the repair ended up costing more due to incompatible parts.
Gather the Correct Tools and Components
Equip yourself with necessary tools like a multimeter, screwdrivers, and replacement parts such as control boards or fuses. When selecting parts, prioritize quality to avoid premature failure. Check out popular parts and their performance benefits. Remember, using third-party components can sometimes void your warranty, so verify compatibility and warranty coverage beforehand. I once tried saving a few bucks with generic parts—resulting in a second disastrous control board failure that set me back days.
Properly Disconnect and Prepare Your Dishwasher
Start by shutting off the power supply at the breaker to prevent electrical hazards. Disconnect the water supply lines and drain hoses, ensuring you have towels ready for any residual water. Proper disconnection is critical to avoid damaging delicate electrical connections; I learned this during my first replace when a rushed job resulted in a leaky connection that short-circuited my new control board. To streamline your process, consult this guide on parts to check during installation for detailed steps.
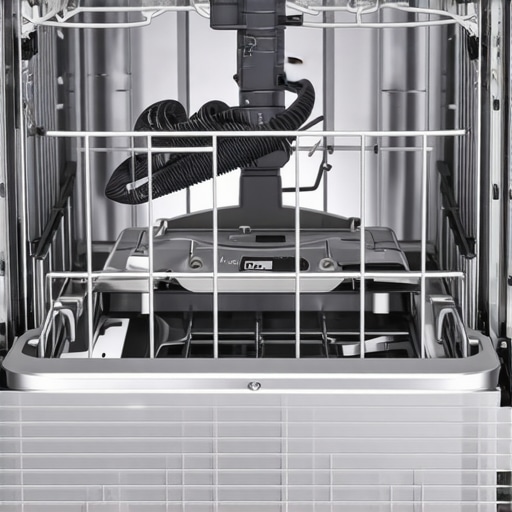
Access and Remove the Control Panel Carefully
Remove the dishwasher panels according to your model’s manual, exposing the control board assembly. Use screwdrivers to carefully detach the wiring harnesses, noting their positions for reassembly. To prevent accidental damage, take photographs of the wiring before disconnecting. I once miswired a connector, which caused the machine to refuse to start afterward—learning this the hard way highlighted the importance of proper documentation, similar to documentation best practices.
Diagnose and Reset the Control Board
Test the control board with a multimeter to identify faulty components like blown fuses or damaged circuits. If repairs are feasible, replace damaged parts instead of installing a whole new board. Realistically, some issues stem from power surges or installation errors, which can be mitigated through installing proper surge protectors. When I had a surge that fried my control board, replacing the fuse and installing a surge protector saved me from future failures.
After repairs, reassemble the control panel, reconnect wiring harnesses securely, and restore power. Turn on your dishwasher and observe for proper operation. If issues persist, revisit steps or consult professional guides like this troubleshooting guide.
Myth-Busting Warranty Expectations
Many assume that a warranty covers all repairs and parts, but this couldn’t be further from the truth. In reality, warranties often exclude certain components or damages caused by misuse. This misconception can lead to unexpected expenses and frustration, especially if you don’t read the fine print in your warranty policy, which is crucial for understanding coverage limits. For instance, knowing what parts are covered can save you significant money and stress when issues arise.
Why Parts Selection Can Make or Break Your Repair
Many DIYers focus solely on the repair process, neglecting the importance of selecting the correct parts, particularly respecting warranty qualifications. Installing generic or incompatible parts might seem cost-effective initially but can void your warranty and cause long-term damage. The key is understanding the nuances of compatible parts and their performance. I once replaced a control board with a cheap aftermarket version, only to face recurring failures due to poor quality—investing in the right original or manufacturer-approved parts is often worth the higher upfront cost.
Installation Matters More Than Many Realize
Surface-level installation might seem sufficient, but improper setup can lead to warranty claims being denied. For example, incorrect leveling, improper water supply routing, or skipping professional installation checks can be grounds for denied coverage. It’s worth reading top tips for professional installation to ensure your setup aligns with manufacturer standards. I learned the hard way that skipping those crucial steps can turn a simple repair into a costly ordeal, emphasizing that precision during installation safeguards your warranty and device performance.
How Can Overlooking Installation Nuances Cost You More?
Neglecting the detailed installation process might not only void your warranty but also accelerate wear and tear on parts, leading to more frequent failures. A study by the appliance warranty expert highlights that proper installation practices significantly extend appliance lifespan and optimize warranty coverage. Ensuring correct mounting, level adjustments, and secure connections can prevent common issues like leaks, noise, and electrical faults, saving you money and stress in the long run. Think of installation as the foundation of a robust repair or maintenance plan—skipping steps is a gamble that often doesn’t pay off.
So, next time you think about replacing or repairing your dishwasher, consider these hidden nuances that can make a big difference. Have you ever fallen into this trap? Let me know in the comments.
Invest in the Right Tools to Ensure Longevity
One of the most effective ways to keep your dishwasher running smoothly over time is by equipping yourself with precise, reliable tools. I personally rely on a high-quality digital multimeter from Fluke because it offers accurate readings essential for diagnosing electrical issues such as faulty control boards or damaged wiring. Additionally, a set of insulated screwdrivers is vital for safely removing panels and components without risking electrical shocks. Using the correct tools doesn’t just make repairs safer; it also improves your efficiency and reduces the risk of causing further damage.
How do I maintain my tools over time?
Proper maintenance of your repair tools is crucial. Regularly clean and store your screwdrivers and multimeters in a dry place to prevent corrosion. Calibrate your multimeter at least annually to sustain measurement accuracy, and replace worn-out bits immediately to avoid slipping or damaging delicate components. Investing a bit in maintaining your tools pays off by extending their lifespan and ensuring precise diagnostics whenever needed.
Prioritize Quality Parts for Long-Term Performance
When it’s time to replace any component, opt for OEM or manufacturer-approved parts. These parts are designed to fit perfectly and perform reliably over years, reducing the likelihood of repeat failures. For example, choosing a high-quality control board from a recognized supplier can prevent recurring issues caused by aftermarket alternatives. This detailed guide discusses how selecting the right parts enhances efficiency and longevity, often saving you money in the long run.
Future trends
Looking ahead, I predict a surge in the integration of smart diagnostics within appliances. Devices will increasingly self-monitor and alert you to maintenance needs before problems escalate, making proactive care more accessible. Staying updated with smart repair tools and software—like Bluetooth-enabled multimeters—will become standard practice for DIY enthusiasts and professionals alike.
How do I maintain my dishwasher over time?
Regularly inspect and clean filters, spray arms, and inlet valves to prevent clogs and inefficiencies. Use a combination of vinegar-based cleaning cycles and professional-grade descaling products to keep internal components free of hard water deposits. Also, schedule periodic checks of electrical connections with a multimeter to detect early signs of wear or corrosion. Staying proactive with these steps extends your dishwasher’s lifespan and helps maintain optimal performance.
For those ready to take their maintenance to the next level, I highly recommend trying the advanced diagnostic techniques discussed here. Proper tool use and component selection form the foundation of effective long-term care—so don’t underestimate their importance in your DIY toolkit.
Three Lessons I Didn’t Expect to Learn First-Hand
- Don’t Assume All Warranties Are Equal: I once thought my warranty covered every repair, but it turns out many exclude control board issues caused by power surges. Reading the fine print saved me from costly mistakes.
- Quality Parts Are the Real Investment: A cheap control board might seem like a bargain, but it ends up failing faster and voids your warranty. Choosing OEM parts has always paid off for me in the long run.
- Proper Installation Is a Game Changer: A professional-level setup prevents leaks and performance issues. Skipping steps and going DIY without guidance can lead to avoidable problems and warranty denial.
- Documentation Matters: Taking photos during installation or repair helps verify proper setup, especially if warranty claims ever come into play. It’s a small step that offers big peace of mind.
- Tools Make All the Difference: Investing in a quality multimeter and the right screwdrivers has transformed my DIY repairs from stressful to manageable. Proper tools are worth the investment.
Related Posts
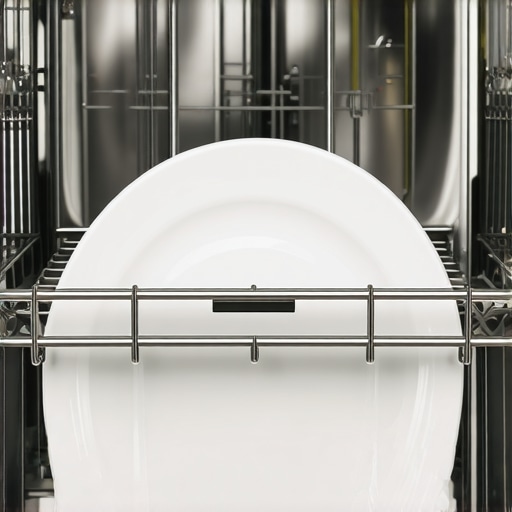
How to Patch a Rusted Dishwasher Rack Before It Stains Your Plates
I remember the moment clearly—loading my dishwasher, happily tossing in…

The $5 Gasket That Fixes 90% of Door Edge Leaks
It was a frustrating weekend when I finally realized that…
Why Your Dishwasher Door Springs Break Every Three Years
Ever opened your dishwasher to find the door hangs at…