It was a slow Saturday morning when I finally snapped. After meticulously installing a new dishwasher, I turned on the water, only to find a mysterious leak seeping from the brass compression fitting I just thought I had secured properly. That sinking feeling, knowing I’d probably messed up—and risking costly water damage—hit hard. I’ve learned the hard way that even seasoned DIYers can overlook key details with compression fittings. If you’ve ever faced a drip, leak, or flood caused by a seemingly simple connection, you’re not alone. These sneaky leaks can turn into a mini disaster faster than you can say “water damage!” But here’s the silver lining: understanding why these fittings keep leaking and knowing how to fix them can save you time, money, and frustration. Today, I’m going to walk you through the common pitfalls and proven tips to put an end to your leaking brass compression fittings for good.
Why Brass Compression Fittings Leak and How to Stop Them
Is it really worth troubleshooting such a tiny part?
Believe me, early in my DIY journey, I brushed off small leaks as minor annoyances. But I quickly realized that those tiny drips could lead to extensive damage—and expensive repairs. Brass compression fittings seem straightforward, yet they’re prone to leaks if not installed correctly. The most common culprit? Over-tightening, which distorts the fitting or damages the seat. I once thought I could save a few seconds by tightening as much as possible—big mistake. Proper installation involves not just tightening but understanding the right torque and ensuring the pipe itself is clean and free of debris. For comprehensive advice on choosing stable, reliable parts, check out this article on selecting the right parts for dishwasher installation. It’s a goldmine for avoiding common installation errors that cause leaks. Understanding your fittings and their proper installation techniques can make all the difference.
Research shows that many plumbing leaks originate from improper fitting installations. In fact, studies indicate that improper compression fitting torque is a leading cause of leaks, costing homeowners thousands in damages. It’s crucial to get it right the first time! If you’d like to explore how to maximize your appliance’s warranty with correct parts, visit this resource on warranty coverage. Trust me; knowing what to look for and how to apply proper tightening techniques is a simple step toward leak-free water connections.
Now, let’s dive deeper into how to identify the root causes of leaks and ensure your fittings stay tight and secure for the long haul.
Inspect and Prepare the Pipe Surface
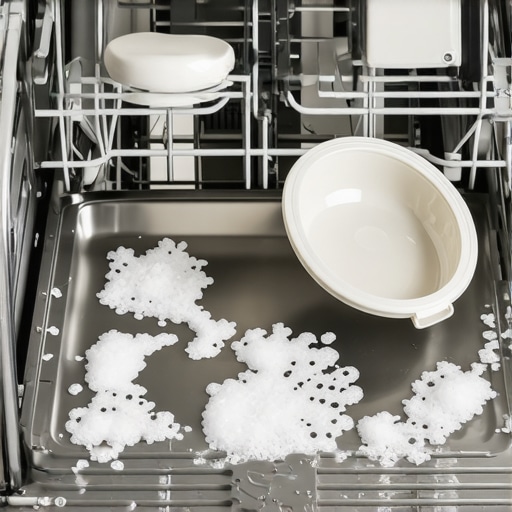
Begin by turning off the water supply and draining any residual water from the pipe. Use a clean cloth to wipe the pipe end thoroughly, removing dirt, rust, and debris that can prevent a proper seal. I once neglected this step and faced an immediate leak—cleaning the pipe surface effectively sealed my connection and saved a costly call to a plumber. Ensuring a spotless surface is critical; even tiny particles can cause a leak over time. For details on choosing the right parts that fit snugly and prevent such issues, review this guide on essential parts you should know about.
Choose the Correct Compression Nut and Fitting
Select a compression nut and ferrule designed for your pipe diameter. Using the wrong size can result in over-tightening, which distorts the ferrule and causes leaks. I remember grabbing a generic set, only to realize they didn’t fit my pipe perfectly, leading to a leak that took hours to diagnose. Always verify part compatibility; consult this resource for selecting the best-fit components. Proper matching is your first line of defense against leaks.
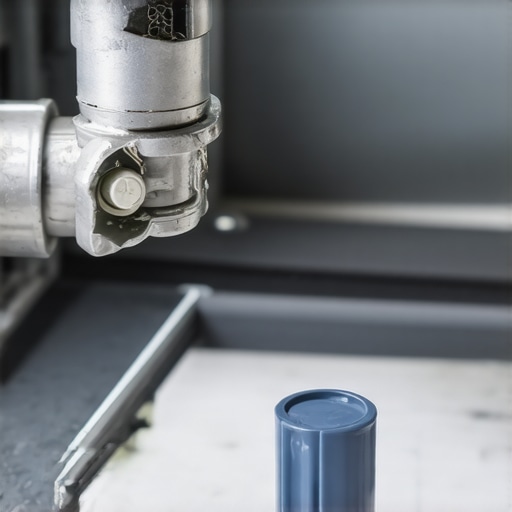
Properly Thread and Tighten the Nut
Hand-tighten the compression nut onto the fitting, then use a wrench to turn it an additional quarter to half turn. Do not over-tighten—this can distort the ferrule, damaging the seal. I once tightened too aggressively during a weekend project, crushing the ferrule and causing a leak that persisted for days until I replaced the faulty part. Think of it like threading a bolt; gentle snugging ensures a secure connection without damage. Use a torque wrench if available, and always check the manufacturer’s recommended torque levels. For guidance on torque specifications, see this tightening technique.
Test and Confirm the Seal
Turn the water supply back on slowly, watching for any signs of dripping or moisture. Don’t rush this step; a gradual increase in pressure reveals leaks early. If water escapes at the fitting, tighten the nut incrementally—don’t overdo it. Once secure, wipe the fitting again and visually inspect for ongoing leaks. I once missed a slow drip that later led to water damage because I didn’t thoroughly check after initial tightening. The key is patience and careful observation. For a deeper understanding of troubleshooting leaks, explore this troubleshooting guide.
Final Tips to Secure Your Connection
Always replace the ferrule if it appears cracked or deformed after tightening. Use high-quality parts, as cheap replacements often lack durability, leading to recurring leaks. Consider applying a small amount of plumber’s tape on the threaded area before assembly to enhance sealing. Lastly, document your installation with photos; this can be invaluable if warranty claims or professional inspections are necessary. Remember, correct installation combined with proper torque application is your best defense against leaks. For additional tips, refer to maximizing warranty coverage.While many homeowners believe that installing a dishwasher is a straightforward task, there are nuanced details that often go unnoticed but can significantly impact performance and warranty support. One widespread misconception is that using generic or cheaper parts won’t affect the appliance’s longevity or warranty eligibility. In reality, inferior parts may fail prematurely, void warranties, or cause leaks that are difficult to diagnose later. It’s a common trap to prioritize cost savings over quality—something I learned the hard way. Ensuring you select high-quality, OEM-approved components not only preserves your warranty but also ensures a reliable connection.
Another overlooked aspect is the importance of precise torque application during installation. Many users tighten fittings by hand or assume that ‘tight enough’ suffices. However, over-tightening can distort seals, leading to slow leaks that escape detection until they cause damage. Conversely, under-tightening may result in loose connections prone to leaks. Using a torque wrench and adhering to manufacturer specifications can save hours of troubleshooting later. Remember, proper installation practices are critical; skipping these nuances risks future problems even if the initial setup seems correct.
Now, let’s address an advanced question that often puzzles seasoned DIYers:
Why does my warranty get denied when parts seem perfectly installed?
This scenario often arises from overlooked conditions such as not registering your warranty, failing to keep detailed documentation of parts and labor, or installing components outside the recommended parameters. Experts emphasize that warranty policies typically require evidence of professional installation or proper part selection. For deeper insights into warranty policies and how to protect your investment, explore [this guide on understanding dishwasher warranty policies for peace of mind](https://appliancedoctorz.com/understanding-dishwasher-warranty-policies-for-peace-of-mind). Don’t underestimate the value of thorough documentation; it can be your best defense during disputes.
Furthermore, the common myth that all parts are interchangeable neglects the nuances of compatibility. Using incompatible parts—even if they seem similar—can lead to misfits, improper sealing, and subsequent leaks. Consulting reputable sources and verifying part specifications is essential. For a comprehensive overview of the critical parts that influence performance and warranty, review [the essential parts you should know about](https://appliancedoctorz.com/essential-parts-every-dishwasher-owner-should-know-about).
Ultimately, mastering these subtle details—such as choosing quality parts, applying correct torque, and maintaining meticulous records—sets apart seasoned homeowners from amateurs. Let’s dig deeper into these hidden nuances, so your dishwasher functions flawlessly and your warranty remains honored. Have you ever fallen into this trap? Let me know in the comments.
Keeping It Going: Essential Tools and Maintenance Strategies
To ensure your dishwasher remains a reliable part of your kitchen for years, having the right tools and adopting consistent maintenance routines is crucial. I personally rely on a high-quality multimeter and a specialized screwdriver kit to troubleshoot electrical issues and replace problematic parts efficiently. Investing in a digital multimeter allows me to quickly test components like thermostats and heating elements, identifying faults without guesswork. For screws and fittings, a precision screwdriver set with various heads ensures I can access tight spots and avoid stripping screws, which is essential during routine part replacements or inspections.
On top of tools, maintaining a regular inspection schedule helps catch issues early. I recommend checking the filter and spray arms monthly—they’re often overlooked but vital for optimal cleaning performance. Using a soft brush and a simple vinegar solution to clean mineral deposits prevents buildup that can clog jets or impair drainage. Additionally, inspecting door seals for cracks or deformation ensures water doesn’t leak during cycles, protecting your cabinetry and flooring.
Considering long-term results, I’ve found that applying a polymer-based lubricant on moving parts like hinges or latch mechanisms can extend their lifespan and maintain quiet operation. Always use lubricants compatible with plastic and rubber components, as petroleum-based products can cause damage over time. When replacing parts, opting for OEM-approved components guarantees compatibility and durability, which correlates directly with warranty protection and appliance longevity.
Looking toward the future, this trend of proactive maintenance combined with the right tools will become even more integrated with smart diagnostics and remote monitoring capabilities. Some modern dishwashers now offer app alerts for filter cleaning or part replacement needs, taking guesswork out of routine upkeep.
How do I keep my dishwasher’s performance optimal over time?
Implementing consistent cleaning routines, using quality replacement parts, and regularly inspecting key components are the foundation. Using a multimeter for electrical tests, as I do, can help you identify hidden issues before they develop into costly repairs. Remember, taking these small steps now can extend your appliance’s life significantly and keep your dishwasher performing like new for years to come.

Lessons From My Dishwasher Mishaps That Changed Everything
- Never underestimate the power of a clean pipe surface; it’s the difference between a leak and a flood. I learned this after one rushed attempt, which cost me days of cleanup and stress.
- Choosing the right-sized fitting isn’t just about fitting—it’s about ensuring long-term peace of mind. Generic parts may be tempting but often lead to recurring leaks, as I discovered with mismatched ferrules.
- Applying torque isn’t a rush job. Gentle, precise tightening, backed by manufacturer guidelines, is the secret to a secure connection that lasts. Using a torque wrench transformed my approach entirely.
- Document every step of your installation process—photos, part details, and notes can save your warranty if questions arise later. Trust me, it’s a simple habit that pays off.
- Patience after turning the water back on is vital. Slow and attentive pressure increases help identify leaks early, saving costly repairs and water damage. Rushing this step almost cost me dearly once.
Tools & Resources I Trust for Leak-Free Installations
- High-quality digital torque wrench: Precise tightening prevents distortions—absolutely worth the investment for any DIYer.
- Essential parts guide: Knowing what parts fit perfectly helps avoid leaks from day one.
- Part selection tips: Ensures compatibility and durability, protecting your warranty and peace of mind.
- Kitchen prep checklist: Preparing your space makes the installation smoother and reduces mistakes.
Your Next Step in Dishwasher Confidence
Embarking on or refining your dishwasher installation journey can feel daunting, but with the right knowledge and tools, you’ll confidently prevent leaks and safeguard your home. Remember, the key lies in patience, proper part selection, and meticulous technique. If you’ve faced challenges or have tips to share, I’d love to hear your story—drop a comment below and join the conversation!
Related Posts
Why Your Dishwasher Still Smells After a Deep Clean
It was late on a weekend evening when I finally…

Why a Damp Subfloor Is the First Sign of a Slow Inlet Leak
It was late evening, and I was just about to…
The $4 Plastic Drain Plug That Kills Your Dishwasher Pump Before It Starts
I remember the shock of flipping the switch on my…