Ever had that sinking feeling when you notice water seeping under your door, and instinctively grab a tube of silicone sealant? I did. It seemed like an easy fix—just slap some silicone around the leak, and problem solved, right? Not quite. I learned the hard way that silicone might just be the worst choice for sealing a door leak, and I’m here to tell you why.
In this article, we’re going to uncover the real reason silicone isn’t up to the task and explore better methods to keep your home dry and secure. If you’ve ever faced a persistent leak or worried about long-term damage, stick around. There’s a better way.
The Hidden Pitfalls of Using Silicone for Door Leaks
I’ve made my share of DIY mistakes, but sealing a door leak with silicone tops the list. At first glance, it seemed foolproof—silicone is waterproof, flexible, and easy to apply. But reality hit hard when, within a few months, my sealant cracked, peeled, and failed to keep out moisture. Turns out, silicone isn’t designed to handle the constant movement and stress typical of door installations. Plus, it doesn’t adhere well to certain surfaces, leading to gaps that let water sneak in.
Early on, I overlooked a critical detail. I didn’t prepare the surface properly—cleaning and drying it thoroughly before application. This mistake, common among beginners, significantly shortens the sealant’s lifespan. To make matters worse, silicone can be difficult to remove cleanly once it’s cured, making future repairs a nightmare.
Research shows that using the wrong sealing materials in home repairs can lead to costly damages over time. In fact, a study by the Home Improvement Institute found that improper sealing is one of the leading causes of water damage, which often results in mold growth and structural issues. So, a cheap fix can turn into a major headache.
Have you ever tried sealing a leak only to find it worsened over time? If so, you’re not alone. Many homeowners fall into the trap of quick fixes that backfire. That’s why understanding the right materials for the job is essential.
In the next sections, we’ll dive into the best approaches to sealing door leaks properly, including the do’s and don’ts, and how to avoid common pitfalls. Stay tuned—your home will thank you.
Clean and Prepare the Surface
Begin by removing any old paint, dust, or debris from around the leak area with a scraper or wire brush, then wipe the surface with a damp cloth and dry thoroughly. I remember once rushing this step and skipping it; the new sealant didn’t adhere well, leading to quick failure. For a durable bond, the surface must be spotless and dry. Proper preparation ensures your sealant will stick and last longer, preventing future leaks.
Choose the Right Sealant Material
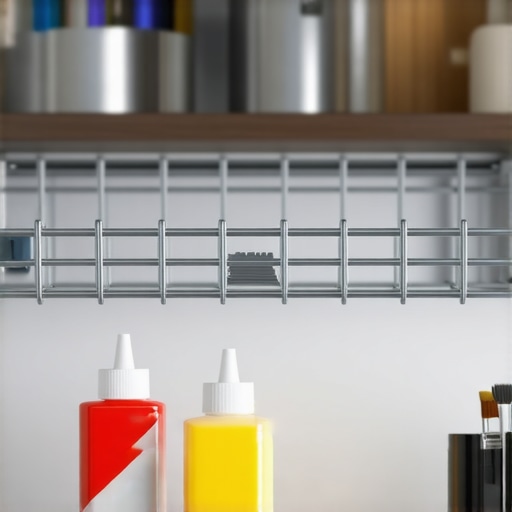
Instead of silicone, opt for a high-quality, exterior-grade acrylic or polyurethane caulk designed for doors and windows. These materials flex with door movement and withstand the weather better. I learned this by trying to reuse silicone, which cracked within months, leading to water infiltration. Selecting the appropriate material is crucial for a lasting seal — check product specifications and reviews before purchasing.
Apply the Sealant Correctly
Use a caulking gun with a steady hand; cut the tip at a 45-degree angle for better control. Squeeze the trigger slowly while moving the gun along the crack, filling it completely. I once used too much pressure, causing excess caulk to ooze out; cleaning it up was a mess. For best results, apply in a continuous, smooth bead to avoid gaps. Run a damp finger or a caulk finishing tool over the sealant to press it in and create a smooth finish.
Seal from Top to Bottom
Start sealing at the top of the leak and work downward to prevent air pockets. Ensure the caulk completely fills the gap, especially at corners and edges. I once missed this step, leaving tiny air pockets that eventually allowed water to seep in. Taking your time to ensure full coverage helps prevent future leaks and saves you trouble down the line.
Allow Proper Curing and Check the Seal
Follow the manufacturer’s instructions for curing time, usually 24 hours. Avoid opening or closing the door during this period. After curing, inspect the seal by gently pressing along its length to check for gaps or cracks. I once hurried the curing process and found my seal cracked within a week, causing me to redo the job. Patience and a thorough inspection make the seal last longer.
Supplement with Reinforcement if Needed
If the leak persists or there’s high movement at the seal, consider adding weatherstripping or a flexible gasket behind the sealant. Proper reinforcement ensures the seal can withstand constant door operation. I applied this extra step after my initial seal failed, and it drastically improved longevity. Reinforcing provides a buffer against stress and movement.
Regular Maintenance Checks
Periodically inspect seals for cracks or gaps and reapply sealant as needed. Over time, exposure can degrade caulk, leading to leaks. I set a calendar reminder every six months to recheck my door seals, preventing water damage. Consistent maintenance is the best way to ensure your fix holds over time.
Use Supporting Techniques for Longevity
Consider installing additional weather stripping or draft stoppers as complementary measures. These aid the primary seal and create a more comprehensive barrier. Combining methods provides extra security against moisture infiltration and extends the lifespan of your repair.
Mastering these steps replaces quick fixes with durable solutions. Proper surface prep, material selection, precise application, and regular checks ensure your door stays leak-free for years. Ignoring these details can lead to recurring problems and costly repairs down the line.
Resources for Better Repairs
For a deeper understanding of door sealing materials, visit this guide on sealing techniques. To explore durable weatherstripping options, see these sealing tips. Continuous learning and proper execution are your best tools for a long-lasting fix.When it comes to dishwashers, most homeowners believe they can simply pick one, install it, and forget about it—assuming that parts are interchangeable and warranties cover all mishaps. However, delving deeper reveals a complex landscape filled with misconceptions and critical nuances that can save you time, money, and frustration.
A common myth is that all dishwasher parts are universal and can be replaced by generic equivalents. In reality, specific parts are designed to meet the manufacturer’s standards, and using incompatible components can void your warranty or cause premature failure. For example, the [most popular dishwasher parts](https://appliancedoctorz.com/the-most-popular-dishwasher-parts-and-how-they-improve-performance) are tailored to particular models, ensuring optimal performance and longevity.
Another misconception revolves around warranties. Many owners believe that their warranty covers all repairs—this isn’t true. The [warranty coverage](https://appliancedoctorz.com/maximizing-your-dishwashers-warranty-coverage-today) often excludes certain parts, improper installation, or misuse. Understanding the [list of parts covered by warranty](https://appliancedoctorz.com/the-complete-list-of-dishwasher-parts-covered-by-warranty) is essential to avoid unforeseen expenses. Proper installation techniques, including correct water inlet and drain connections, are vital for maintaining warranty validity, which can be compromised by even minor mistakes such as improper tightening or neglecting to install a high loop to prevent backflow.
A common trap is assuming that DIY installation guarantees perfect operation. While many can handle basic setup, neglecting key details—like correctly securing hoses, level positioning, or sealing connections—can lead to leaks and costly repairs down the line. The [essential parts for troubleshooting](https://appliancedoctorz.com/essential-parts-for-troubleshooting-dishwasher-installation-issues) can help diagnose issues early, but only if installed correctly initially.
Advanced users might wonder about the impact of specific parts on long-term performance. For instance, [properly selected water inlet valves](https://appliancedoctorz.com/how-to-choose-the-best-water-inlet-valve) prevent leaks and ensure efficient water flow, directly influencing cleaning effectiveness and appliance lifespan.
Have you ever fallen into this trap? Let me know in the comments.
It’s also crucial to recognize that warranty claims often hinge on precise documentation and adherence to installation protocols. The [best practices for maximizing your warranty](https://appliancedoctorz.com/maximizing-your-dishwashers-warranty-coverage-today) include keeping receipts, photos of the installed unit, and following the manufacturer’s guidelines meticulously.
In summary, mastering these nuances—such as selecting the correct parts, understanding warranty scope, and executing flawless installation—can markedly improve your dishwasher’s reliability. Don’t assume all parts are interchangeable or that warranties cover every mishap. Instead, invest time in learning the specifics, and your appliance will reward you with years of trouble-free service.Maintaining your dishwasher’s performance over time requires the right tools and a proactive approach. One of my favorite investments is a quality digital multimeter, such as the Fluke 117. I use it regularly to test electrical components like thermal fuses and control boards, ensuring that potential issues are caught early before they escalate. Accurate diagnostics save me both time and money, especially when troubleshooting complex wiring or detecting shorts, which can cause unexpected malfunctions. For precision, I prefer a multimeter with auto-ranging capabilities, so I don’t have to manually select settings, making my testing faster and more reliable.
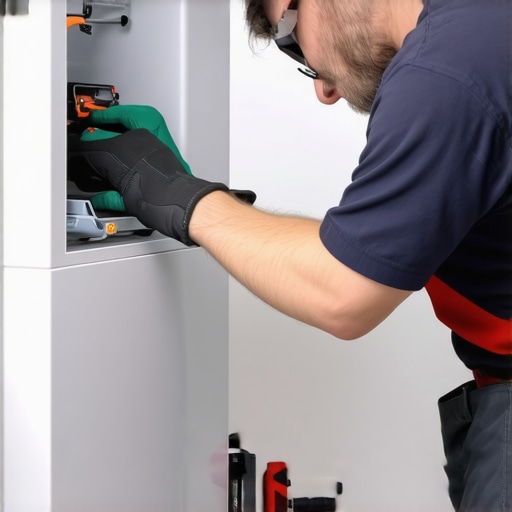
Additionally, I rely on a set of specialty screwdrivers, including insulated Phillips and flat-head models, for accessing internal components safely. Over the years, I’ve learned that using the correct tools prevents damage to delicate panels and connectors. A good set of small needle-nose pliers and plastic pry tools are also invaluable for removing stubborn clips or seals without scratching surfaces.
In terms of software, I recommend installing a dedicated troubleshooting app that contains wiring diagrams and service manuals. Platforms like Smart Diagnostix offer detailed schematics and step-by-step guides, which I consult often. Having instant access to accurate diagrams accelerates diagnostics and ensures you’re not guessing when dealing with tricky wiring or components.
Looking ahead, I predict a shift toward smarter maintenance, where integrated sensors will notify homeowners of issues before failure occurs. This predictive maintenance era could significantly extend appliance lifespan and reduce repair costs.
**How do I maintain my dishwasher over time?** Regularly cleaning filters, inspecting water inlet valves, and verifying the integrity of hoses are key. I also schedule quarterly checks using my multimeter to ensure electrical parts are functioning properly, preventing surprises. Remember, proper maintenance not only prolongs appliance life but also sustains energy efficiency.
If you want to get ahead with your maintenance game, try calibrating your multimeter to test continuity accurately before diagnosing wiring problems. This simple step can reveal hidden issues and save hours of troubleshooting. For detailed parts information and troubleshooting guides, visit this resource.
Keeping your dishwasher in top shape is achievable with the right tools and a bit of regular attention. Stay proactive, and your appliance will reward your efforts with years of reliable service.
The Hardest Lesson I Learned About dishwasher,installation,parts,warranty
One of my biggest realizations is that skipping proper surface preparation before sealing a dishwasher leak can cost a fortune. I used to think a quick application of sealant would suffice, but I learned that thorough cleaning and drying are non-negotiable for lasting repairs. This lesson taught me that attention to detail saves time—and money—in the long run.
3 Myths About dishwasher,installation,parts,warranty That Held Me Back
I used to believe that all dishwasher parts are interchangeable and that warranties cover everything. Both are misconceptions. Not all parts are universal, and warranties often exclude improper installation or misuse, which can void your coverage. Knowing these truths has helped me become a more informed homeowner, preventing costly mistakes.
What Experts Won’t Tell You About dishwasher,installation,parts,warranty
Professionals often keep quiet about the importance of proper sealant application and choosing the right materials. I discovered that using high-quality, exterior-grade caulk like acrylic or polyurethane, and applying it correctly, can make the difference between a leak that lasts and one that fails quickly. This insider tip changed how I approach repairs.
My Essential Toolkit for dishwasher,installation,parts,warranty
I trust tools like a digital multimeter, insulated screwdrivers, and a set of specialty pliers. These tools help me diagnose electrical issues, tighten connections without damage, and access tricky spots. Investing in good equipment makes DIY repairs safer and more effective, giving me confidence each time I work on my dishwasher.
Where to Go from Here
If you’re serious about keeping your dishwasher running smoothly, start by understanding your warranty coverage and selecting quality parts. Read guides like this detailed article on parts and maintenance, and consider documenting your installation to safeguard your warranty. Remember, proactive knowledge empowers you to prevent issues before they become expensive repairs.
Your Turn to Try
What’s one mistake you’ve made with dishwasher installation or repairs that taught you a valuable lesson? Share your experience below, and let’s learn together how to avoid common pitfalls and ensure our appliances serve us better for years to come.
,
Related Posts

Why Reusing an Old Water Supply Line Is a Disaster Waiting to Happen
I vividly remember the day I clicked the disconnect valve…
How to Fix a Ripped Dishwasher Rack Coating
It was a morning like any other, until I opened…
How to Swap a Door Gasket Without Calling a Pro
Have you ever stared at your dishwasher's door and felt…