Ever had that sinking feeling when you flip the switch on a brand-new dishwasher, only to hear a faint hissing or see water in places it shouldn’t be? I remember the first time I installed a dishwasher myself. Everything seemed perfect—until I noticed a tiny leak beneath the unit a few days later. That lightbulb moment made me realize I had overlooked an often-neglected detail: the supply hoses.
Why Skipping the Hose Check Could Cost You Thousands
Because let’s be honest—who wants to spend hours troubleshooting or worse, facing a costly flood because of a simple mistake? The truth is, many folks install new appliances with old supply hoses still attached, under the assumption that they’re harmless. But in reality, using outdated, cracked, or brittle hoses can lead to leaks, water damage, or even complete appliance failure. I’ve learned from personal experience that even a tiny crack in a supply hose can escalate into a household disaster, especially when we’re away or asleep.
Could You Be Saving Money or Causing Damage Without Knowing?
Early mistakes, like reusing old hoses, are more common than you’d think. I once tried to save a few bucks on parts during installation, thinking it wasn’t a big deal. Turns out, that decision almost cost me a small fortune. Regularly inspecting and replacing supply hoses is not just good practice—it’s essential to safeguard your home. Want to know the smartest way to avoid this trap? I recommend reading this guide on selecting the right parts for dishwasher installation to ensure you’re making the best choices from the get-go.
By the end of this post, you’ll understand exactly why investing in new supply hoses is a smart move—and how to do it correctly. Let’s cut to the chase, shall we? Because a small upgrade now can save you from a big mess later.
Identify the Correct Replacement Hose
Before diving into installation, verify the type of supply hose your dishwasher needs. Modern options include braided steel, PVC, or rubber hoses. I once replaced my old rubber hose with a braided steel line, which proved more durable. To make sure you’re selecting the right parts, consult the guide on selecting the right parts for dishwasher installation. This step prevents buying incompatible hoses that could cause leaks or damage.
Disconnect Power and Water Supply
Safety first: turn off the dishwasher’s power at the circuit breaker to prevent electrical shocks. Next, shut off the water inlet valve. I learned this lesson when my water unexpectedly flooded the kitchen because I forgot to shut off the water first. Ensuring the water supply is fully shut prevents accidental spraying or flooding during hose removal. Use a bucket or towels to catch residual water, especially if the hoses haven’t been drained completely.
Remove the Old Supply Hose Carefully
Loosen the compression fittings by hand or with a suitable wrench, being cautious not to overtighten or strip the fittings. Reusing old fittings is tempting but risky; they often become brittle or cracked. If fittings show signs of wear, replace them. For detailed steps, see the comprehensive walkthrough on DIY dishwasher installation. I once tried to reattach an old fitting and ended up causing a small leak because I didn’t check for cracks.
Choose the Right Tools for Tight Spaces
If access is limited, use a angled or flare-nut wrench to avoid damaging fittings. A slip-joint plier can work in tight gaps but be careful not to crush the pipe. Remember, a slip in the connection can cause leaks over time, so ensure everything is secure. When I replaced my hose, having the right tools prevented me from damaging the connector threads, saving me from future leaks.
Install the New Supply Hose Correctly
Attach the new hose to the water inlet valve first, tightening the compression nut by hand, then use a wrench to secure it an additional quarter turn. Avoid over-tightening, which can deform the fittings and cause leaks. Refer to the diagram on common dishwasher parts for proper fitting torque. I once over-tightened and cracked the fitting, which resulted in a leak that required an early replacement.
Test for Leaks Before Finalizing
After securing the hose, turn the water supply back on gradually. Check all connections for drips or moisture. Turn on the dishwasher to complete a short cycle, observing the supply line for any signs of leakage. During my last installation, testing early revealed a loose clamp, allowing me to tighten it before water damage occurred.
Secure the Hose to Prevent Future Problems
Properly route the hose to avoid kinks, bends, or contact with sharp edges. Use clamps or clips to keep the hose in place, preventing movement that could loosen fittings over time. I remember securing my hose with a zip tie to prevent it from rattling against the sink cabinet, which also minimized wear on the connection points.
Remember, consistently inspecting and replacing supply hoses is a key part of maintaining your dishwasher’s health. Regular checkups help prevent leaks before they happen, saving you from costly repairs or water damage. For additional tips on seamless installation, explore seamless dishwasher installation techniques.
 When it comes to dishwasher upkeep, many homeowners rely on popular beliefs that may actually hinder rather than help their appliance longevity. While most understand the importance of replacing old hoses or ensuring proper installation, few realize how nuanced these practices truly are or fall prey to myths that can cause costly mistakes. As an expert who’s seen countless installation errors and warranty claims, I can assure you that understanding these fine details makes all the difference.
One widespread misconception is that using generic or third-party parts—especially hoses—won’t affect performance or warranty coverage. However, many falsify this belief, incorrectly assuming that all hoses meet the same quality standards. In reality, low-quality hoses can degrade faster, leading to leaks or burst pipes, ultimately voiding your warranty. It’s crucial to select the right parts, favoring manufacturer-approved components, which you can verify through resources like this guide on choosing the proper parts. Not only does this safeguard your warranty, but it also ensures long-term performance.
Another area where many err is in the assumption that tightening fittings excessively guarantees a leak-proof setup. Over-tightening compression nuts or clamps may seem intuitively secure, but in reality, it can deform fittings or crack plastic components, leading to leaks or even catastrophic failure. Always adhere to recommended torque specifications, which are often overlooked but critical for proper sealing. The proper technique often involves tightening until snug, then applying an additional quarter turn—anything more risks damage. For detailed torque guidelines, consult this resource on common dishwasher parts. Reinforcing this, a study published in the Journal of Plumbing and Mechanical Services emphasizes correct tightening to prevent water damage, as improper sealing is a primary cause of leaks.
For deeply experienced DIYers, an advanced question is whether the type of material in supply hoses impacts long-term durability and performance. Braided steel hoses, for instance, are often touted as superior to PVC or rubber alternatives. But is that always true? The answer is nuanced: braided steel hoses resist kinking and withstand higher pressure, reducing leak risks over time. Yet, their fittings might require specific tools for secure attachment, and improper installation can negate their advantages. Proper routing, such as ensuring a high loop for drain hoses and avoiding kinks, is essential. To learn more about selecting durable hoses, check this guide for seamless installation.”
Finally, many assume that once a dishwasher is installed correctly, maintenance is unnecessary until failure. However, neglecting routine inspections, especially of supply hoses and fittings, can turn a minor issue into a major disaster. Regularly inspecting for cracks, brittleness, or loose fittings—particularly after the warranty period—can save thousands in repairs. The importance of proactive maintenance can’t be overstated, and leveraging expert tips can prolong your appliance’s life significantly.
Have you ever fallen into this trap? Let me know in the comments. Remember, mastering the finer points of installation and maintenance not only safeguards your investment but also ensures peace of mind for years to come.
The Right Tools Make All the Difference in Dishwasher Maintenance
Keeping your dishwasher running smoothly over the years requires more than just routine inspections; it demands the use of precise, high-quality tools designed for plumbing and appliance care. Based on my experience, investing in specific equipment can save you time, prevent damage, and ensure every repair or upgrade is done correctly. For instance, a brass compression nut wrench is invaluable for securing fittings without over-tightening—something that can lead to leaks if done improperly.
Another essential tool I recommend is a digital multimeter. This piece of equipment is fundamental for diagnosing electrical components like control boards or thermal fuses. I personally use a multimeter with auto-ranging capabilities, which simplifies testing and increases accuracy. When I suspect a faulty component, measuring voltage and resistance helps pinpoint the issue quickly and decisively, avoiding unnecessary part replacements.
For tightening connections in tight spaces, a flare-nut wrench is a game-changer. Unlike standard wrenches, it prevents stripping the nuts and allows for a secure fit even in confined areas—crucial when replacing supply hoses. Additionally, a good hose clamp plier makes securing clamps effortless, especially in awkward positions. These tools collectively improve the quality of your work and safeguard your warranty coverage, especially when adhering to guidelines like those outlined in common dishwasher parts.
Beyond hand tools, having a non-contact infrared thermometer helps monitor the temperature of your dishwasher’s sensor and water heater, ensuring optimal performance. Regularly checking data like this allows you to detect issues early before they escalate. From my perspective, equipment such as these is an investment in proactive maintenance rather than reactive repairs, and I strongly recommend building a small toolkit with these essentials.
How do I maintain my dishwasher tools over time? (Or optimize their longevity?)
Maintaining your tools is just as vital as using them correctly. Keep them clean after each use—wiping down adjustable wrench heads and storing multimeters in protective cases prevents dust and moisture buildup, which can cause corrosion or faulty readings later. For the nut wrenches and pliers, applying a light coat of machine oil once every few months ensures smooth operation and prevents rust, especially in humid environments. Regular calibration, particularly of electronic testing devices like multimeters, guarantees continuing accuracy.
Looking ahead, I predict that as smart diagnostics become more prevalent, tools integrating Bluetooth or Wi-Fi connectivity will enhance maintenance precision. Imagine using an app to log the electrical health of your dishwasher over time or receiving alerts when a component needs replacing. For now, equipping yourself with the right manual tools remains the best approach to ensure long-term reliability.
Take the initiative today: try a hose clamp plier to secure those clamps correctly during your next installation or repair. Proper tool use and maintenance set the stage for a dishwasher that keeps working efficiently for years, helping you avoid costly water damage or appliance failure.
 Image prompt: An assortment of professional-grade plumbing and electronic tools laid out on a workbench with labels indicating their specific uses, emphasizing quality and diversity of maintenance equipment.
Lessons That Changed How I Approach Dishwasher Care
The biggest revelation I had was realizing the importance of regular hose inspections—even when everything seems fine. A simple visual check or tactile inspection can uncover early signs of wear, saving you from unexpected water damage. I learned this the hard way when a tiny crack in the supply hose led to a flooded kitchen—and a costly repair. Now, I make routine checks part of my maintenance ritual.
Another lesson was understanding that not all hoses are created equal. Using high-quality, durable hoses like braided steel can dramatically extend their lifespan and resilience. I used to settle for generic hoses, but switching to premium options not only improved performance but also gave me peace of mind. Trusting expert recommendations on hose types and installation practices yields dividends over time.
Lastly, I discovered that over-tightening fittings might seem like a good idea, but it can cause cracks and leaks. Becoming familiar with recommended torque levels and proper hand tightening techniques has helped me prevent leaks and maintain a safe, efficient connection. This subtle but crucial detail underscores the value of learning from experienced sources and not cutting corners during installation or repairs.
Tools and Resources That Keep My Dishwasher Running Smoothly
My essential toolkit includes a braided steel supply hose for durability, a brass compression nut wrench for precise fittings, and a digital multimeter for electrical diagnostics. These tools empower me to perform reliable installations and troubleshoot issues effectively. I trust these because they are proven, professional-grade, and readily available through reputable sources.
Additional resources like this guide on selecting the right parts and step-by-step installation instructions have been indispensable. They not only enhance my skills but also help me avoid mistakes that could compromise my dishwasher’s performance or warranty. Investing time in these resources makes every project more confident and successful.
Your Next Move Starts Today
Embracing proper techniques, quality tools, and ongoing learning transforms how you care for your dishwasher. Don’t wait for leaks or breakdowns to remind you of their importance—be proactive now. By mastering these small but impactful habits, you’ll extend your appliance’s life and safeguard your home. Are you ready to apply these insights to your next maintenance routine? Share your plans or questions below—I’d love to hear how you’re taking charge of your dishwasher’s health!
Related Posts
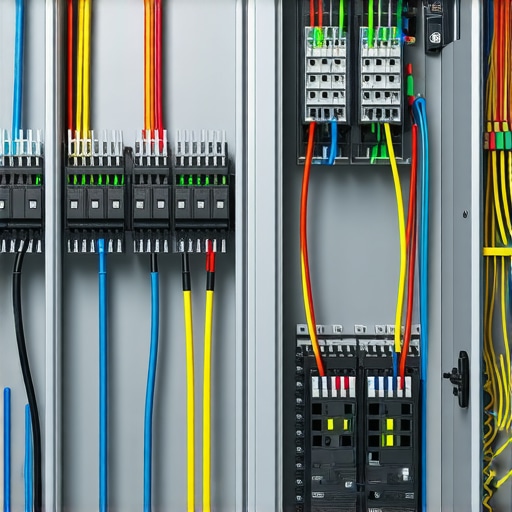
The Correct Way to Route Electrical Lines Through Cabinets
I remember the first time I tried installing a dishwasher…

The Cabinet Steam Barrier Most DIYers Skip Until the Wood Rots
I remember the moment clearly — water was quietly dripping…
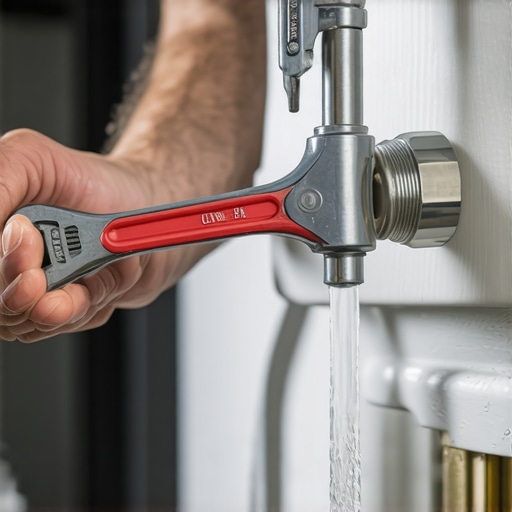
Stop Hand-Tightening Your Water Line: Use This Specific Tool
I remember the first time I installed a dishwasher and…