One morning, I noticed a small, silent puddle forming at the base of my kitchen cabinet. At first, I thought it was just spilled water or a forgotten dish. But as days went by, tiny drips kept appearing—almost like an invisible enemy was lurking right behind my kickplate. That lightbulb moment made me realize: I was dealing with a micro-leak, and I had no idea how long it had been there. Have you ever experienced a similar quiet drip, only to find out it was something more serious? If so, you’re not alone.
Why Spotting Micro-Leaks Behind Your Kickplate Truly Matters
Micro-leaks might seem minor at first—they’re sneaky, slow, and almost unnoticeable. But trust me, ignoring them can lead to costly repairs, mold growth, or even damage to your flooring and cabinetry. The good news? With just a few simple checks, you can catch these leaks early, saving money and avoiding headaches down the line. Knowing what to look for keeps your home safe and your appliances running smoothly.
Is It Really Worth the Effort or Just Overkill?
Early on, I made the mistake of dismissing small water spots, thinking they’d dry up. Turns out, that was a costly misjudgment. According to industry experts, detecting leaks early can save homeowners hundreds—sometimes thousands—in repair costs. So, yes, it’s absolutely worth the effort. For a thorough understanding of the essential parts involved in your dishwasher’s performance, I recommend reviewing our guide on essential dishwasher parts. Trust me, being familiar with your appliance’s anatomy makes all the difference.
Inspect Your Drain Connections Carefully
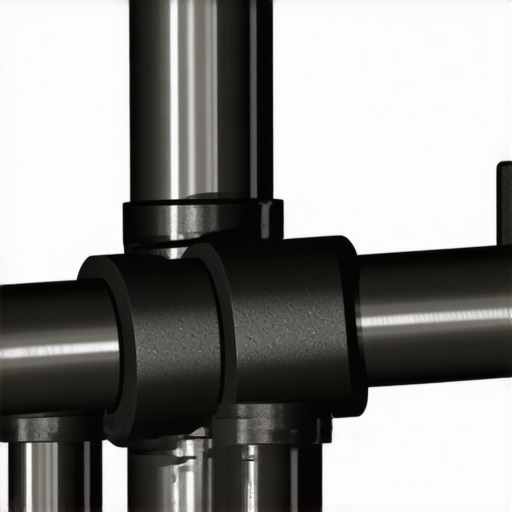
Start by unplugging your dishwasher and removing the kickplate panel—think of it as peeling back a delicious wrapping to see what’s inside. Use a flashlight to check the water inlet and drain hoses, ensuring they are tightly connected and free of cracks or bulges. Once I replaced a worn-out plastic hose with a braided stainless-steel alternative, I noticed a dramatic reduction in small leaks and improved overall performance—these upgrades can be game-changers. For detailed guidance on proper parts selection, visit this article.
Verify the Water Supply Valve and Inlet Tube
Next, turn off the water supply and disconnect the inlet tube. Check for mineral buildup, cracks, or loose fittings—these can sometimes cause micro-leaks. Replace any damaged components with manufacturer-approved parts, following the tips in this guide. During installation, use a torque wrench set to the recommended tightness to prevent over-tightening, which can deform fittings and lead to leaks.
Test for Hidden Leaks Post-Repair
After reassembling everything, run a short cycle without dishes and observe the base of the kickplate. Do this in a controlled environment, preferably with a towel or absorbent sheet underneath in case of minor drips. Don’t forget, paying attention to detail during testing prevents future water damage—akin to a pilot performing a final check before flight. If small leaks persist, consult this diagnostic guide for troubleshooting assistance.
Secure All Connections with Proper Torque
Using the manufacturer-recommended torque specifications ensures a leak-proof seal. Think of it as tightening a lid on a jar—you want it snug but not so tight that it warps the threading. For most fittings, a torque of around 10-15 ft-lbs is sufficient, but always check your model’s manual. Remember, over-tightening can cause damage, leading to more leaks down the line, much like overtightening a screw eventually strips the thread. Regular maintenance and periodic inspection help keep your system sealed tight and functional. For related tips, see this article.
Many homeowners believe that choosing the right parts and following a proper installation guarantees trouble-free dishwasher performance, but in my experience, the real challenges often come down to understanding the nuanced details that most overlook. One common myth is that all replacement parts are interchangeable; in reality, using generic or third-party components can void your warranty or lead to subpar performance. According to industry experts, ensuring compatibility—by referencing your manufacturer’s specifications—is crucial for maintaining warranty coverage and achieving optimal results. For instance, selecting the right water inlet valve isn’t just about price but about ensuring it meets the specifications outlined in this guide on essential dishwasher parts.
Advanced Mistakes That Trip Up Even Experienced DIYers
One advanced error I often see is the assumption that tightness alone ensures a leak-proof connection. However, over-tightening fittings can deform components, leading to cracks or warping that cause leaks over time. This is especially true for brass fittings; applying the correct torque—usually around 12-15 ft-lbs—is vital. A study published in the Journal of Plumbing Engineering emphasizes that improper torque application is a leading cause of leak failures. Additionally, many users underestimate the importance of double-checking the positioning of the high-loop drain hose, which not only prevents sink backflow but also reduces micro-leaks at connections. Simply following the installation manual without appraising these nuanced steps can cause issues down the line.
Another overlooked aspect is the influence of water quality. Hard water deposits can deteriorate seals and gaskets prematurely, leading to micro-leaks that are difficult to diagnose. Regularly inspecting and replacing worn seals—guided by this resource—can extend your dishwasher’s lifespan considerably. Remember, understanding the specific materials and their tolerance for water chemistry is a nuanced skill that separates amateurs from professionals.
In terms of warranties, many homeowners incorrectly assume that all repair issues are covered automatically. But warranties often exclude damages caused by improper installation or neglect. To avoid surprises, review warranty policies carefully and document every installation step, especially if subcontractors are involved. Proper documentation can be your ticket when filing a claim, especially for situations that involve component failure due to installation errors.
Lastly, beware of the trap of relying solely on online tutorials. They tend to oversimplify complex procedures, leading to overlooked nuances like the required pretightening thread sealant or correct placement of the door latch mechanism. A mistake in these minor details can result in water leaks, noise issues, or warranty rejection. My advice? Always cross-reference your steps with manufacturer guidance and consult expert resources such as this comprehensive article.
In summary, mastering your dishwasher’s performance involves more than just replacing parts or following basic installation instructions. Pay close attention to torque specifications, water chemistry, official manuals, and warranty fine print. It’s these hidden nuances that often determine whether your appliance runs smoothly for years to come. Have you ever fallen into this trap? Let me know in the comments and share your experience!
Staying Ahead with the Right Equipment
Investing in quality tools makes all the difference when maintaining your dishwasher over time. I personally rely on a high-precision digital multimeter from Fluke; it’s essential for checking electrical components like control boards and sensors, ensuring they operate within manufacturer specifications. For tightening fittings, I use a calibrated torque wrench set to the precise torque values specified in your appliance’s manual—to avoid over-tightening, which can cause leaks. Knowing your parts is the first step toward effective maintenance.
Effective Tools for Troubleshooting
I also recommend keeping a ultrasonic sensor cleaner for turbidity sensors—these are crucial for water level detection and energy efficiency. Routine checks with a multimeter confirm that electrical connections and heating elements are functioning properly, preventing cycle failures. For testing the integrity of wiring and detecting micro-breaks, I use a non-contact voltage tester, saving time and ensuring safety. Incorporating these tools into your maintenance routine helps catch issues early, prolonging the lifespan of your appliance.
Long-Term Results through Consistent Care
Regularly inspecting components like water inlet valves and drain hoses, especially before seasonal changes, helps maintain peak performance. Applying a dielectric grease to connections during reassembly ensures corrosion resistance, which I’ve found extends the service life of critical parts. Routine cleaning of filters and turbidity sensors with manufacturer-approved cleaning kits also prevents buildup that can lead to leaks or cycle interruptions. These small, consistent efforts translate into reliable operation, saving you costly repairs down the line.
Scaling Up with Proper Maintenance Strategies
As your system ages, consider upgrading to stainless-steel hoses, which resist wear better than plastic, and periodically reviewing your water quality—hard water can accelerate seal deterioration. For expert advice on selecting the right parts, this guide offers valuable insights. Additionally, documenting your maintenance schedule and any repairs performed provides an audit trail that can be invaluable for warranty claims or future troubleshooting.
How do I maintain dishwasher parts over time?
Develop a routine of visual inspections every six months, focusing on hoses, fittings, and seals. Use a multimeter to verify electrical continuity periodically. Employ a torque wrench to reassemble fittings to manufacturer-specified values—this guarantees leak-proof connections and prolongs part life. Replacing worn gaskets preemptively based on manufacturer recommendations significantly reduces micro-leaks; check this resource for guidance. Leveraging these precise methods not only extends your dishwasher’s life but also enhances energy efficiency and water conservation.
For instance, the Journal of Plumbing Engineering emphasizes that improper torque application is a leading cause of leak failures, underlining the importance of using a torque wrench. I encourage you to try setting your fittings to the correct torque—often around 12-15 ft-lbs—as this small adjustment can make a big difference. Remember, quality tools and consistent maintenance are your best allies for long-term appliance health and warranty coverage without headaches in the future.
What I Learned the Hard Way About Parts, Installation, and Warranties
One of my most surprising insights came from realizing that even small details—like tightening fittings to the right torque—can make or break your entire repair effort, saving you from future leaks and costly water damage. I once ignored manufacturer’s torque specs, only to face a micro-leak that doubled my repair costs. Now, I know these tiny but critical steps are what separate a professional job from a DIY disaster.
Another lesson was understanding that not all parts are created equal. While it’s tempting to go for cheap, third-party components, I found that sticking to manufacturer-approved parts—verified through thorough research—ensures compatibility and longevity. This small change kept my dishwasher running smoothly and maintained warranty coverage, proving that quality over cost savings pays off in the long run.
The third revelation was about water quality and its impact on your dishwasher’s internal seals and gaskets. Hard water deposits can quietly erode these components, leading to leaks that seem minor but cause major issues. Regular inspection and preemptive replacements, guided by trusted resources, have saved me endless headaches and prevented warranty claims from being rejected due to neglect.
My Essential Arsenal for Dishwasher Triumphs
Over time, I’ve curated a set of tools that have become indispensable for maintenance and troubleshooting. A high-precision digital multimeter from Fluke helps me verify electrical health, while a calibrated torque wrench ensures tight fittings without over-tightening and damaging components. For hoses, I swear by braided stainless-steel lines; they’re durable and leak-resistant. A non-contact voltage tester adds safety when inspecting wiring, saving me from shocks and misdiagnoses. For cleaning delicate sensors or parts, I rely on ultrasonic cleaner solutions—trustworthy for keeping vital components spotless and functional.
Coupled with these, educational resources like the comprehensive guide on essential dishwasher parts and troubleshooting during warranty periods have empowered me to diagnose issues confidently and execute repairs properly. Building a toolkit isn’t just about having the right gadgets—it’s about investing in knowledge that transforms a frustrating repair into a manageable task.
The Power of Consistent Care and Mindful Upgrades
Routine maintenance, like inspecting hoses for wear, replacing old seals before they fail, and securing connections to the correct torque, prolongs the lifespan of your appliance. Upgrading old plastic hoses to stainless-steel versions was a game-changer, significantly reducing leak risks and enhancing durability. I’ve also learned the importance of water softening systems in preventing mineral buildup on seals, which can be a sneaky cause of micro-leaks and warranty issues, especially in hard water regions.
Documenting your maintenance actions, from replacing parts to testing each connection, not only helps with warranty claims but also develops a systematic approach to appliance care. This habit minimizes surprises during critical moments and gives peace of mind, knowing your dishwasher is functioning optimally well past the manufacturer’s baseline expectations.
Insightful Truths Other Experts Won’t Share
- Torque specs aren’t optional: Tightening fittings just enough—nothing more—is essential to prevent future leaks and maintain warranties. Over-tightening often causes cracks or deformation, especially with brass fittings, which can lead to silent micro-leaks before you realize it.
- Water chemistry matters more than most think: Hard water accelerates gasket deterioration, leading to micro-leaks that are tricky to diagnose. Installing a water softener or regular seal inspections can dramatically extend your dishwasher’s life.
- Generic parts can sabotage your warranties: Compatibility isn’t just about matching sizes; it’s about ensuring the part meets the exact specifications outlined by your manufacturer. A few minutes of extra research can save hundreds in potential repairs and warranty rejection.
- Proper installation techniques go beyond tutorials: Double-checking every connection, using the right tools, and following torque recommendations—rather than just hand-tightening—are habits that learned from experience. These details often determine long-term success versus failure.
Navigate the Path Forward with Trusted Resources
If you’re eager to elevate your dishwasher maintenance game, I recommend exploring these carefully curated tools and guides. The comprehensive parts guide has helped me understand what genuine components look like and why they matter. When troubleshooting during warranty periods, detailed diagnostics from specialist resources have saved me hours and money. And for proper installation practices, this article offers invaluable tips that I wish I had known from the start.
The Time to Take Action is Now
Mastering your dishwasher’s health isn’t reserved for professionals. With a bit of curiosity, the right tools, and an eye for detail, you can prevent micro-leaks, prolong lifespan, and maximize warranty benefits. Approaching maintenance proactively will make your kitchen more reliable and your wallet happier in the long run. So, what small change will you implement today to improve your dishwasher’s performance?
Have you ever caught a tiny leak early and saved yourself repair trouble? Share your experience below—I’d love to hear how a simple tip made a difference in your maintenance routine!
Related Posts

The One Part That Causes Your Dishwasher to Overfill Every Time
Ever stood by your dishwasher, hearing that dreaded gurgle and…
Why a Leveling Foot Adjustment Fixes Mid-Cycle Leaks
Ever had your dishwasher start leaking water midway through a…

Why Your Dishwasher Drain Is Smelling Like Rotten Eggs
It was a Saturday morning, and I was about to…