If you’ve ever rushed to install a new dishwasher only to find it leaks or won’t seal properly, you know the sinking feeling that comes with thinking you’ve missed a crucial step. I learned this lesson the hard way early in my DIY journey—thinking I could save time by skipping a simple task, only to have water dripping under my cabinets weeks later. That misstep cost me extra time, money, and a lot of frustration. But here’s the lightbulb moment: there’s a tiny, often overlooked gasket that absolutely must be lubricated before installation. Neglecting this detail can turn your smooth upgrade into a plumbing nightmare.
Why Overlooking This Small Gasket Can Lead to Big Problems
From my experience, water leaks aren’t always obvious at first. Sometimes, they come from a tiny gap that let moisture seep through over time. This all hinges on one crucial component—the gasket sealing the connections on your dishwasher. If you skip lubricating it before installation, the gasket can dry out, stick, or even tear, compromising the seal. That’s when tiny leaks turn into soggy floors and costly repairs.
Research confirms that improper sealing is a leading cause of appliance leaks. According to the Appliance Doctorz guide, a well-lubricated gasket ensures a tight, durable seal, preventing leaks and extending the longevity of your dishwasher.
Now, I’m not here to scare you—just to share what I’ve learned so you can avoid the same pitfalls. Whether you’re installing a brand-new machine or replacing an old one, paying attention to this small detail can save you from big headaches later on. Ready to dive into the why and how of this tiny but mighty gasket? Good. Let’s get into the nuts and bolts of making sure your seal is spot-on from the start.
Prepare the Gasket and Surrounding Area
Start by turning off your water supply and unplugging the dishwasher to ensure safety. Remove the lower kickplate and access the door seal area. Carefully inspect the gasket for any dirt, debris, or signs of cracking. Wipe it clean with a damp cloth to remove grime that could hinder proper sealing. This step is crucial because a clean surface allows the lubricant to adhere effectively, ensuring a better seal during installation.
Select the Right Lubricant and Apply Properly
Use a food-grade silicone-based lubricant, which is flexible and durable—think of it as a moisturizing cream for rubber parts that prevents drying and cracking. Avoid petroleum-based products as they can degrade the gasket material over time. Apply a thin, even layer of lubricant around the entire gasket, focusing on areas that will be compressed or bent during installation. Don’t oversaturate; a light coating is enough to improve pliability and sealing performance. This process resembles applying a moisturizer—you want enough to keep the gasket supple but not so much that excess messes the areas around it.
Position the Gasket Correctly During Installation
Carefully place the gasket onto the door or the relevant connection, making sure it sits evenly without twists or folds. Press it into place firmly to ensure it seats snugly into its groove. When installing the dishwasher, engage the gasket into the frame gradually, checking for proper alignment at each step. An analogy here is fastening a tire onto a rim—you want the seal to be even all around to prevent leaks. Take your time to avoid pinching or tearing the gasket, which could compromise the seal later.
Secure Connections Without Over-tightening
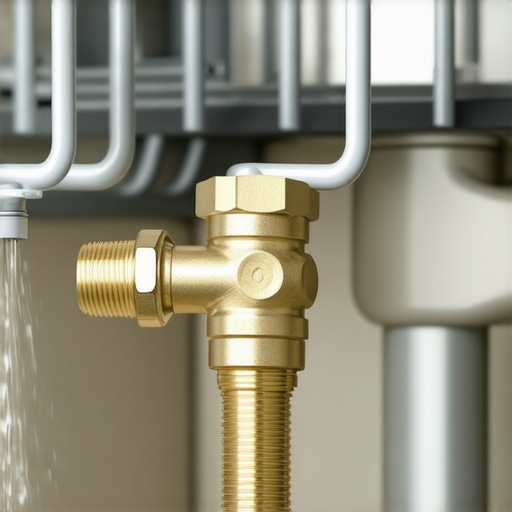
Once the gasket is in position, tighten the compression nuts or fasteners by hand, then use a wrench for the final turn—avoid over-tightening, which can distort the gasket or crack the plastic components. Think of it like tightening a bicycle spoke: enough force to hold everything tight, but not so much that it crushes the rim. Hand tighten initially to feel the resistance, then snug it up just enough to prevent leaks. For detailed guidance on proper compression nut seating, visit this resource.
Test for a Proper Seal and Check for Leaks
Before reassembling everything fully, run a short cycle with hot water. Observe the connection points closely—if water seeps from around the gasket, tighten the connections slightly more, but never force it beyond resistance. Micro-leaks are common if the gasket isn’t lubricated properly or if the installation isn’t aligned correctly. In my experience, applying the lubricant precisely and tightening with a steady hand prevented leaks after my first attempt, saving me from future water damage and potential warranty issues.
Remember that a well-lubricated gasket is the first line of defense against costly damage and warranty pitfalls. This simple but critical step can prolong your dishwasher’s lifespan and ensure it operates smoothly. For more details on parts that impact both installation and warranty coverage, see this guide.
Many homeowners operate under misconceptions about dishwasher maintenance, warranty claims, and installation nuances. A prevalent myth is that all parts are equally covered under warranty—this isn’t true, especially for wear-and-tear components like door gaskets and spray arms, which often require proactive replacement before warranty expiration. Relying solely on manufacturer warranties without understanding their specific exclusions can lead to costly surprises, so it’s vital to read the fine print on coverage details, such as those discussed in this comprehensive guide. Furthermore, many assume that installation is a straightforward process, but neglecting advanced details—like correctly seating the drain hose or ensuring a proper high-loop for drainage—can cause micro-leaks and short-circuit warranties. The misconception that using generic or third-party parts is just as good as OEM components is another pitfall; inferior substitutes can compromise seal integrity and functional longevity, which is why selecting certified parts is crucial, as outlined in this expert article. The sneakiest trap many fall into involves neglecting the installation environment—like ignoring the importance of leveling or over-tightening compression fittings—resulting in leaks or damage that void warranties and cause operational issues. Indeed, over-tightening can distort parts and void seals, as advised in this detailed tutorial. For advanced installers, recognizing these nuances means paying close attention to each step and avoiding shortcuts; a misstep here can lead to long-term problems that are not immediately apparent but become costly over time. Are you aware of these hidden pitfalls? Have you ever fallen into this trap? Let me know in the comments!
How do I maintain my dishwasher over time?
Keeping your dishwasher in top shape requires specific tools and consistent maintenance routines. Personally, I swear by a high-quality multimeter to test electrical components like thermal fuses and control boards. This tool allows me to quickly diagnose issues without costly service calls, especially when troubleshooting intermittent errors. Additionally, a set of precision screwdrivers is vital for accessing and replacing small parts such as door seals or spray arms. I prefer insulated screwdrivers to prevent accidental shocks during electrical work.
For routine cleaning, a soft brush combined with a commercial descaling solution ensures that mineral buildup doesn’t impair performance. I recommend running a vinegar rinse monthly to prevent limescale, but for deeper cleaning, specialized dishwasher cleaning tablets are more effective at removing grease and soap scum. Working with these tools and products consistently helps extend the lifespan of your appliance and prevents unexpected breakdowns.
Future trends in dishwasher maintenance and tools
Looking ahead, I predict that smart diagnostics integrated into dishwashers will revolutionize maintenance. Future models may offer real-time alerts via mobile apps, pinpointing the exact part needing attention—saving time and minimizing downtime. Innovation in IoT-enabled sensors could also facilitate predictive repairs, where components signal imminent failure before causing operational issues.
What’s the best way to ensure long-term performance?
Regularly checking and replacing vital parts like door gaskets, spray arms, or filters is crucial. When do I replace dishwasher parts for optimal results? I follow manufacturer guidelines but also rely on personal inspections using a comprehensive checklist to identify early signs of wear. For complex repairs or if you’re unsure, consulting a professional can save you money and prevent further damage. Remember, proactively maintaining your dishwasher with the right tools and knowledge can help you avoid costly warranty issues and extend its service life. Try cleaning and inspecting your spray arms with a soft brush and a rubber mallet—this simple step can improve water flow and cleaning efficiency significantly.
Secrets No One Tells You About Proper Gasket Lubrication
One of the most impactful lessons I’ve learned is that a tiny amount of food-grade silicone lubricant can prevent endless headaches. I used to skip this step, assuming it was unnecessary, only to end up with leaks and soggy floors. Applying lubricant was a simple step that made a huge difference in sealing quality and longevity of the gasket.
Getting Real About Hidden Pitfalls in Dishwasher Installations
I realized that neglecting details like correct gasket positioning or avoiding over-tightening compression fittings can cause issues that are costly to fix later. These mistakes often stem from assumptions that seem minor but have major consequences—like thinking the gasket is perfectly seated when it’s not, leading to micro-leaks and warranty problems.
What I Wish I Knew Before Starting My Dishwasher Upgrade
Understanding that manufacturer-specific parts and following detailed guides, such as this essential parts overview, can save time and money. Investing in quality tools and reading the fine print on warranties prevents frustration and ensures your installation is up to standard.
Keep Your Peace of Mind: Mistakes to Avoid
Over-tightening fittings or reusing old hoses without inspection are common traps that can void warranties or cause leaks. Recognizing early signs of gasket wear and understanding warranty coverage—like in this detailed checklist—helps maintain peace of mind over the long haul.
Here’s the Ultimate Tip I Swear By
Take your time during installation, double-check alignment and tension, and never underestimate that tiny gasket. It’s the unsung hero that keeps your dishwasher performing flawlessly and your home dry. When in doubt, consulting comprehensive guides and investing in correct parts makes all the difference.
My Essential Toolkit for a Leak-Free Dishwasher
From a quality silicone lubricant to reliable torque tools, the right equipment simplifies the process. I personally recommend a digital torque wrench and a set of precision screwdrivers—these small investments prevent big headaches, especially when dealing with fragile plastic components or tight spaces.
Stay Inspired to Maintain Your Dishwasher’s Peak Performance
Regular inspections, timely replacements, and proactive adjustments can extend the life of your appliance. Thinking ahead about trends like smart diagnostics (see future maintenance trends) keeps you one step ahead, protecting your investment and peace of mind.
Your Turn to Elevate Your Dishwasher Knowledge
Have you faced challenges with gasket sealing or installation mistakes? Share your stories and tips below—your experience might help someone avoid the same pitfalls!
Related Posts
The $20 Valve That Stops Your Dishwasher from Siphoning
It happened to me during a busy weekend—my brand-new dishwasher…
The One Part That Causes Your Dishwasher to Overfill
Ever stood in your kitchen, hearing that annoying gurgling and…

The $6 Brass Compression Nut That Stops Silent Cabinet Rot
Imagine this: You're finally tackling that stubborn cabinet leak under…