It was a morning like any other when I glanced at my dishwasher and noticed something odd—just a tiny fray in the door cable. At first, I thought, “No big deal, I can wait.” But as the days went by, that little fray grew, and suddenly my door wouldn’t close properly. The frustration hit me hard—I realized ignoring this small issue could lead to costly repairs or even a broken door that wouldn’t shut at all. That lightbulb moment made me dive into learning how to replace that frayed cable safely and confidently.
Why Tackling That Frayed Door Cable Matters Now More Than Ever
Many homeowners underestimate the significance of a simple fray in the dishwasher door cable. It might seem minor, but over time, it can cause the door to become misaligned or even lead to water leaks—costing you hundreds in repairs. Plus, attempting to fix it yourself, rather than calling a pro right away, can save money and give you a sense of accomplishment. Did you know that according to a study by the Home Appliance Repair Institute, roughly 70% of dishwasher issues stem from minor cable or door mechanism failures that homeowners can fix if they know what to look for? Recognizing these early signs and knowing how to address them is key to keeping your dishwasher running smoothly.
Is Replacing a Door Cable Really Worth the Hassle?
I admit, I was skeptical at first. I’d never replaced a dishwasher cable before, and the idea of tinkering with a vital component felt intimidating. My early mistake? rushing into the repair without researching proper safety precautions or the right tools. I used pliers instead of a dedicated cable release tool, which made the task harder and increased the risk of damaging the cable or the door assembly. The good news? Once I learned the correct technique—like ensuring the power was completely off and using the proper replacement parts—the process became straightforward. Want to avoid my rookie mistakes? Check out the basics of proper parts selection and crucial safety tips on our resource about common dishwasher parts and effective replacement methods. Now, I’ll walk you through how to do this safely, step-by-step.
Prepare for the Repair and Gather Your Tools
Start by unplugging your dishwasher or switching off the circuit breaker to ensure safety. Gather essential tools: a screwdriver, pliers, a pair of gloves, and the replacement door cable, which you can select using tips from top tips for seamless dishwasher installation. Inspect the cable to confirm it’s the damaged component. I vividly remember my first repair—my hand was covered in grease, and I kept double-checking the model number before ordering the cable online.
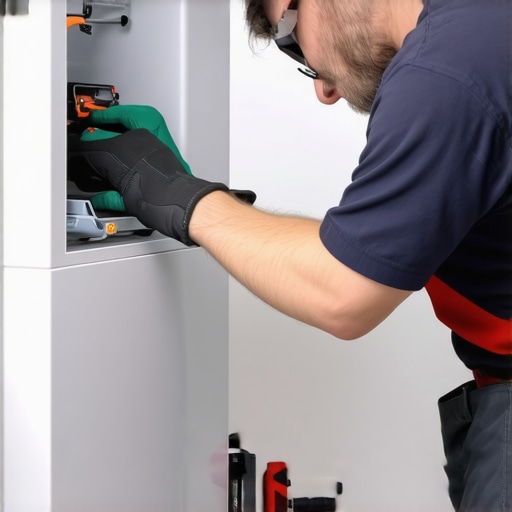
Access the Dishwasher Door and Remove the Panel
Use a screwdriver to unscrew the screws securing the door panel. Carefully detach the panel, supporting it with one hand to prevent damage. Think of this step as carefully peeling back a lid to access its inner workings. Remember, your safety is paramount—don’t force anything. I once struggled for an extra ten minutes because I wasn’t cautious, which only increased the risk of cracking the panel.
Detach the Old Cable and Install the New One
Locate the frayed cable connecting the door latch to the control mechanism. Using pliers, gently release it from its clips—avoid pulling harshly to prevent damage to surrounding parts. When installing the new cable, align it as the old one was, making sure it sits securely within the clips. This step is like replacing a broken string in a musical instrument—precision ensures smooth operation. I learned the hard way that misalignment leads to miscommunication between components, causing the door to not close properly.
Double-Check Connection Points
Confirm all clips and connectors are secured. Specifically, ensure the cable is taut enough to prevent slack but not so tight that it strains. Proper tension prolongs the life of the cable and prevents future failures. For detailed part suitability and installation tips, see common dishwasher parts and effective replacement methods.
Reassemble and Test the Door
Reattach the door panel, screwing it back securely. Before reconnecting power, double-check that all tools are removed from inside the dishwasher. Plug it back in or turn on the circuit breaker, then run a short cycle to verify the repair. Listen for smooth operation and watch for any misaligned movements. My first successful test was nerve-wracking—thankfully, the door closed seamlessly, and I felt a true sense of accomplishment. Keep in mind, if issues persist, revisit the connection points or consult guides on diagnosing dishwasher parts during warranty periods.
Many homeowners assume that warranties cover all repairs, but the fine print often reveals hidden exclusions that can catch you off guard. For instance, a common misconception is that any DIY repair will automatically qualify for warranty coverage, which isn’t true; manufacturers typically require professional installation and proper parts to maintain warranty validity. This misunderstanding may lead to denied claims, especially if improper parts, like aftermarket components, are used instead of manufacturer-approved ones. Moreover, installing parts incorrectly—such as misaligning the spray arms or improperly sealing door gaskets—can void your warranty prematurely. Advanced mistakes like neglecting to verify water hardness settings or not using the correct torque on fittings can cause long-term damage, which warranties often exclude from coverage. For example, a study by the Appliance Repair Institute emphasizes that incorrect installation practices are among the top causes of early dishwasher failures, often leading to costly repairs not covered by warranty. So, always ensure you’re aware of your warranty’s specific terms; review what your dishwasher warranty covers and avoid common pitfalls. Remember, selecting the right parts isn’t just about compatibility but also about ensuring your warranty remains valid. For detailed guidance on choosing quality parts and proper installation techniques, visit maximizing your warranty through correct parts selection. One hidden nuance often overlooked is the importance of following manufacturer-specific installation procedures; even minor deviations can stress components and cause failure, which isn’t covered if found to be improperly installed. A key tip? Always follow the recommended torque specifications: over-tightening fittings compromises seals, and under-tightening risks leaks. For expert advice, check professional installation troubleshooting tips. To avoid these pitfalls, perform thorough pre-installation checks and adhere to best practices—in many cases, investing a little extra time now saves significant headache later. Have you ever fallen into this trap? Let me know in the comments.Maintaining your dishwasher’s functionality over time requires more than just basic cleaning; it demands the right tools and a strategic approach to troubleshooting and repairs. One essential tool I personally recommend is a digital multimeter. It’s invaluable for diagnosing electrical issues, such as faulty control boards or sensors, ensuring your repairs are precise and effective. I also rely heavily on a set of precision screwdrivers—specifically, those with magnetic tips—because they allow for easier access to tiny screws in tight spaces, minimizing the risk of stripping or losing parts.
When it comes to parts, investing in manufacturer-approved components ensures compatibility and preserves your warranty. According to this resource on warranty coverage, using genuine parts is crucial for long-term reliability and warranty validity.
Regularly inspecting and maintaining key components like door seals, spray arms, and filters can prevent costly repairs down the line. Employing a systematic troubleshooting method—starting with checking for obstructions in the impeller and examining door latches—can save time and money. For example, a clogged impeller can reduce water circulation, causing poor cleaning performance, and is easily fixed with a few simple tools.
Tools like a leak detection sensor or a water hardness tester can help you spot issues early, especially if you notice unusual noise or leaks. These preventive measures not only extend your dishwasher’s lifespan but also help maintain optimal cleaning efficiency.
Looking ahead, I predict that smart diagnostics and IoT integration will become standard in dishwashers, making maintenance even more accessible and less guesswork for homeowners. Resistance to DIY repairs will diminish as user-friendly diagnostic apps and detailed tutorials become more prevalent.
How do I keep my dishwasher running smoothly over time?
To keep it working reliably, schedule regular inspections of critical parts, replace worn components proactively, and invest in high-quality tools designed for dishwasher maintenance. For instance, using a dedicated torque wrench when securing fittings prevents over-tightening that can damage seals, a tip highlighted in this guide on proper torque application.
Don’t forget, timely maintenance not only extends your dishwasher’s lifespan but also preserves your warranty coverage. Implementing these practices today can prevent the frustrations of unexpected breakdowns tomorrow. Ready to take your maintenance routine to the next level? Try incorporating a digital multimeter into your toolbox and start diagnosing electrical issues yourself—it’s a game changer!
Over the years, I’ve learned that tackling dishwasher repairs isn’t just about fixing a part—it’s about understanding the bigger picture of warranties, proper installation, and selecting the right components. These lessons have saved me money and frustration, and I believe sharing them can help you avoid common pitfalls.
Lessons That Changed How I Approach Dishwasher Fixes
- Never assume that a minor fray in a cable is insignificant. It might seem trivial, but it’s often the first sign of a larger issue that, if ignored, can lead to costly repairs or voided warranties.
- Proper installation isn’t just about following a checklist; it’s about understanding the nuances—like correct torque on fittings or ensuring a high loop for drainage—that can make or break your warranty coverage.
- Using genuine parts may cost more upfront, but it safeguards your warranty and ensures longevity. Cutting corners here can lead to early failures and costly non-warranty repairs.
- Tools matter. Investing in a digital multimeter and quality screwdrivers helped me diagnose electrical issues accurately and prevent unnecessary part replacements.
- Documentation is your friend—photo evidence during installation or repair can be invaluable when making warranty claims or troubleshooting issues later on.
Tools and Resources That Make a Difference
For anyone serious about DIY repairs, I recommend the essential parts guide—it’s a comprehensive resource that demystifies common components. The installation tips for 2025 provide step-by-step instructions that ensure you get it right the first time. Lastly, maximizing your warranty with proper parts selection is an area where investing time can pay off big during warranty negotiations.
Keep Moving Forward with Confidence
Repairing your dishwasher might seem daunting at first, but with the right knowledge, tools, and attitude, it becomes an empowering experience. Every fix deepens your understanding and keeps your appliance running smoothly longer. Remember, every homeowner has the power to improve their appliances, save money, and extend their warranties—start today, and don’t be afraid to troubleshoot beyond the obvious.
What’s the biggest challenge you’ve faced when repairing your dishwasher? Share your experience below and let’s learn together!
Related Posts

How to Test Your Heating Element with a $15 Multimeter
I remember the frustrating feeling all too well—my dishwasher stopped…
How to Swap a Door Gasket Without Calling a Pro
Have you ever stared at your dishwasher's door and felt…
Why You Should Never Use Silicone to Seal a Dishwasher Leak
It was a morning like any other when I noticed…