I remember the first time I watched my old dishwasher leak profusely during a busy morning — not exactly the wake-up call I wanted, but it was enough to make me question everything about appliance longevity. That moment led me down a path of discovery, and what I learned transformed how I care for my kitchen. One revelation? The type of tub inside your dishwasher really does matter.
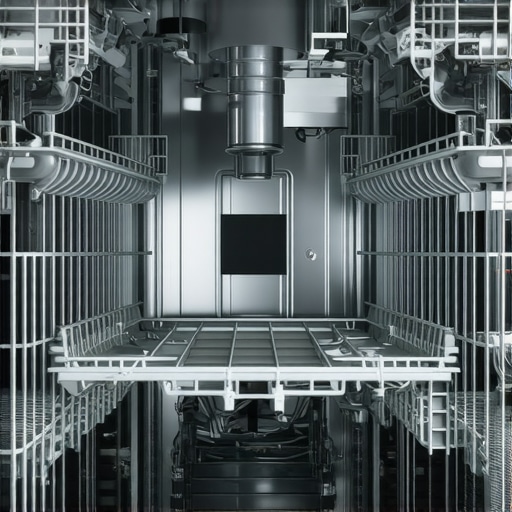
Sometimes, what seems like a small detail can make a huge difference in performance and durability. I used to dismiss the idea that investing a bit more upfront could save me money and hassle later on. But in my experience, choosing a durable, high-quality component — like a stainless steel tub — isn’t just about luxury; it’s about practicality and peace of mind.
How a Small Upgrade Can Save You Big Troubles
It’s frustrating to deal with frequent repairs, especially when it feels like you’ll never get ahead. When I decided to replace my dishwasher, I was tempted by cheaper models with plastic tubs, convinced I could get away with it. Turns out, that was a mistake. Plastic tubs tend to warp, stain, and crack over time, especially with hot water and powerful detergents, leading to leaks and costly repairs.
Switching to a dishwasher with a stainless steel tub isn’t just about aesthetics — it’s an investment in longevity and performance. A stainless steel interior withstands years of use without warping or staining, and it resists rust and corrosion much better than plastic. Over time, this translates into fewer breakdowns and a lower total cost of ownership.
If you’re considering an upgrade, understanding why stainless steel tubs are worth the extra expense can save you money and headaches in the long run. Want to see how to get the most from your dishwasher’s warranty or properly select parts to avoid costly failures? Check out our detailed guides on [maximizing warranty coverage](https://appliancedoctorz.com/maximizing-your-dishwashers-warranty-coverage-today) and make informed decisions.
Is the Hype About Stainless Steel Tub Worth It
Early in my appliance journey, I made the mistake of skipping the stainless steel option, thinking it was just a luxury feature. That oversight led to a cracked tub within five years, forcing me to replace the entire dishwasher prematurely. Trust me, many homeowners face similar pitfalls. Do you worry about throwing money at appliances that might not last? Rest assured, investing in steel — while initially more expensive — offers resilience that plastic simply can’t match.
By understanding the importance of quality parts — like a robust tub — you can avoid the common pitfalls that drain your budget and patience. For a deeper dive into installing durable parts and avoiding warranty pitfalls, explore [common dishwasher parts and their role in proper installation](https://appliancedoctorz.com/common-dishwasher-parts-and-their-role-in-proper-installation). This knowledge will empower you to make smarter choices and keep your appliance running smoothly.
Now that I’ve set the stage with why this upgrade matters, let’s look into what makes stainless steel tubs so resilient and how you can benefit from choosing them for your home.
Select the Right Parts for Long-Term Performance
Start by carefully choosing genuine, high-quality replacement parts, especially the stainless steel tub. Use detailed parts lists from trusted sources like this parts guide to ensure compatibility. Remember, using inferior parts can undermine your warranty coverage and lead to costly repairs.
Double-Check Compatibility and Quality
Before purchasing, verify the part numbers against your dishwasher model. In my experience, I once ordered a tub that looked perfect online but arrived mismatched—causing delays and headaches. To avoid this, measure the interior dimensions and compare them with your chosen part. When in doubt, consult with customer service or reach out for professional advice.
Prepare Your Workspace and Tools
A clean, organized area simplifies installation. Clear the space around your dishwasher, disconnect the power supply, and gather essential tools like a socket wrench, screwdriver, and Teflon tape. Having a well-prepared workspace reduces the risk of damaging delicate components or making installation errors that void your warranty, as detailed in our installation guide.
Use the Correct Torque for Water Connections
This step is crucial—overtightening can crack fittings, while under-tightening risks leaks. I once tightened a water inlet connection too much, causing a small crack that later led to leaks. Applying the right torque, similar to the torque recommendations, ensures a secure, leak-free connection without damaging the fitting.
Secure the Dishwasher Properly to Prevent Vibration and Water Damage
Proper anchoring prevents movement that can crack the tub or disconnect water lines. Use the manufacturer’s brackets and follow secured mounting techniques. When I installed my dishwasher, I double-checked all brackets and used a level to ensure stability—this avoided any future stress on the connections or the tub itself.
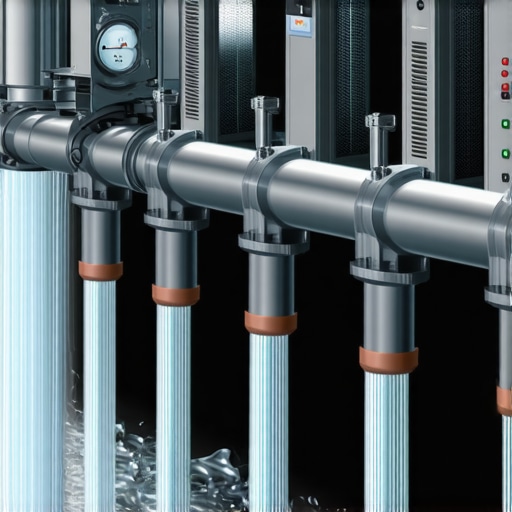
Properly Connect Drain and Supply Lines
Ensure that the drain hose is mounted with the correct high loop, approximately 32 inches above the floor, to prevent backflow—a common mistake leading to permanent damage. Use braided stainless-steel supply hoses for durability, as recommended in best-practice links. When I recently replaced my hoses, I avoided plastic connectors, opting instead for brass fittings, which last longer and resist corrosion.
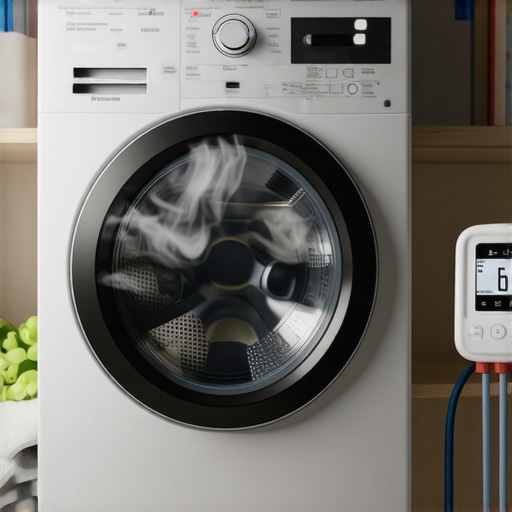
Run Initial Test Cycles and Check for Leaks
Power up your dishwasher, run a short cycle, and inspect all connection points for leaks. Use a wide basin or towels initially to catch any drips. Early detection of leaks, often caused by improperly tightened fittings or incompatible parts, can save you from extensive water damage. In my last setup, I caught a tiny leak within the first minute—quick fix that avoided expensive repairs.
Document Your Installation Process
Take photos during each step. This documentation can be invaluable when making warranty claims or troubleshooting later. If an issue arises, you can reference your photos and installation notes to support warranty claims or seek expert advice.
Even seasoned homeowners often fall prey to misconceptions regarding dishwasher parts, warranties, and proper installation methods. One prevalent myth is that all parts are covered equally under warranty, but in reality, many warranties exclude critical components like the door gasket or heating element if they’re deemed wear items. As explained in this detailed guide, understanding the nuances can save you from unexpected repair costs.
A common mistake during installation is overlooking the importance of quality water supply hoses. Many believe cheaper plastic hoses are sufficient, yet repeated expert advice shows that braided stainless-steel supply lines significantly reduce leaks and ruptures over time, preventing water damage and extending your appliance’s lifespan. For insights on choosing durable components, visit this resource.
One of the biggest pitfalls is relying solely on DIY installation without verifying compatibility or torque specifications of fittings. Applying too much torque can crack fittings or cause leaks, while too little leads to water ingress. A frequently overlooked detail is ensuring that the high loop drain hose is correctly positioned—about 32 inches above the floor—to prevent backflow. For advanced techniques, see this expert article.
Moreover, many users assume that warranty coverage remains intact regardless of parts replacement. In truth, improper installation or using incompatible or inferior parts can void your warranty entirely. It pays to double-check part numbers and compatibility through trusted sources, as outlined in this comprehensive guide.
Finally, a subtle but impactful mistake is neglecting to document each step of the installation process. Photos of the setup, part serial numbers, and connection details can prove invaluable when navigating warranty claims or troubleshooting, saving time and resources. To streamline your warranty process, consider following this advice.
In your experience, have you ever fallen into this trap? Share your stories in the comments and learn how to avoid these common pitfalls for a smoother, more reliable dishwasher experience.
Keeping your dishwasher running smoothly over the years requires more than just occasional cleaning; it demands a set of reliable tools and a proactive maintenance routine. I personally rely on a few key pieces of equipment that allow me to diagnose issues early and perform effective repairs, saving time and money. One indispensable tool is a digital multimeter, which I use to check electrical components such as the control board, heating element, and sensors. Accurate readings ensure that problems are correctly identified before parts are replaced unnecessarily.
Another essential instrument is a good quality plumbing wrench—specifically, a basin wrench that allows me to tighten or loosen water inlet fittings in tight spaces. Having a set of calibrated torque wrenches helps me apply the right amount of force when securing water connections, which is critical for maintaining warranty coverage and preventing leaks. For ongoing filter maintenance, I use a small, handheld brush that helps me clean the turbine and turbidity sensors—important parts that can drastically affect performance if neglected. Regularly inspecting these components reduces the risk of costly motor failures and energy waste.
In addition to tools, software plays a vital role. I utilize diagnostic apps compatible with most modern smart dishwashers, which can interpret error codes and suggest corrective actions. These apps speed up troubleshooting, especially for complex issues like communication failures or control board glitches. While technology is advancing rapidly, I believe that manual inspection remains essential. Combining traditional tools with digital diagnostics provides a comprehensive approach that adapts to future trends—like predictive maintenance algorithms—which will likely become standard in appliance care.
How do I maintain my dishwasher effectively over time?
Consistency is key. Regularly running cleaning cycles with descaling solutions, inspecting supply hoses for wear, and replacing worn gaskets based on manufacturer recommendations prolong your appliance’s lifespan. I also recommend periodically checking what your warranty doesn’t cover to understand which repairs are your responsibility versus those handled under warranty. Proper documentation of maintenance activities ensures eligibility for warranty claims if issues arise.
Looking ahead, the trend toward smart maintenance apps and IoT integration suggests that future dishwashers will diagnose themselves and notify owners of potential failures before they happen. Embracing current tools and best practices prepares you for this evolution. For example, regularly updating your diagnostic software and calibrating sensors can preempt many common failures.
One advanced tip to try today is calibrating your turbidity sensor using a test solution—this sensor helps your dishwasher optimize water usage and cleaning effectiveness. A precise calibration can improve cycle efficiency and extend component life, aligning with the predicted trend toward intelligent appliance management. For detailed instructions, visit this resource.
Remember, combining the right tools with a consistent maintenance routine not only enhances your dishwasher’s performance but also extends its warranty coverage and operational life. Don’t hesitate to invest in quality equipment and stay proactive—little habits today prevent big headaches tomorrow.
What I Wish I Knew About Parts and Warranty Before Starting
One of the most valuable lessons I learned was the importance of verifying parts compatibility before purchase. Rushing into replacements without double-checking serial numbers or model specifics can lead to costly delays and voided warranties. I also discovered that understanding the nuances of warranty coverage—like which parts are protected—can empower you to advocate for repairs confidently. Lastly, I realized that investing in quality components, such as a stainless steel tub, might seem expensive initially but Pays off through extended performance and fewer repairs, saving money in the long run.
Tools, Resources, and Wisdom That Changed My Approach
My essential toolkit for maintaining my dishwasher includes a reliable digital multimeter, a set of calibrated torque wrenches, and a high-quality plumbing basin wrench. These tools help me diagnose electrical issues, apply the right torque during installation, and access tight spots easily. Trusted resources like this parts guide and warranty tips have been instrumental in avoiding mistakes. I also rely on professional blogs and community forums where real-life experiences shed light on pitfalls and best practices, making me more confident in my DIY projects.
Seize the Moment and Upgrade Your Dishwasher Smartly
Taking proactive steps now—like choosing robust, compatible parts, following precise installation techniques, and performing regular maintenance—can dramatically extend your appliance’s lifespan. Remember, your dishwasher is more than a convenience; it’s an investment in your everyday comfort. By applying the insights shared here and continuing your learning journey, you empower yourself to handle issues before they escalate, turning complex repairs into manageable tasks. So, why not start today? Every small improvement today builds a more reliable, efficient kitchen tomorrow.
Have you ever intercepted a leak early or upgraded a key part in your appliance? Share your experiences below and inspire others to take charge of their dishwasher maintenance!
Related Posts
The One Modification That Makes Old Dishwashers Energy Efficient
I remember the moment I finally looked at my aging…
Why Your Energy Bill Spikes When You Use Heated Dry
I remember the moment I realized my energy bills were…
The Impact of Cold Water Inlets on Cycle Efficiency
I remember the moment clearly—my dishwasher was acting up, and…