Ever had that gut-wrenching moment when you open your dishwasher or oven door, only to watch that stubborn spring snap right in front of your eyes? I’ve been there—frustrated, cursing under my breath, and wondering if I needed to call in a pro. It’s that sinking feeling of realizing a tiny part has brought your entire morning routine to a halt. I used to think these issues required hours, special tools, or a handyman’s expertise. But let me tell you—there’s a simple, straightforward way to fix it that can save your day and maybe even your weekend.
Why Replacing a Door Spring Can Feel Like a Mountain to Climb
When that door spring snaps, it’s easy to panic. The first instinct? Fear of the unknown. You might worry about damaging your appliance further, making the problem worse, or spending a fortune on repairs. I remember my first attempt—fumbling with tools, spilling oil, and questioning my own DIY skills. In fact, an early mistake I made was rushing to replace the spring without properly diagnosing the cause of the failure. That led to another snapped part a few months later. That experience taught me the value of understanding what goes wrong and how to fix it efficiently. It turns out, most spring replacements don’t need to be complicated or time-consuming. With a bit of guidance, you can have that door working smoothly again—and in under ten minutes, to boot.
Today, I’m going to share with you the proven steps I’ve perfected over time—methods that I wish I’d known when I started. Considering how critical the door mechanism is, whether it’s a dishwasher, oven, or garage, knowing how to replace a broken spring quickly can save you a lot of headaches and keep your appliances running perfectly. Plus, it’s a great way to build confidence in your troubleshooting skills and avoid unnecessary expenses. If you’ve ever faced that sinking feeling of a snapped door spring, stick around—I’ve got a solution that’s simple, fast, and effective.
Is Replacing a Door Spring Really as Easy as It Looks?
It’s a fair question. Early on, I convinced myself that such repairs must be complex and best left to professionals. That’s a common misconception. One mistake I made was underestimating the importance of proper tools and safety precautions. Neglecting a few simple steps like disconnecting the power supply or having the right replacement spring can turn a quick fix into a dangerous ordeal. The truth is, with the right guidance and a little elbow grease, you can restore your door’s function without calling a specialist. This blog will walk you through the process step-by-step, so you can tackle this minor inconvenience on your own and get back to what matters most.
If you’re tired of waiting for repairs or paying high service fees, let’s dive into the practical steps to replace that snapped spring and restore your appliance’s performance—quickly, safely, and with confidence.
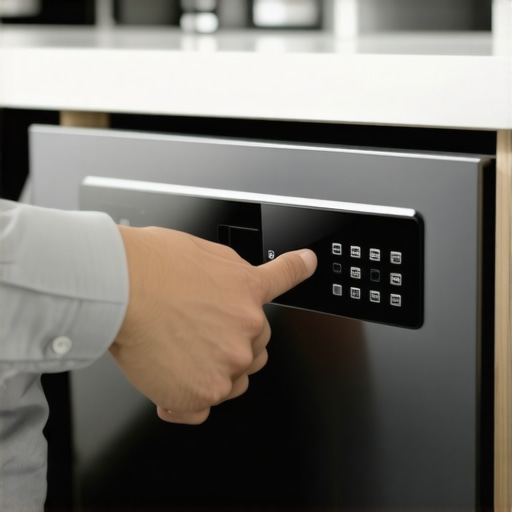
Disconnect Power and Prepare Your Workspace
Ensure safety by unplugging the dishwasher or shutting off the circuit breaker. Clear the area around the appliance to access the door mechanism easily. A messy kitchen can hide hazards, so take a moment to organize tools and materials. I once started this process without turning off power, which caused a small spark—lesson learned the hard way, always prioritize safety.
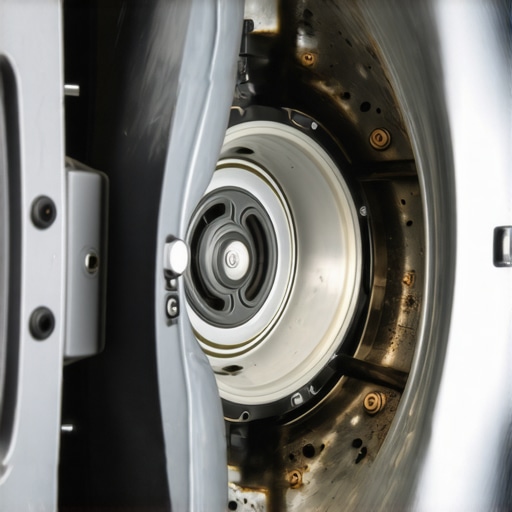
Remove the Door Panel Carefully
Unscrew the screws holding the door panel in place using a screwdriver. Keep track of all screws as they are tiny and easy to lose. Gently lift the panel, avoiding force to prevent cracking or breaking clips. Think of it like peeling a sticker; gentle and steady pressure prevents damage. Once removed, you’ll see the spring tension and attachment points clearly. This step is crucial because rushing here can disturb other parts or cause injury.
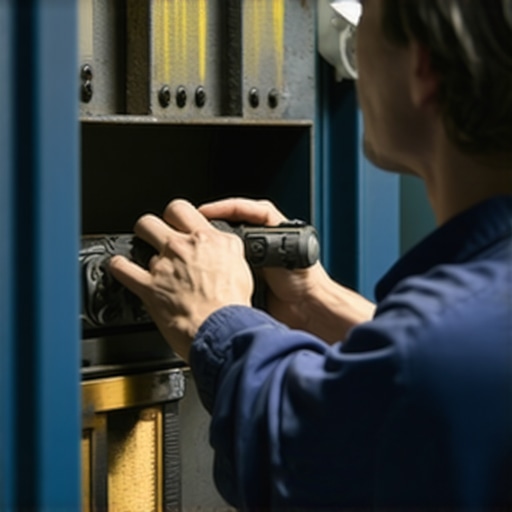
Identify and Detach the Broken Spring
Locate the broken spring—typically hanging loosely or visibly snapped. Use pliers to detach the spring from the door arm and frame. Be cautious; springs are under tension and can snap back unexpectedly, potentially causing injury or damaging nearby parts. Recalling a time when a spring pinged into my eye, I now wear safety glasses. Properly detaching the spring is the core action; skip this, and you’ll struggle to reinstall it correctly.
Compare and Select the Correct Replacement Spring
Match the old spring with a new one by length, diameter, and tension force. Always choose a spring listed for your specific dishwasher model—incorrect springs can cause improper door operation or damage. For example, I once bought a generic spring, and it stretched too much, leaving the door sagging. Use links like this resource for part verification to avoid mismatches.
Install the New Spring with Precision
Attach the spring to the door arm first, then secure it to the frame. Use a spring hook or specific tool if available. Think of this step as threading a needle—careful footing ensures the spring stays in place. I once tried to do this with bare hands, and the spring slipped, causing a minor hand injury. Before starting, review pre-installation tips to gather the right tools and prepare for a smooth operation.
Adjust Tension for Smooth Operation
Test the door movement by gently opening and closing it. Adjust the spring tension if the door opens too freely or feels stiff. Proper tension balances the door, preventing wear and tear. I spent extra time here because a poorly tensioned spring led to early spring failure. Remember, too tight can strain the mechanism; too loose, the door won’t stay shut. Fine-tune gradually, testing movement after each adjustment.
Replace the Door Panel and Final Checks
Snap the door panel back into place and tighten all screws securely. Double-check that all fastenings are firm, and nothing obstructs the door’s movement. Power up the dishwasher and run a short cycle to ensure everything works smoothly. As a safety net, I always observe the first few cycles after repair to catch potential issues early, such as uneven door alignment or strange noises.
Recreating the spring tension process taught me patience and precaution. With the right tools, methodical approach, and safety mindset, this repair can be quick and straightforward, saving you time and money. If you need more detailed parts info or troubleshooting tips, consider **[this comprehensive guide](https://appliancedoctorz.com/common-dishwasher-parts-and-how-to-replace-them-effectively)** or reach out via contact page for expert advice.
Many homeowners assume that installing and maintaining a dishwasher is straightforward, but this misconception can cost you time and money. One of the biggest myths is that all replacement parts are interchangeable; in reality, selecting incompatible components can void your warranty or cause long-term damage. For example, relying on generic parts without verifying compatibility might seem cost-effective initially, but it often leads to premature failures, especially if the part doesn’t meet the original specifications. To avoid this trap, always consult your device’s manual or trusted resources like this comprehensive parts guide. Additionally, many believe that warranty coverage is automatic; however, many warranties exclude damages caused by improper installation or use of non-approved parts, which could leave you footing the bill for repairs. A crucial nuance is understanding what your warranty actually covers—some manufacturers restrict coverage to parts only, not labor, making repairs more costly than anticipated. This highlights the importance of thorough documentation and proper installation techniques, as detailed in this step-by-step guide. Another common mistake is neglecting to register your appliance post-installation; registration often extends warranty benefits and simplifies claims. Don’t overlook this simple yet vital step. Furthermore, many overlook the importance of verifying electrical requirements—using a circuit with insufficient amperage can cause trip-offs or damage, jeopardizing your warranty and safety. According to expert advice, always ensure your circuit breaker matches the appliance’s specifications—usually a dedicated 15 or 20 amp circuit, as explained here. A final point worth noting is the significant impact of proper water supply connections. Improper sealing or using incompatible fittings can lead to leaks, which not only damage cabinetry but may also void warranty coverage due to installation errors, as highlighted in this resource. Overall, understanding these hidden nuances—like verifying parts, proper electrical hookup, correct sealing, and warranty registration—is essential for ensuring your investment is protected and the dishwasher functions optimally. Don’t let common misconceptions set you on the wrong path. Keep in mind that thorough preparation and knowledge can save you from costly repairs down the line. Have you ever fallen into this trap? Let me know in the comments.
Tools That Make Maintenance a Breeze
Investing in quality tools is crucial for effective dishwasher upkeep and repair. I personally rely on a magnetic tip screwdriver set, which provides precision and stability when dealing with delicate screws in tight spaces. A pair of high-tensile pliers, especially those with rubber-coated handles, is essential for safely detaching and attaching springs and hoses without slipping. For spring replacement, I recommend a spring hook tool—these are specifically designed to manage tensioned springs safely, reducing the risk of injury or damage. Additionally, a digital multimeter allows me to quickly diagnose electrical issues, saving time and unnecessary part replacements. Using these tools regularly not only simplifies maintenance but also extends the lifespan of your appliance.
Adopting Software and Reference Materials
Beyond physical tools, I leverage online manuals and wiring diagrams to ensure accurate repairs. Websites like this resource provide detailed schematics and troubleshooting tips tailored to specific models. Keeping digital copies of warranty documents and serial numbers helps streamline warranty claims and repairs. I also use maintenance tracking apps to schedule periodic checks, such as inspecting seals and filters—these proactive steps help catch problems before they escalate. Staying organized with these digital tools ensures long-term efficiency and peace of mind.
Future of Dishwasher Maintenance Technology
The trend is moving towards smart diagnostics integrated directly into appliances, allowing remote troubleshooting via smartphone apps. Manufacturers are incorporating sensors that monitor wear and tear, sending alerts when parts like filters, spray arms, or seals need attention. As these technologies become more affordable, homeowners will increasingly rely on automated diagnostic tools rather than manual inspections. Embracing these advancements now sets the stage for easier, more predictive maintenance, reducing downtime and repair costs.
How do I keep my dishwasher functioning optimally over time?
Consistency is key. Regularly schedule preventive checks—like inspecting water inlet valves, cleaning filters, and testing door seals—to prevent minor issues from becoming major problems. Using the right tools, such as a compressor puller or specialized wrenches, ensures repairs are done correctly without damage. Remember to consult your appliance’s manual and keep track of maintenance dates. By proactively maintaining your dishwasher with trusted equipment and knowledge, you can enjoy trouble-free operation for years. Want to take your maintenance to the next level? Try incorporating a smart home app that monitors usage and alerts you to potential issues before they become costly repairs. This small investment in technology can save you significant time and money over the long run.
Lessons that Changed My DIY Approach
- One of the toughest realizations was that rushing the spring replacement often leads to more problems than solutions. Patience and careful step-by-step work save time and avoid injuries.
- I learned that every appliance model might have subtle differences—what works on one dishwasher may not on another. Always double-check part compatibility and consult specific guides.
- The importance of safety gear became crystal clear after experiencing a spring snapback. Wearing safety glasses and gloves should never be optional during tensioned spring work.
- Understanding the inner mechanism deeply allowed me to diagnose issues more accurately, preventing unnecessary part replacements.
- Proper tension adjustment is crucial—too tight or too loose can cause early wear or malfunction. Testing and fine-tuning after installation gives the best results.
Tools and Resources I Trust for Dishwasher Repairs
- Spring hook tool: Essential for managing tensioned springs safely and efficiently, preventing injuries.
- Magnetic screwdriver set: Precision tools are a game-changer when working in tight, delicate areas.
- Digital multimeter: Diagnoses electrical issues quickly, saving time and avoiding guesswork.
- Model-specific manuals: Websites like this resource provide detailed schematics and troubleshooting tips tailored to your appliance.
- Warranty documentation: Keep digital copies for quick reference, and ensure your repairs qualify for warranty coverage. Details about warranty policies can be found here.
- Online repair communities: Forums and expert blogs where real-life experience helps you avoid common pitfalls and learn new techniques.
I’m Excited for Your Dishwasher Journey
If you’ve ever hesitated about tackling spring replacements, take heart—armed with the right knowledge and tools, you can master this repair. Embrace the learning process and remember that each successful fix boosts your confidence and deepens your understanding of how your appliances work. When you maintain and repair your dishwasher properly, you not only extend its lifespan but also save money in the long run. Ready to apply what you’ve learned today? Don’t forget—staying informed and prepared makes all the difference. How about sharing your repair stories or asking questions in the comments below? I’d love to hear about your experiences with dishwasher maintenance and help you troubleshoot any lingering doubts.
Related Posts
How to Check Your Inlet Valve for Small Debris Without Tools
I remember the first time my dishwasher started acting up…
How to Reset a Dishwasher Control Board After a Power Spike
Ever had your dishwasher suddenly stop working right after a…
How to Spot a Failing Wash Motor Before it Seizes
I clearly remember the moment my dishwasher suddenly stopped mid-cycle,…