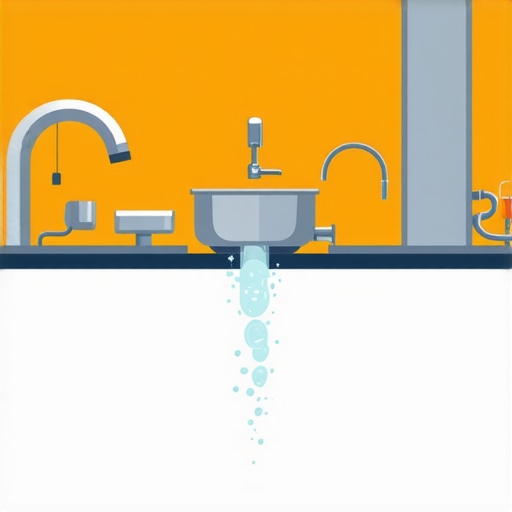
It hit me one morning while loading my dishwasher—why am I scrubbing and rinsing every plate and glass before I even turn it on? I used to believe that pre-rinsing was the only way to get my dishes truly clean, but after a few costly water bills and a messy kitchen sink, I realized I was doing more harm than good. That moment of clarity became my lightbulb moment: there had to be a better, more efficient way.
Cutting Back on Pre-Rinsing Without Sacrificing Cleanliness
Many homeowners, myself included initially, think that rinsing off food debris before loading the dishwasher is essential. But did you know that unnecessary pre-rinsing can actually waste a significant amount of water? According to the Environmental Protection Agency, the average American family uses about 300 gallons of water daily, with dishwashing draining a good chunk of that. Canceling out the pre-rinse step can save hundreds of gallons each year.
Is Pre-Rinsing Actually Worth the Hype?
I remember obsessing over each plate, scrubbing furiously to remove every crumb. Turns out, this is a common misconception. Modern dishwashers, especially those with advanced sensors and detergents, are designed to handle food residue effectively without pre-washing. My early mistake was relying on old habits and overloading my dishwasher with the assumption that more cleaning meant better results. A better understanding of how your appliance works can significantly reduce water usage and extend its lifespan.
If you’re curious about installing a new dishwasher or troubleshooting existing issues, I recommend visiting our guide on [dishwasher installation troubleshooting](https://appliancedoctorz.com/expert-advice-on-dishwasher-installation-troubleshooting). It’s packed with tips to ensure you get the most out of your appliance and avoid costly repairs.
The next step? Let’s look at how skipping the pre-rinse can actually improve your overall efficiency and save money in the long run. Stay tuned as I share practical tips tested in my own kitchen to help you ditch the rinse and embrace smarter cleaning routines.
Prepare Your Kitchen Space Properly
Before diving into installation, clear out the area where the dishwasher will sit. Remove any obstacles, and ensure the space is level and accessible. This reduces the risk of misalignment and makes the process smoother. For detailed guidance, check our kitchen prep guide. I once overlooked this step, and the dishwasher wouldn’t fit properly, leading to extra adjustments and frustration.
Gather Necessary Tools and Parts
Assemble all the tools you’ll need: adjustable wrench, pliers, screwdriver, level, and possibly a drill. Make sure you have the correct parts — including the correct supply hoses, mounting brackets, and the electrical cord. Review our installation checklist to confirm. I once started without the right wrench, which delayed my project by an hour and risked damaging attachments.
Connect Water Supply Securely
Attach the water inlet hose to your home’s water supply using a brass compression fitting, tightening it to prevent leaks. Use a torque wrench if necessary to avoid over-tightening, which can strip threads and cause leaks. Refer to our parts guide for details. I initially used pliers, which marked the fitting, leading to leaks that required reinstallation.
Ensure Correct Drainage Setup
Position the drain hose high enough to prevent backflow—ideally 32 inches above the floor. Use an anti-siphon device to avoid drainage issues. For step-by-step instructions, see our installation guide. I once neglected the height, leading to water pooling inside the dishwasher after several cycles.
Electrical Connection Basics
Connect the dishwasher to a dedicated 20-amp circuit to prevent overloads and ensure safety. Use a properly grounded outlet and avoid extension cords. When connecting the power cord, ensure all wiring is secure and insulated. Our wiring tips offer detailed advice. I learned this tip when my dishwasher kept resetting mid-cycle due to power issues, which was solved by a dedicated circuit installation.
Level and Secure the Appliance
Use a level to ensure the dishwasher is perfectly horizontal. Adjust the leveling feet accordingly, then secure the unit to the countertop if necessary. Proper leveling prevents leaks and ensures smooth operation. I once installed an unlevel dishwasher, and the door wouldn’t close, causing operational errors.
Test the Installation Before Finalizing
Turn on the water supply and power, then run a cycle without dishes to check for leaks and proper drainage. Observe all connections and ensure there are no water leaks or electrical issues. If problems arise, consult our troubleshooting guide. I caught a minor leak after an initial test, prevented water damage, and corrected it immediately.
Wrap Up and Inspect
After confirming everything works smoothly, secure any loose panels, reconnect cabinetry, and clean up the workspace. Regularly inspecting connections and using quality parts extend the lifespan of your dishwasher. Remember, proper installation is key to warranty coverage; see our warranty tips for more details. Proper setup saved me from costly repairs down the line and kept my kitchen running efficiently.
Many homeowners assume that warranty policies are straightforward, but in reality, there are nuanced pitfalls that can cost you dearly if overlooked. One common misconception is that all parts covered by warranty guarantee a hassle-free repair, but the devil is in the details. Manufacturers often specify specific conditions for coverage, such as proper installation procedures and using authorized parts, which many DIYers unknowingly bypass, risking voiding their warranty. For instance, installing a dishwasher without following the detailed steps outlined in our kitchen prep guide can lead to coverage denial. Moreover, misidentifying essential parts like high-quality hoses or sensors—the core components—can make repairs more costly and time-consuming, emphasizing the importance of understanding [common dishwasher parts](https://appliancedoctorz.com/common-dishwasher-parts-and-their-role-in-proper-installation). Advanced mistakes include neglecting to ensure proper electrical connections, such as dedicated circuits, which are often overlooked despite their impact on performance and warranty eligibility, as detailed in this guide. A notable trap is assuming that warranty covers accidental damage or improper use—rarely true, and many users are surprised when their claim is rejected due to installation errors or neglecting manufacturer’s instructions. Experts stress that maintaining detailed records of parts and service receipts, and following manufacturer guidelines scrupulously, maximize your chances of successful warranty claims—see this article for strategic tips. Interestingly, some believe that high-end, branded parts are automatically covered, but warranties often exclude specific components, especially those subject to wear and tear, such as door springs or spray arms—further detail in this resource. The bottom line? Always verify that your installation adheres to all safety and procedural standards, particularly attention to proper sealing, leveling, and electrical safety, to prevent voiding your warranty and incurring costly repairs down the line. After all, many failures stem from overlooked nuances during initial setup or parts selection, which could have been avoided with a bit more research. Have you ever fallen into this trap? Let me know in the comments.Maintaining your dishwasher’s performance over time requires more than just regular use; it demands the right tools and a proactive approach. I swear by a few specific pieces of equipment that have saved me countless trips to the repair shop and extended the lifespan of my appliance.
My Go-To Tools for Dishwasher Care
First and foremost, a high-quality digital multimeter is indispensable. It allows me to quickly diagnose electrical issues, such as faulty thermostats or door switches, by testing voltage and continuity. I personally use the Fluke 117 model, which is known for its accuracy and durability. For inspecting water lines and fittings, a set of brass hose fittings—particularly the 8 brass elbow—provides superior longevity over plastic alternatives, preventing leaks and breakages over years of use. To get into tight spaces, I keep a pocket-sized inspection mirror and a flexible flashlight handy. These might sound simple, but they make a huge difference when checking behind the appliance or inside the detergent dispenser.
Effective Methods for Long-Term Reliability
Regularly inspecting and cleaning your dishwasher’s drainage system is critical. A small, curved plastic drain plug that fits tightly can prevent clogging and backflow issues if used properly. For detailed guidance on how to service your dishwasher’s interior parts—like spray arms, filters, and sensors—I recommend consulting the comprehensive parts guide. A good rule of thumb is to schedule a monthly check where I remove and clean the turbidity sensor and inspect the impeller for debris. This keeps energy consumption low and washing quality high.
Preparing for Scale and Future Upgrades
As water quality varies, installing a water softener or a dedicated water-conditioning device can drastically reduce mineral buildup, improving both cleaning and part longevity. Future trends point toward smarter diagnostics integrated directly into appliances, with manufacturer apps providing real-time alerts about wear-and-tear. Using a smartphone app linked with your dishwasher’s sensor data—like the ones discussed in this resource—can help catch issues early before costly breakdowns occur. I predict that in the upcoming years, AI-driven maintenance alerts will become standard, making DIY repairs easier and more accurate.
How do I keep my dishwasher functioning smoothly over time?”
One of the best ways to ensure long-term efficiency is to stay ahead of problems by integrating advanced diagnostic tools with your maintenance routine. For example, regularly testing electrical components with a multimeter and inspecting key parts like the spray arms and seals can prevent minor issues from escalating. And remember, replacing worn-out parts with recommended, high-quality replacements—like the brass elbows mentioned earlier—will not only improve performance but also uphold your appliance’s warranty. For detailed tips on parts maintenance and warranty compliance, check out this article. Take the initiative now: try out a detailed inspection with your multimeter this weekend. It’s a small step that can save heaps of money in the long run! 
The Hardest Lesson I Learned About warranty,parts,installation,dishwasher
One of the biggest realizations I had was that skipping proper installation steps could void my entire warranty, leaving me helpless during a breakdown. It taught me to pay close attention to the manufacturer’s instructions and not cut corners, no matter how tempting. This experience emphasized that thoroughness saves money and stress in the long run.
I also discovered that shortcutting parts selection—opting for cheap, generic components—can lead to frequent repairs and performance issues. Trusting quality, recommended parts makes all the difference, especially when it comes to things like drain hoses and seals. This lesson was a game-changer for maintaining long-term reliability.
Another insight was the importance of understanding the electrical requirements; using a dedicated 20-amp circuit isn’t just a rule—it’s a safeguard against unexpected failures. After learning this the hard way, I now prioritize proper wiring, which ensures safety and preserves my warranty coverage.
Finally, I realized that regular checks, like inspecting spray arms and cleaning the turbidity sensor, extend my dishwasher’s lifespan much more effectively than waiting for a breakdown. Small maintenance actions, rooted in knowledge, are the best investment for a trouble-free appliance.
Related Posts

Why Your Eco-Cycle Is Leaving Food Particles on Plates
It happened again last night. I opened my dishwasher, a…
Why Modern Machines Use Less Water Than Your Kitchen Sink
It was a moment of frustration that hit me harder…

Why Your Eco-Cycle Is Taking Longer Than Usual
There I was, kneeling beside my dishwasher, cursing softly as…