
It was a quiet Sunday afternoon when I opened my dishwasher and nearly gagged. Instead of the usual clean smell, I was met with a damp, musty odor emanating from the door seal. Turns out, a stubborn mold spot had taken hold, and my first instinct was to grab the strongest bleach I had. But then I paused—what if I told you there’s a safer, gentle way to clean that moldy gasket without risking damage or exposing your family to harsh chemicals?
Let’s face it, moldy door seals are a common headache. Not only do they hint at hidden bacteria, but they also can lead to unpleasant odors and even compromise your appliance’s performance over time. If you’ve ever experienced a musty smell lingering after running your dishwasher, you know how frustrating it can be. The good news? You don’t need to resort to aggressive cleaners to restore your gasket.
In this post, I’ll share my personal experience with mold buildup and walk you through effective, natural methods that really work. You’ll gain confidence in maintaining your dishwasher’s health without compromising safety or your wallet. Ready to turn your moldy dilemma into a clean, fresh-smelling seal? Let’s dive in.
Why Mold in Your Dishwasher Door Gasket Is More Than Just an Ugly Spot
Mold isn’t just unsightly. It can cause allergic reactions, respiratory issues, and even lead to quicker wear and tear of your appliance. According to the EPA, mold spores can hide in damp, dark places, creating a breeding ground for bacteria. That means the rubber seal around your door, which often stays moist after cycles, can become a haven for mold.
One common mistake I made early on was overusing bleach, thinking it would resolve the problem instantly. But I learned that harsh chemicals can degrade the gasket material over time, creating tiny cracks where mold can hide even more stubbornly. Plus, bleach isn’t eco-friendly and can be harmful if not handled properly.
Instead, I started exploring natural, non-abrasive solutions that clean and disinfect without damage. If you’re tired of the persistent mold spots or that musty smell, keep reading. I’ll show you the simple steps that transformed my cleaning routine and can do the same for your dishwasher’s gasket.
Curious if this approach is truly effective? Some skeptics worry that natural remedies might not be strong enough. Trust me, I’ve been there. A mistake I made at first was neglecting to dry the gasket thoroughly—and that tiny oversight kept the mold coming back faster. The key is consistent cleaning and proper drying.
Now, are you ready to tackle that mold with confidence and ease? Let’s move on to the proven methods that will restore your gasket—and your peace of mind.
Remove the Gasket for Deep Cleaning
Start by carefully pulling back the rubber gasket around the door. I remember one Sunday when I struggled to detach mine without tearing it—use a plastic scraper to gently lift the edges. Once loose, lay the gasket flat on a towel to inspect for mold and debris. This step is crucial because accumulated grime often hides beneath, fueling the mold growth.
Prepare a Gentle Cleaning Solution
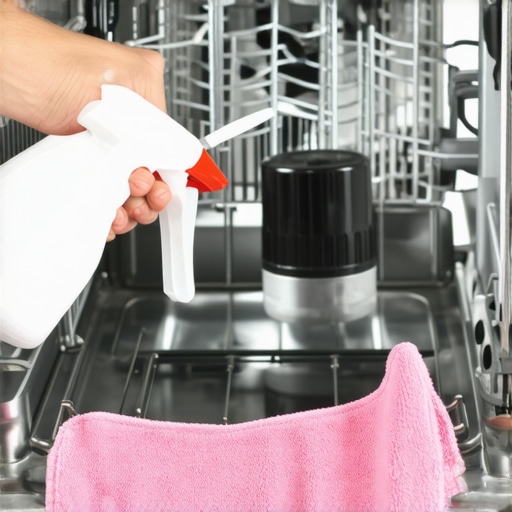
Mix equal parts white vinegar and water in a spray bottle—no harsh chemicals needed. I once tried applying pure vinegar directly, which worked but smelled overpowering; diluting made it more tolerable and still effective. Spray generously onto the gasket, paying close attention to creases. It acts as a natural disinfectant, breaking down mold without damaging the rubber material.
Optional: Use Baking Soda for Stubborn Spots
If you notice stubborn stains or residues, sprinkle baking soda onto the gasket and scrub lightly with a soft brush. I found that gentle agitation lifts mold spores and dirt more effectively. Remember, avoid abrasive tools that could scratch or weaken the rubber.
Scrub and Wipe the Surface Thoroughly
Utilize a soft toothbrush or microfiber cloth to scrub the gasket’s rubber surface. When I cleaned mine, I targeted the folds where water tends to pool, creating the perfect environment for mold. Wiping with a damp cloth afterward removes loosened debris and excess cleaning solution. This routine ensures all mold spores are dislodged.
Rinse and Dry Completely
After cleaning, wipe the gasket with a clean damp cloth to remove any residual vinegar or baking soda. Then, thoroughly dry with a lint-free towel or paper towels. I made the mistake of leaving the gasket damp, which made mold reappear quickly. Consistent drying prevents future mold growth and maintains a fresh smell.
Reassemble and Maintain Regularly
Gently press the gasket back into place, ensuring it’s seated properly to maintain an airtight seal. Regular maintenance is key; after every few washes, wipe down the gasket with the vinegar solution and dry. This habit not only keeps mold at bay but also prolongs the gasket’s lifespan. For detailed advice on maintaining your dishwasher’s parts, consider reviewing common dishwasher parts.
 While many homeowners believe that choosing the right dishwasher parts or installing the appliance correctly guarantees smooth operation and warranty coverage, the reality is often more complex. A common misconception is that as long as a part is compatible and installed properly, it will ensure warranty validity. However, manufacturers frequently have strict stipulations about the type of parts used and the installation procedures, which, if overlooked, can void your warranty. For instance, using non-approved replacement parts might seem harmless but can lead to denied warranty claims, especially if the part’s specifications don’t meet manufacturer standards. Don’t assume that a self-repair or third-party part will always be covered; always check the details outlined in your warranty policy, as there’s often fine print regarding approved components.
Another often-missed nuance involves the installation process itself. Expert advice suggests that improper leveling, insufficient drainage setup, or neglecting electrical grounding can not only cause operational issues but also jeopardize your warranty. For example, an incorrectly grounded machine might work initially but could sustain damage over time, which many warranty agreements would deny coverage for due to installation negligence. Learning to correctly diagnose and simulate proper installation conditions can save you from costly repairs and warranty disputes.
Many believe that the warranty period is the ultimate safeguard against repair costs. However, what most don’t realize is that warranties are typically limited and come with specific exclusions. For example, routine maintenance issues or damages caused by user neglect are generally not covered. A surprising number of consumers fall into the trap of assuming their warranty covers everything, only to find out additional costs during a repair process. To maximize your warranty benefits, familiarize yourself with the full list of covered parts and services, which can be found in resources like this comprehensive list, and stay proactive in maintenance and issue diagnosis.
Expert tip: Regularly inspecting critical components like water inlet valves, filters, and spray arms can catch issues early before they escalate into costly failures. Recognizing the signs of wear and knowing when to seek professional assistance can help preserve your warranty coverage. Additionally, always document your maintenance and repairs diligently—photos, receipts, and logs—as proof can be crucial if disputes arise.
Finally, beware of common pitfalls such as improper sealing or ignoring leakage signs, which can result in water damage and warranty termination. Manufacturers often require compliance with specific installation standards; failure to adhere can be considered user error, nullifying claims later. For detailed guidance, resources like this article can help you understand what documentation is necessary.
Have you ever fallen into this trap of misunderstanding warranty conditions? Let me know in the comments.
Invest in Quality Tools for Precise Maintenance
When it comes to maintaining your dishwasher, having the right tools can make all the difference. I personally rely on a few key items that have saved me time and prevented damage during repairs. A dedicated spray arm removal tool, such as the one featured in this guide, ensures you can detach and clean even the most stubborn spray arms without risking breakage. Additionally, a digital multimeter helps me quickly diagnose electrical issues, ensuring only necessary parts are replaced, which aligns with the advice in this resource.
Use Diagnostic Software for Long-Term Monitoring
Installing specialized diagnostic software like SmartDish Analyzer allows ongoing monitoring of your dishwasher’s performance. While primarily used by professionals, DIY enthusiasts can utilize basic apps that connect via Wi-Fi to get alerts on potential issues before they become costly repairs. This proactive approach is predicted to become standard as appliances become smarter, emphasizing the importance of integrating technology into routine maintenance.
Keep Parts Organized for Easy Access
Maintaining a dedicated toolbox with labeled compartments for replacement parts such as filters, gaskets, and valves keeps your repair process smooth. I find that knowing exactly where my components are reduces downtime and helps me follow maintenance routines more effectively, as suggested by this comprehensive list.
Plan for Future Upgrades and Scaling
As dishwasher technology advances, planning for upgrades by stockpiling compatible parts or installing modular components can extend the lifespan of your appliance. For instance, upgrading your spray arms for better water coverage, as detailed in this article, can improve cleaning performance and reduce the need for future repairs. Keeping informed about emerging trends in smart appliance maintenance will help you adapt over time.
How do I maintain my dishwasher over time?
Regularly inspecting and cleaning critical components like water inlet valves, filters, and spray arms is essential. Also, using recommended cleaning routines with natural solutions minimizes wear and preserves warranty coverage, especially when following guidelines from this resource. Remember, proactive maintenance combined with the right tools can prevent unexpected breakdowns, saving you money and stress.
What I Wish I Had Known About Warranties and Parts Before the Mold Became a Nightmare
One of the biggest revelations came from realizing that not all parts and installation practices are created equal. I discovered that using unapproved replacement parts or neglecting proper installation procedures can inadvertently void your warranty, leaving you vulnerable when your appliance needs repair. Checking out this guide helped me understand the fine print and avoid costly pitfalls. Also, I learned that even the best warranty can be meaningless if your installation was sloppy—something that many overlook until it’s too late. Staying informed about what your warranty truly covers and how your parts should be installed has become a crucial part of my appliance care routine.
My Go-To Tools and Resources for Keeping My Dishwasher in Top Shape
Over the years, I’ve curated a toolkit that makes maintenance straightforward and effective. A quality spray arm removal tool, which you can explore here, has saved me from damaging delicate components. I also swear by a durability-tested digital multimeter for electrical troubleshooting, ensuring I don’t replace parts unnecessarily. When I need guidance on parts that ensure my warranty stays valid, this list has been invaluable. These tools and resources empower me to handle minor repairs confidently, minimize costs, and extend my dishwasher’s lifespan.
Step Up Your Maintenance Game and Feel the Difference
Taking proactive steps like inspecting and cleaning your dishwasher regularly can dramatically improve performance and prevent surprises. For instance, simple routines like wiping down the gasket with natural vinegar solutions and drying thoroughly after each wash create a hostile environment for mold. Small habits, when adopted consistently, transform your appliance care, making repairs less frequent and warranty claims smoother. Remember, your dishwasher is an investment—treat it with attention and care, and it will serve you reliably for years to come.
Related Posts
How to Clean Your Dishwasher Interior Without Harsh Chemicals
It happened again. I opened my dishwasher expecting sparkling dishes,…
How to Save Money on Water by Avoiding Pre-Rinsing
It hit me one morning while loading my dishwasher—why am…
The Truth About Using Baking Soda for Odor Control
It was a typical Saturday afternoon and I was grappling…