Ever opened your dishwasher after a cycle and found your plates caked with a muddy, grimy residue? It’s frustrating, isn’t it? You’re doing everything right—loading carefully, choosing the best detergent—and yet, something’s still off. I remember times I’d shrug it off, thinking maybe I just needed to switch detergents, only to realize the real culprit wassomething simpler—yet easily overlooked.
Why Your Dishes Still Look Muddy Despite Your Efforts
That stubborn residue can be discouraging, especially when you’re striving to keep your family’s dishes spotless. What’s worse, many folks jump to replace their detergent or upgrade their machines without first considering the filter and the parts inside the dishwasher. The truth is, those components play a significant role in cleaning performance, and neglecting them might be the root cause of that muddy film.
Is the hype about Filter Cleaning Actually Worth It?
Early in my dishwasher journey, I made the mistake of ignoring the filter. I thought, “It’s probably fine; I run it weekly.” Turns out, a dirty or clogged filter drastically reduces cleaning efficiency. A clogged filter isn’t just a minor inconvenience—it can cause water to recirculate improperly, leaving residues behind. Regularly inspecting and cleaning your filter, much like how you might check your air filters, can restore that sparkling shine and save you from unnecessary replacements.
And if you’re thinking, “It’s probably my detergent’s fault,” consider that some residues are actually due to mineral build-up or a faulty filter trapping debris. My personal experience shows that a simple filter cleaning can make the difference, sometimes more than switching to a pricier detergent. For more on how to properly maintain your dishwasher, check out this guide on dishwasher parts maintenance.
But how do you know whether the issue lies with your detergent or the filter? The next sections will help you diagnose and fix the problem step by step, so your dishes can come out pristine every time. And trust me, maintaining your dishwasher’s internal parts isn’t as daunting as it seems—sometimes, all it takes is a moment of awareness and a few minutes of your time.
Remember, a muddy residue isn’t just a cosmetic issue; it’s a sign that your dishwasher may need some internal attention. Have you faced this problem recently? Stay tuned—because fixing it might be easier than you think, and I’m here to show you how.
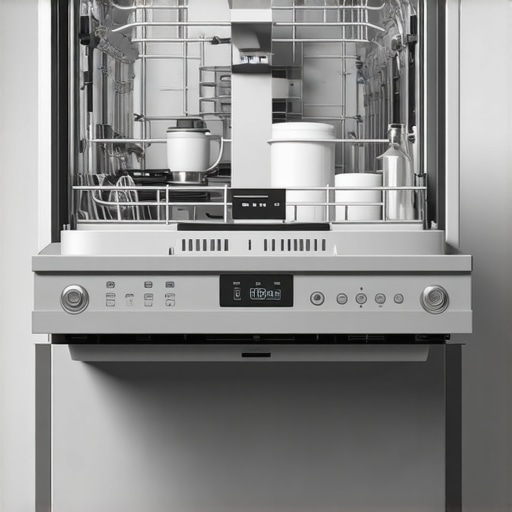
Remove and Inspect the Filter
Start by locating your dishwasher’s filter, usually at the bottom center. Turn off the machine and unscrew the filter assembly—use a screwdriver if necessary. I remember the first time I did this, I got a mess of gunk all over my hands, but it was a valuable lesson. Rinse the filter under warm water and scrub away debris with an old toothbrush to remove stubborn grime. This simple step can vastly improve cleaning efficiency, as clogged filters are often the primary culprits behind muddy residues. Regular inspection—about once every three months—keeps your dishwasher performing at its best. For detailed instructions on filter removal, check out this guide on replacing dishwasher parts.
Clean the Filter Housing and Internal Components
Once the filter is out, wipe down the filter housing with a damp cloth to remove any trapped debris. Use a soft brush or an old toothbrush for nooks and crannies, especially around the impeller and spray arms. These parts can harbor mineral deposits, which reduce water flow and leave residues on dishes. For a deep clean, consider soaking removable spray arms in vinegar to dissolve lime scale, then rinse thoroughly. My personal experience with this step resulted in dishes coming out significantly cleaner, even without switching detergents. Properly maintaining these internal parts helps prevent muddy buildup and extends your dishwasher’s lifespan. For more insight into common wear parts, visit this resource on dishwasher parts.
Replace or Upgrade Essential Components
If cleaning doesn’t fix the issue, some parts might need replacement. Key components include door seals, spray arms, and inlet valves—wear and tear here can cause residue buildup. Before purchasing replacements, verify your model number and compatibility; using mismatched parts can cause leaks or poor cleaning. When installing new parts, follow the manufacturer’s instructions meticulously. I once replaced a faulty inlet valve myself, and the difference in wash quality was immediate. Remember, general maintenance extends beyond cleaning; maintaining your parts can prevent muddy residue from returning. You can explore trusted aftermarket parts and learn about warranty considerations at this warranty maximization guide.
Preventative Checks for Long-Term Performance
After replacing or cleaning, inspect the drain hose for clogs or kinks, and ensure all connections are tight. Proper drainage is critical; any obstruction can cause dirty water to recirculate, leaving residue. Additionally, check the sump basin for debris or blockages—use a flashlight to peek behind the filter assembly for hidden obstructions. Regularly inspect the door gasket for cracks or residue buildup; a compromised seal can let in dirt and cause muddy leftovers. During my own maintenance routine, I set a reminder every six months for a comprehensive check, which saved me costly repairs. For safe installation tips and warranty considerations, visit this installation quick-start guide.
Document Your Maintenance for Warranty Benefits
Keep records of parts purchases, replacements, and cleaning schedules. If your warranty requires proof of maintenance, organized documentation can be crucial, especially when filing claims or troubleshooting issues. I personally keep a digital folder with receipts and photos of replaced parts, which expedites warranty claims and helps identify recurring problems. Remember, proper maintenance not only boosts performance but also safeguards your investment. For more about warranty policies and how to optimize coverage, see this warranty optimization article.
Many homeowners believe that once they’ve installed their dishwasher correctly or replaced a faulty part, their job is done. However, beneath these assumptions lie nuanced pitfalls that can compromise performance and warranty coverage. Let’s dig deeper into what most people get wrong, despite their good intentions.
Misconception About DIY Installation and Its Impact on Warranties
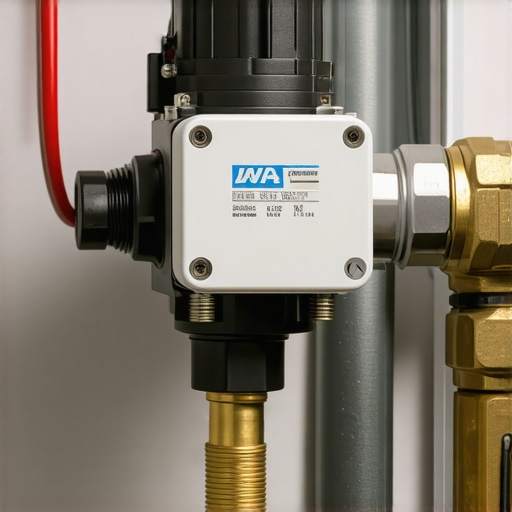
A prevalent myth is that DIY installation automatically voids your warranty. In reality, manufacturers often specify that installation must meet certain standards, but they don’t necessarily require professional fixing for coverage to remain valid. According to appliance experts, proper installation—adhering to guidelines such as those outlined here—is crucial. Failing to follow these steps can lead to issues that might not be covered under warranty, especially if negligence is involved. An overlooked detail is ensuring the water supply line is the correct gauge and fitting; using mismatched or cheap parts can cause leaks, which many assume warranty will cover, but often it does not, especially if damage results from improper setup. Always review your warranty policy and installation requirements.
Why the Smallest Part Choices Matter When Installing
When selecting parts for installation, many tend to prioritize price over compatibility. This is a mistake that can have long-term consequences. For instance, using a generic or incompatible supply hose might seem cost-effective initially but can lead to leaks or bursts that damage your kitchen, voiding warranty claims. Invest in the correct parts recommended by the manufacturer—it’s a small price for peace of mind. Remember, even the high-quality brass fittings recommended here can crack if improperly installed or mismatched.
Inside the Parts: Overlooked Nuances That Kill Performance
Many people focus solely on replacing visibly faulty components, ignoring internal parts that wear silently but dramatically impact cleaning. For example, a worn-out spray arm nozzle or a misaligned filter can cause muddy residue regardless of detergent quality. Properly checking internal components requires experience: a cracked or clogged impeller can cause improper water flow, leading to residue buildup. As highlighted in this guide, understanding these nuances ensures longevity and optimal performance. Regular inspection—at least semi-annually—can prevent minor issues from evolving into costly repairs.
How Can Overlooking Minor Parts Void Your Warranty?
It may surprise many that neglecting small components, such as door hinges or thermal fuses, can jeopardize warranty claims. Manufacturers often specify that maintenance and timely replacement of minor parts are necessary for coverage. Failing to replace a cracked door gasket or ignoring a leaking inlet valve can lead to extensive damage, which is rarely covered if the failure resulted from neglect. To ensure your warranty stays valid, keep on top of routine checks in accordance with recommended maintenance routines.
Being Aware of Hidden Traps When Handling Parts and Warranty
One common trap is assuming all aftermarket parts are equal. In truth, inferior parts—often labeled as “compatible” without proper certification—may cause damage or performance issues, invalidating warranties. Always verify parts’ compatibility and opt for those endorsed by your dishwasher’s manufacturer. Additionally, neglecting to document replacements and maintenance activities can make warranty claims more difficult. Keeping records, such as receipts and photos, accelerates the process when disputes arise, as underscored in this advice.
Finally, remember that the difference between basic maintenance and advanced knowledge lies in recognizing these hidden nuances. By understanding how minor components can influence warranty validity and performance, you’re stepping beyond the basics into true appliance mastery. Have you ever fallen into this trap? Let me know in the comments.
Building a Reliable Maintenance Routine
Maintaining your dishwasher over time requires more than just occasional cleaning; it demands the right tools and a disciplined approach. One investment I highly recommend is a quality set of precision screwdrivers, especially Phillips and flathead variants, which are essential for accessing internal components without damaging delicate parts. I personally use a Wiha Precision Screwdriver Set because of its durability and ergonomic design, making routine inspections much more manageable.
Another invaluable tool is a flexible inspection mirror paired with a LED flashlight. These allow you to peer into tight spaces behind seals and within spray arms, ensuring no debris or mineral buildup goes unnoticed. Regular internal checks can catch issues early, preventing costly repairs and prolonging the lifespan of the appliance.
For more advanced diagnostics, a multimeter is crucial. It helps verify that electrical components, such as thermostats and heating elements, function correctly. I use a digital multimeter to ensure accurate readings, which aids in troubleshooting persistent performance problems. Incorporating these tools into your maintenance routine allows you to diagnose issues precisely, rather than guesswork, saving time and money.
Future of Dishwasher Maintenance Tools
Emerging technologies promise to revolutionize in-home dishwasher upkeep. IoT-enabled sensors can now monitor internal conditions like temperature, water quality, and cycle efficiency, notifying homeowners via smartphone when maintenance is due. As these systems become more affordable and user-friendly, predicting and preventing breakdowns will be easier than ever, minimizing downtime and expenses.
How do I maintain my dishwasher tools over time?
To ensure your maintenance arsenal remains effective, clean your tools regularly—especially those exposed to water and cleaning agents—by wiping them down and storing them in a dry place. Periodically calibrate your multimeter with a known voltage source to maintain accuracy, and replace worn screwdriver bits to avoid damaging fasteners. Keeping your tools in top condition ensures that when a repair arises, you’re ready to act swiftly and effectively.
Remember, a well-equipped toolbox paired with a proactive maintenance schedule not only extends the life of your dishwasher but also preserves its warranty coverage. For detailed guidance on selecting the right parts for long-term performance, visit this resource. Don’t hesitate—start integrating these tools into your routine today, and see how much smoother your dishwasher’s performance can become.
What I Wish I Knew Before Diving Into Dishwasher Repairs
- One of my biggest surprises was discovering that neglecting internal parts like spray arms could undo months of hard work. These components can silently wear out, causing muddy residues despite everything else being perfect.
- I learned that DIY installation isn’t just a money-saver—it’s a tightrope walk. Missing even small details like proper drainage height or correct fittings can void warranties and cause headaches down the line.
- Keeping detailed records of each maintenance step is a game-changer. It’s easy to forget when you last cleaned the filter or replaced a part, but having proof can be a lifesaver during warranty claims.
- It became clear that trusting the right parts is crucial. Cheap, unverified replacements might save a few dollars upfront, but they often lead to longer-term issues that void your warranty or damage your machine.
- Over time, I realized that proactive checks—like inspecting hoses and seals every few months—are more effective and less costly than waiting for a breakdown. Prevention is truly better than cure.
My Must-Have Resources for Hassle-Free Dishwasher Care
- This comprehensive guide on dishwasher parts has been invaluable in understanding the internal mechanics and identifying when parts need attention.
- The step-by-step replacement tutorials helped me confidently tackle repairs myself, saving money and time.
- Investing in a quality maintenance toolkit with screwdrivers, inspection mirrors, and multimeters has been essential for in-depth diagnostics and preventive care.
- Also, keeping up with warranty policies ensures I stay informed about valid claims and avoid unnecessary expenses.
Take Charge and Keep Your Dishwasher Running Smoothly
Embarking on your own dishwasher maintenance journey might seem daunting at first, but with the right knowledge, tools, and attitude, you can prevent many common issues like muddy residues. Start small—inspect your filter, check internal parts, and keep records—then build up your skills over time. Remember, proactive care not only preserves your warranty but also guarantees sparkling dishes every cycle. Are you ready to take control of your dishwasher’s health and avoid costly repairs? Share your thoughts or experiences below—let’s learn together and keep those plates shining bright.
Related Posts
The $10 Drain Solenoid That Often Mimics a Dead Pump
Ever opened my dishwasher and found that frustratingly silent machine…
Why Soft Water is Killing Your Glassware and Your Heating Element
Ever stood in your kitchen, brand-new glass in hand, only…
Why Your Dishwasher Drains Properly but Still Smells
Ever had that sinking feeling when your dishwasher runs perfectly…