
I remember the moment clearly. I was about to buy a new dishwasher, eager to upgrade my kitchen, when I glanced at the Energy Guide sticker and felt my confidence slipping. The numbers looked like a foreign language—kilowatt hours, cost estimates, efficiency ratings—all drowned in a sea of unfamiliar jargon. I realized I had been making assumptions based on flashy features, but overlooking the crucial details that could save me hundreds over the appliance’s lifespan. It was a lightbulb moment: understanding that energy labels aren’t just legalese, but a powerful tool to make smarter choices.
Why Knowing Your Energy Guide Can Save You Money and Headaches
Have you ever bought an appliance, only to find out later that it’s more expensive to run than you thought? If so, you’re not alone. Many homeowners jump into purchases based on brand names or initial costs, ignoring the detailed energy information that can reveal long-term expenses. The Energy Guide sticker on appliances is designed to provide transparent insight into how much it will cost to operate, but few of us understand how to read it properly—and that can lead to some costly mistakes.
From my own experience, skipping this step meant I purchased a dishwasher that was energy-efficient on paper but, in reality, consumed more power than another model with a lower rating. This oversight cost me extra money on my utility bills and reduced the lifespan of my unit, as I didn’t recognize early signs of inefficiency or know how to maintain it properly.
But don’t worry—once I learned how to interpret these labels, I started making smarter decisions that saved hundreds each year. Understanding the details on the Energy Guide helped me identify models that genuinely save energy and money, and it can do the same for you. Whether your goal is to reduce monthly expenses or to find an appliance that’s kinder to the environment, knowing how to read your energy label is a critical first step.
Did you know that according to the U.S. Department of Energy, choosing energy-efficient appliances can cut household energy bills by up to 30%? That’s real savings that add up over time. Armed with the right knowledge, you can make a purchase that benefits your wallet and the planet alike.
Now, let’s delve into how you can decode your dishwasher’s Energy Guide and use it to your advantage. Ready to become an informed shopper? Great! But first, have you ever felt overwhelmed or confused by those labels? If so, you’re in the right place—because understanding these details can be easier than you think. My goal is to demystify the process and help you avoid the common pitfalls that many homeowners fall into when evaluating appliance energy performance.
Read the Energy Guide Carefully
Start by locating the energy label on the appliance and examine the kilowatt-hour (kWh) consumption figure. This value indicates how much energy the dishwasher uses annually. To get an accurate comparison, look at different models side by side, focusing on the kWh and estimated yearly operating cost provided on the label. I once compared two dishwashers in-store—one had a slightly higher price but a significantly lower annual energy cost, which saved me hundreds over time.
Use the Efficiency Ratings as a Guide
Next, pay attention to the energy efficiency rating or label. Some models have labels indicating **ENERGY STAR** certification, which means they meet strict energy-saving criteria. This certification isn’t just a badge—it translates into real savings on utility bills. When I chose my last dishwasher, I prioritized ENERGY STAR certified units, and my energy bills decreased noticeably within the first few months.
Understand the Estimated Annual Cost
Most energy labels display an estimated yearly energy cost based on average usage. Multiply this number by your household’s typical usage to estimate your actual expenses. For example, if your household runs the dishwasher four times a week, compare the label’s estimate with your actual usage pattern. Knowing this helps avoid surprises on your electricity bill. Remember, an appliance with a low purchase price but high operational costs can be a false economy, so always check this figure carefully.
Check the Power Consumption in Kilowatt-Hours
Beyond the annual estimate, look at the kWh per cycle if available. This figure helps determine how much energy your specific use will consume. Think of it as the ‘fuel efficiency’ metric for your dishwasher. When I analyzed models, I found that some with similar features had vastly different per-cycle energy consumptions, impacting my monthly utility costs. For precise details, consult the user manual or [the guide to dishwasher parts & how to replace them effectively](https://appliancedoctorz.com/common-dishwasher-parts-and-how-to-replace-them-effectively) to understand how these components influence overall efficiency.
Compare Water Usage Alongside Energy Consumption
Energy efficiency isn’t just about electricity; water consumption plays a role too—less water can mean less energy used in heating and pumping. Look for labels that specify both. During my last upgrade, I chose a model with a low water footprint, which in turn reduced energy costs associated with heating water. This holistic approach grants you a twofold saving—less water use and lower electricity bills.
Take Practical Steps When Shopping
Bring a calculator or use online comparison tools to analyze multiple models based on these figures. Use the [DIY dishwasher installation step-by-step guide](https://appliancedoctorz.com/diy-dishwasher-installation-step-by-step-guide) before installing your new unit, ensuring your setup maximizes its efficiency. Remember, proper installation—like correct water inlet positioning and secure electrical connections—can significantly influence operational costs and warranty coverage. For detailed tips on [selecting the right parts for installation](https://appliancedoctorz.com/top-tips-for-selecting-the-right-parts-for-dishwasher-installation), consult trusted guides or professionals.
Reflect on Long-Term Savings
By decoding these labels, I avoided impulse buys and chose models that delivered real savings. The initial investment might be higher, but understanding energy and water consumption ensures you save hundreds annually. Ultimately, this knowledge transforms a potentially confusing shopping experience into a strategic decision-making process that benefits both your wallet and the environment.
When it comes to dishwashers, many assume that once the appliance is installed, their primary concern is cleaning efficiency. However, the real expertise lies in understanding the nuances of installation, parts, and warranty coverage. Many homeowners get caught off guard by common pitfalls that can lead to costly repairs or voided warranties. For example, a frequent misconception is that any plumber’s flexible water line will suffice. In reality, using the wrong size or material can cause leaks, and reputable sources recommend upgrading to brass inlet valves to ensure durability and maintain warranty validity. Additionally, improper installation of the drain hose—such as incorrect looping—can lead to water backups or foul odors, which are often overlooked during setup. You can find a comprehensive step-by-step guide on [seamless dishwasher installation](https://appliancedoctorz.com/top-tips-for-seamless-dishwasher-installation-in-2025) to avoid these issues.
One critical area often misunderstood is parts replacement. Many believe that any generic part will do, but incompatible or low-quality replacements can degrade performance and invalidate warranties. For instance, replacing a gasket with a subpar model may cause leaks or damage internal components. To ensure longevity and warranty protection, consulting resources like [the complete list of dishwasher parts covered by warranty](https://appliancedoctorz.com/the-complete-list-of-dishwasher-parts-covered-by-warranty) can help you identify genuine, warranty-approved components.
Another overlooked detail is warranty coverage itself. Homeowners frequently assume that the manufacturer’s warranty covers all repair costs, but in reality, it often excludes damage caused by improper installation, hard water, or use of non-approved parts. Recognizing this, many professionals recommend understanding what your warranty does and doesn’t cover through detailed guides such as [the guide to dishwasher parts & warranty](https://appliancedoctorz.com/guide-to-dishwasher-parts-warranty-what-you-need-to-know). Regular maintenance and correct part selection are essential for keeping your warranty valid and avoiding unexpected expenses.
Now, consider the advanced question: How can homeowners protect their warranties when replacing parts or performing DIY repairs? The key lies in adhering to manufacturer specifications and documenting all work meticulously. For example, using recommended [installation parts](https://appliancedoctorz.com/top-tips-for-selecting-the-right-parts-for-dishwasher-installation) and following established procedures ensures that warranty claims won’t be rejected due to improper procedures. Moreover, employing professional resources or consulting detailed troubleshooting guides, like [how to diagnose dishwasher parts during warranty periods](https://appliancedoctorz.com/how-to-diagnose-dishwasher-parts-during-warranty-periods), can save time and money.
Ultimately, mastering these nuanced aspects of dishwasher maintenance empowers you to make informed decisions, avoid pitfalls, and extend the lifespan of your appliance. Have you ever fallen into this trap? Let me know in the comments.
Mastering Long-Term Maintenance with the Right Tools
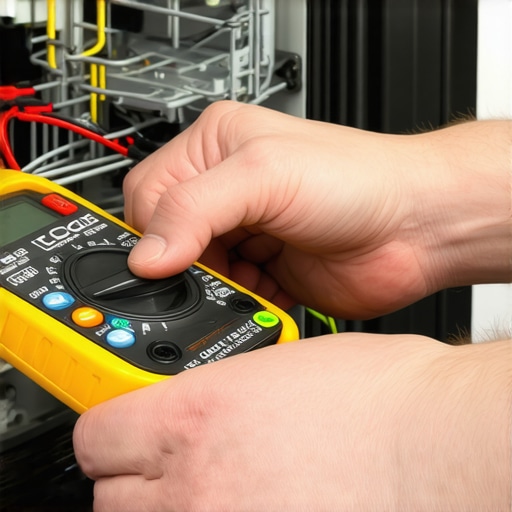
Ensuring your dishwasher remains reliable over years requires more than just routine cleaning; it calls for having the right tools at your disposal. Personally, I swear by a high-quality multimeter for electrical checks and a digital torque wrench to ensure parts are secured to manufacturer specifications. These tools help me quickly diagnose issues like faulty wiring or loose connections, preventing minor problems from escalating.
Investing in a set of precision screwdrivers and plastic pry tools streamlines disassembly, especially when replacing delicate parts such as the spray arms or door handles. I always keep a tube of food-grade silicone lubricant handy for sealing door gaskets and lubricating hinges—simple steps that prolong the lifespan of vital components.
Software and Diagnostic Aids That Save Time
While manual tools are fundamental, software-based diagnostic devices can further improve maintenance efficiency. I recommend a smart diagnostic meter compatible with your appliance model, as it can read error codes directly from the control board, saving you time in troubleshooting. For example, some models support apps that interpret error codes and suggest remedies, like checking the circulation pump or replacing a worn-out door latch.
Regularly updating your firmware, when available, can optimize performance and add features that facilitate self-diagnosis. Trend predictions indicate that future upgrades will integrate AI-powered analytics, allowing even DIY enthusiasts to troubleshoot with greater accuracy and confidence. Staying current with such technologies promises to make maintenance more accessible and less intimidating.
How do I maintain dishwasher parts over time?
Preventive care is key to maintaining your dishwasher’s health. I find that inspecting and cleaning the filter assembly monthly through tools like a soft brush and a flashlight can prevent clogs and residual buildup. Using compatible parts, such as those listed on our comprehensive parts guide, ensures durability and warranty compatibility. Additionally, scheduling professional inspections every few years can catch hidden issues early, and many technicians now utilize thermal imaging tools to detect hotspots or wiring faults unseen to the naked eye.
For DIY repairs, understanding which parts are most vulnerable—like the float switch or inlet valve—allows proactive replacement before failure occurs. The common mistake of ignoring signs like slow draining or unusual noises often leads to costly repairs. Keeping a detailed maintenance log, including serial numbers and part replacement dates, can help track wear patterns and plan timely interventions.
Preparing Your Equipment for Years of Service
Preparing your tools and parts for long-term use involves proper storage in a dry, organized toolbox, and calibrating electronic testers periodically to maintain accuracy. When installing new components, always follow the step-by-step installation guide to ensure proper fit and function. Proper calibration and installation prevent unnecessary strain on your parts, preserving your warranty coverage, especially if you use certified components.
Remember, a little investment in quality tools now can save you a lot down the road. Keep yourself equipped, stay updated with evolving tech, and regularly perform preventive checks to extend your dishwasher’s lifespan. As technology advances, the ability to self-maintain with precision tools will only become more critical, saving you money and stress over time.
Lessons From My Dishwasher Journey That Changed Everything
One of the biggest lightbulb moments in my appliance experience was realizing the value of truly understanding the nuances of dishwasher parts and warranties. I once blindly replaced a gasket without verifying if it was the right model, only to find it caused leaks and voided my warranty. That taught me to always cross-reference parts with official lists—like those found on warranty coverage guides. Another lesson was in installation: rushing through setup without consulting professional installation guides led to recurring drainage issues. Now, I prioritize following detailed installation tips to ensure longevity. Lastly, I learned that proper maintenance and having the right tools—like calibrated screwdrivers—can save hundreds in repairs. These lessons transformed my approach from reactive to proactive, allowing me to maximize my dishwasher’s lifespan and warranty benefits.
Related Posts

The most reliable dishwasher brands for long-term use
Ever had that sinking feeling when a new dishwasher starts…
How to Save Water by Adjusting Your Loading Patterns
I still remember the moment it hit me—standing in my…
How to Reduce Your Water Usage Without Sacrificing Cleaning Power
I remember standing in my kitchen two years ago, water…