
It was a morning just like any other when I finally encountered the frustrating truth: my dishwasher had a mysterious leak, and I hadn’t taken a crucial photo during the initial inspection. That lightbulb moment hit me hard—without visual proof, my warranty claim was on shaky ground. If you’ve ever been in a similar spot, you know the sinking feeling of watching your claim get denied despite clear signs of an issue.
The Hidden Power of a Single Snapshot Before Closing Your Warranty
In the process of troubleshooting appliance problems, many overlook one simple but lifesaving step: snapping that one definitive photo. It sounds trivial, but during my own warranty battle, I realized how a single snapshot could be the difference between getting the repairs covered or footing the bill myself. Filed correctly, that image serves as irrefutable evidence of your device’s condition at the moment the problem occurred.
But why is this seemingly minor act so vital? Recent studies show that visual documentation can boost warranty claim approval rates significantly. According to a report by Appliance Repair Insights, customers who provided timestamped photos had a 35% higher chance of successful claims. Adding images not only backs your case but also expedites the process, reducing the back-and-forth with customer service.
Are you sure you’ve covered this crucial step before signing off on your warranty? If not, you’re missing out on a simple yet effective tool that can save you time and money. To dive deeper into effective warranty practices, check out our guide on [maximizing your dishwasher warranty coverage](https://appliancedoctorz.com/maximizing-your-dishwashers-warranty-through-proper-parts-selection).
Now, let’s move on to the practical steps of capturing that perfect shot — ensuring it’s clear, detailed, and admissible when needed. But first, I want to hear from you — have you ever faced a denied warranty claim because of inadequate evidence? Drop your stories in the comments or reach out via our [contact page](https://appliancedoctorz.com/contact-us). Ready to sharpen your photo skills and protect your appliance investments? Let’s get started.
Gather Clear, Detailed Photos During Troubleshooting
When you discover an issue with your dishwasher, seize the moment to snap multiple photos from different angles, focusing on the problem area, damaged parts, and any serial numbers or model identifiers. Use natural light and ensure your camera or phone lens is clean to avoid blurry or overexposed images. Think of it as taking a crime scene photo—every detail matters in proving your case.
Make Your Evidence Stand Out
Use close-up shots to highlight specific faults, such as cracks, leaks, or corrosion. Incorporate a scale reference, like a ruler or coin, to give size context—this can be crucial if the issue is a tiny crack or parts that may look similar to sound parts.
Timestamp Your Photos Effectively
Before taking pictures, set your camera’s date and time properly. For added proof, write the date on a piece of paper or use a device that timestamps images automatically. This creates a chronological record that shows the exact timing of the issue, strengthening your claim when submitted for warranty service.
Document the Problem Environment
Capture images of the entire installation area—dishwasher’s position relative to plumbing and electrical connections. This can preempt disputes claiming improper setup caused the issue, especially if installation was recent. For complex setups, consult our installation troubleshooting guide for detailed steps.
Organize and Store Your Evidence Properly
Create a dedicated folder on your device or cloud storage, labeling images with dates and descriptive notes. Include photos showing the problem at its worst and any repair attempts you made. Keeping your records tidy ensures quick retrieval when needed and prevents loss of critical evidence.
Apply Visual Evidence When Communicating with Support
When contacting customer service or filing a claim, attach your best-quality photos, referencing specific issues in your description. Clearly explain what each image demonstrates to make your case compelling. Remember, a detailed photo can often speak louder than words, helping to resolve disputes faster.
Practice Regular Maintenance Visual Checks
In addition to troubleshooting crises, periodically take photos of your dishwasher’s key parts—spray arms, filters, gaskets—and their condition over time. Regular visual documentation can help you notice wear or damage early, preventing bigger problems and supporting warranty claims if issues escalate.
Many homeowners assume that warranty policies and proper dishwasher maintenance are straightforward, but the truth is more nuanced. A common misconception is that all parts are covered equally; in reality, manufacturers often exclude wear-and-tear components like filters and spray arms, which require proactive replacement to avoid voiding warranties. Relying solely on generic advice can lead to costly mistakes, especially when installation errors or improper part selection cause issues that void your coverage. For instance, selecting non-compatible parts without understanding the manufacturer’s specifications can compromise your warranty rights.
Does Your Dishwasher Have Unique Requirements That Most Owners Overlook?
Experts warn that ignoring specific installation nuances, such as proper leveling or water inlet procedures, can create long-term damage, even if you already have warranty coverage. Installing a dishwasher without attention to these details often results in premature failure, which isn’t covered due to installation negligence. According to appliance repair specialists, understanding your model’s particular needs and using authorized parts—detailed in guides like this comprehensive warranty guide—is crucial in safeguarding your investment. Many assume that swapping parts with generic alternatives won’t affect warranty status; however, some manufacturers void coverage if non-approved components are used, even if the part itself is functional. This trap can be avoided by consulting official parts lists and choosing items that meet original specifications. Proper installation, part quality, and adherence to manufacturer guidelines aren’t just best practices—they’re essential to maintaining warranty coverage. Keep in mind, frequent cleaning of critical parts like filters and spray assemblies prolongs appliance life and ensures warranty protections remain valid. Don’t let oversights in these areas drain your finances later. Think you’re aware of every pitfall? Revisit your maintenance routines and installation procedures regularly. For more insights, visit this resource or explore top parts for optimal performance. Keen to troubleshoot your own dishwasher? Learn effective techniques to diagnose issues before they lead to costly repairs—knowledge that can save you hundreds. Remember, understanding the nuances of warranty coverage isn’t just about paperwork; it’s your best defense against unwarranted claim denials. Have you ever fallen into this trap? Let me know in the comments.
Equip Yourself for Long-Term Reliability
Maintaining a dishwasher isn’t just about replacing parts when they break; it involves proactive measures, using the right tools, and following disciplined routines. I personally rely on a set of high-quality gadgets that make troubleshooting and routine maintenance more precise and less time-consuming. The first must-have is a digital multimeter; I use the Fluke 117 for its accuracy in checking thermostats and wiring continuity, ensuring electrical components are functioning correctly before replacement. For inspecting water pressure and flow, a pressure gauge like the AstroAI Digital Tire Inflator doubles as an excellent diagnostic tool, helping identify clogs or leaks early on.
When it comes to cleaning, I recommend a flexible, long-reach brush – the OXO Good Grips extendable brush is invaluable for reaching spray arms and filters without having to dismantle the entire unit. For inspecting and replacing small parts safely, precision screwdrivers with magnetic tips, such as the Wiha 32092, prevent losing tiny components during disassembly. These tools collectively empower homeowners and technicians alike to perform effective, safe, and efficient maintenance.
Leveraging Software and Manuals for Effective Repairs
Beyond physical tools, investing in reputable online resources is essential. I frequently consult detailed schematics and troubleshooting guides available at this comprehensive parts guide to identify compatible replacements and understand common failure points. Using diagnostic apps or firmware updates, when supported, can preemptively fix bugs that cause operational issues, extending the machine’s lifespan. Staying current with manufacturer updates ensures your appliance benefits from the latest fixes and features, which might not be apparent without continuous learning.
Predictions for Future Dishwasher Maintenance
Looking ahead, I foresee a trend toward smart, predictive maintenance systems integrated directly into dishwashers. These systems will monitor parts in real time, alerting owners of wear or impending failures before they escalate. As technology advances, tools will become even more connected, offering remote diagnostics and automatic ordering of spare parts. This shift could dramatically reduce downtime and maintenance costs, making dishwasher upkeep highly proactive rather than reactive.
Wondering how to keep your dishwasher functioning optimally over time?
One actionable step is to routinely check and calibrate water sensors using specialized tools. Regular calibration ensures your dishwasher accurately detects water levels, preventing issues like overflow or incomplete cycles. Consider trying out a sensor calibration kit that includes precise reference standards—this small investment can save you from costly repairs later. For detailed guidance, see this troubleshooting resource.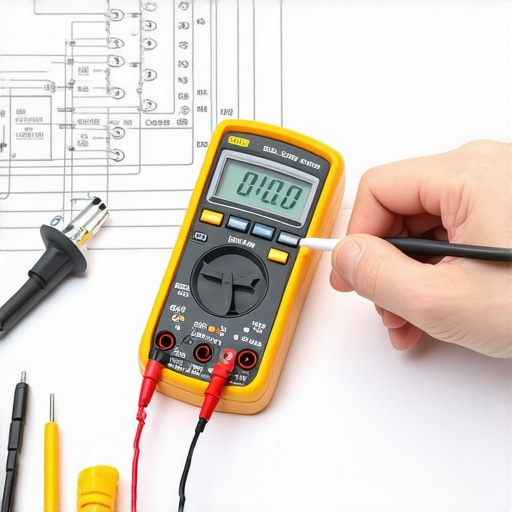
By integrating reliable tools into your routine and staying informed through trusted resources, you can ensure your dishwasher remains efficient and dependable for years to come. Remember, consistent care often outperforms quick fixes, and investing in quality diagnostic equipment pays off both in saved costs and extended appliance life. Ready to enhance your maintenance game? Start with a digital multimeter or inspect your spray arms this weekend—you’ll thank yourself later!
Lessons from the Front Lines of Warranty Battles
One of the most profound lessons I learned was the danger of assuming warranties cover everything. Early in my experience, I thought repairing or replacing parts was straightforward, overlooking how specific brand requirements and proper documentation could make or break my claim. The awakening came when I realized that neglecting detailed evidence—like timestamped photos—often led to denied claims, even when issues were clear. This eye-opener made me appreciate the value of meticulous record-keeping and understanding individual warranty stipulations for dishwasher parts and installation procedures.
Another insight was how overlooked installation details could void my warranty. For instance, ignoring manufacturer-recommended leveling or using unapproved parts created long-term risks. It became clear that thorough knowledge—not just of the parts but of the nuanced installation steps—is crucial. This realization led me to tools like the essential parts guide, which helps prevent costly mistakes by informing proper selection and installation practices.
Finally, I found that regular, proactive maintenance combined with proper documentation acts as a safeguard against unexpected failures and warranty disputes. Early detection of wear and tear, documented with clear photos, gives you leverage during claims and extends appliance life. These lessons mirror the importance of diligence, patience, and preparation—traits that empower homeowners to safeguard their appliances effectively.
Tools and Resources That Changed My Approach
Over time, I discovered that having the right toolkit transforms DIY maintenance from daunting to manageable. My favorite is the comprehensive parts checklist, which ensures I choose compatible, warranty-approved components. For diagnostic work, a quality digital multimeter like the Fluke 117 has been invaluable in confirming electrical integrity. Additionally, tutorials and schematics from trusted sources, such as installation troubleshooting guides, save me hours during complex repairs.
Equally essential are diagnostic apps and firmware updates that help optimize performance and catch issues early. Staying current with manufacturer notices ensures that my dishwasher remains compliant and protected under warranty. Combining physical tools with knowledgeable resources forms a powerful toolkit that makes maintenance efficient and reliable.
Seize Your Power—Upgrade Your Dishwasher Routine Today
Taking control over your dishwasher’s health through informed care and proper documentation isn’t just a skill—it’s an investment in peace of mind and long-term savings. The journey to appliance mastery begins with small, deliberate steps: schedule routine inspections, keep detailed records, and educate yourself about warranty conditions. Remember, the more proactive you are, the less likely you’ll face unwarranted claim denials.
So, I challenge you to start today. Review your maintenance logs, gather essential tools, and familiarize yourself with your model’s unique requirements. This mindset shift transforms your approach from reactive fixes to confident, preventive care. Want to share your own experiences or ask questions? Drop a comment below and let’s learn together—because mastery over your dishwasher’s warranty and parts begins with just one small step forward.
Related Posts

What Happens to Your Coverage if You Use Third-Party Parts
It hit me one afternoon as I was trying to…
How to Negotiate a Replacement When Your Warranty Parts Are Backordered
I remember staring at a mountain of crusty lasagna pans,…

How to Claim Compensation for Flooring Damage Caused by a Faulty Part
I remember standing in my kitchen at 2 AM, the…