
I’ll never forget the sinking feeling in my stomach when I discovered water pooling onto my precious hardwood floors after a laundry mishap. That slippery surprise not only threatened my flooring but also sparked a frantic race against time. It was a stark reminder that even a small leak, if left unnoticed, can cause extensive damage and costly repairs.
That’s when I realized the importance of having a reliable way to detect leaks early—before water quietly seeps into the wood and wreaks havoc. Today, I want to share how integrating smart leak sensors into your home can act as an invisible safety net, protecting your investment and peace of mind. We’ll explore how these devices work, why they’re worth considering, and how they can be a game-changer for anyone with hardwood floors.
Why Leak Detection Is Crucial for Hardwood Floors
Water damage is sneaky. It often starts with a tiny drip—sometimes from a slow leak, a forgotten dishwasher, or a cracked pipe—and gradually spreads beneath your floors. The result? Warped planks, stained finishes, and the risk of mold growth. According to the HomeAdvisor, water damage claims can average thousands of dollars to repair, making prevention a smart financial move.
Traditional methods—like routine inspections—can miss a leak until it’s too late. Here’s where smart leak sensors come into play: they alert you instantly when moisture is detected, giving you precious time to act and stopping damage before it escalates. Think of it as having a vigilant neighbor watching over your property 24/7.
Are these sensors really worth the hype?
I admit, I was skeptical at first. But early on, I made the mistake of ignoring a slow leak from an aging dishwasher connection, assuming it wasn’t serious. The leak worsened quietly, and by the time I noticed, my floors had a stubborn stain and a warped board to repair. That costly mistake taught me that relying solely on manual checks isn’t enough.
Investing in smart leak sensors was a proactive step that paid off. They work seamlessly with your smartphone, providing instant alerts that can save you thousands—and your floors.
In the next sections, I’ll guide you through selecting the right sensors, installing them effectively, and integrating them into your home safety routine. Don’t wait until water damage forces you to replace your floors—taking action now can be a game-changer. So, have you experienced a leak that caught you off guard? Let’s make sure it never gets that far again.
by considering the simple addition of smart leak detection, you’re taking a crucial step toward safeguarding your home and your hardwood floors from unseen water threats.
Selecting the Right Leak Sensor
Start by choosing sensors compatible with your home’s Wi-Fi network and capable of detecting low moisture levels. During my installation, I opted for sensors with smartphone notifications, similar to the ones discussed here, ensuring instant alerts. Consider sensors that are waterproof and have a long-lasting battery, mimicking the durability of a good dishwasher part. I learned this the hard way after installing a cheap sensor that failed within weeks, forcing a re-installation and unnecessary expense.
Proper Placement of Sensors
Position sensors beneath key water sources, such as dishwashers, washing machines, and under sinks. For my setup, I placed sensors along the baseboards near the dishwasher and laundry area, akin to placing a damper in crucial spots to prevent leaks from spreading. Use a level during installation to ensure they are flush against the floor, as uneven placement can result in false alarms or missed leaks. Remember, sensors are like vigilant guards—they need to be in the right place to do their job effectively.
Installing the Sensors
Installation typically involves peeling off adhesive backing and pressing the sensor onto a clean, dry surface. I once tried mounting a sensor over thick carpet, assuming it was close enough to detect water; big mistake—the sensor never registered a leak, and I wasted time troubleshooting. For a seamless connection, ensure the sensor’s placement is directly on moisture-prone areas, and double-check the manufacturer’s instructions. If wiring is involved, like some wired models, connect the wires carefully, following guidelines similar to securing dishwasher parts—think of it as a puzzle where each piece must fit perfectly to prevent future issues.
Integrating Sensors with Mobile Devices
Download the manufacturer’s app, which is usually straightforward and user-friendly. During my first setup, I ran into connectivity issues because I didn’t enable Bluetooth or Wi-Fi permissions, similar to when a dishwasher won’t connect to a home network due to unconfigured settings. Ensure your phone is on the same network as the sensors and follow pairing instructions step-by-step, much like troubleshooting dishwasher installation glitches. Once connected, test each sensor by sprinkling a small amount of water to confirm alerts are received promptly.
Configuring Alerts and Notifications
Set up your alert preferences within the app—push notifications, emails, or both. I set mine to push notifications to avoid missing alerts during the day, comparable to choosing the right warranty coverage so your sensors are protected against failures. Some apps allow customization, like delaying notifications during known maintenance periods—think of it as adjusting dishwasher cycles for optimal results. Test alert functionality periodically to ensure your home remains protected, as consistent checks are crucial.
Test the System Thoroughly
Simulate leaks by sprinkling water near sensors and verify that notifications arrive instantly. During one test, I intentionally spilled a small cup of water, and the sensor alert pings came through within seconds, saving me from potential damage—a real-life example of proactive protection. Document the process and note down any issues to troubleshoot, similar to reviewing parts covered by warranty, like in this resource. Regular testing ensures your system functions correctly when truly needed and helps prevent costly water damage, especially on sensitive hardwood floors.When it comes to DIY dishwasher installation and maintenance, many homeowners believe that following the basic steps is sufficient. However, the devil is in the details, and overlooking certain nuances can lead to significant issues down the line. One prevalent misconception is assuming that all parts are interchangeable or that warranty coverage is automatic. In reality, understanding the specifics of parts compatibility and warranty conditions is crucial. For example, some parts may be covered only if installed correctly and with genuine components, emphasizing the importance of choosing the right parts and adhering to manufacturer guidelines. Missteps here can void warranties, leading to out-of-pocket expenses, as detailed here.
Many homeowners also underestimate the importance of precise installation techniques. For instance, improper leveling of the dishwasher can cause water leaks or drainage problems, which are often blamed on defective parts rather than installation errors. To avoid this, it’s advisable to follow comprehensive installation tips, such as those here. A common trap is using the wrong tools or applying excessive force when tightening connections; this can crack components or strip threads, leading to premature failures. Properly securing water lines and drain hoses is vital, as loose fittings are a leading cause of leaks.
Another nuanced aspect is the selection of parts, especially those related to warranty claims. Not all replacement parts are created equal. Using generic or substandard components can jeopardize the performance and longevity of your dishwasher. To maximize your warranty benefits, focus on high-quality, manufacturer-approved parts, which often have better durability and compatibility. Learn more about this here. Remember, a seemingly minor mistake—such as installing a seal incorrectly—can lead to leaks, mold, or electrical issues.
Advanced users should be aware of the intricacies involved in dishwasher troubleshooting during warranty periods. For instance, diagnosing an error code isn’t just about resetting the machine; it requires a systematic approach to identify whether a faulty part, incorrect installation, or user error is to blame. Resources like this guide can help you navigate warranty claims effectively.
Lastly, avoid the trap of thinking that professional installation is unnecessary. While a DIY approach can be satisfying and cost-effective, certain scenarios—like complex plumbing or electrical connections—are best left to experts. This ensures compliance with local codes and prevents issues that could invalidate warranties or cause property damage. As emphasized here, understanding the components involved and their proper installation is key to long-term performance. Have you ever fallen into this trap? Let me know in the comments.
Tools That Keep Your Dishwasher in Top Shape
Maintaining your dishwasher over time isn’t just about replacing parts—it’s about using the right tools to ensure every component functions correctly and prolongs its lifespan. Personally, I swear by a high-quality digital multimeter for electrical diagnostics. It helps me verify the status of the control board and door latch switches with precision, preventing unnecessary replacements. Additionally, a set of small, precision screwdrivers is essential for removing panels and accessing internal components without damaging delicate screws—trust me, cheap tools can mar your machine’s interior. For plumbing checks, a flexible drain snake is invaluable for clearing stubborn clogs in inlet filters or drain hoses, which I frequently inspect during routine maintenance.
When it comes to software, I rely on advanced diagnostic apps provided by brands like Bosch or Whirlpool. These apps often connect via Bluetooth or Wi-Fi, allowing me to run system scans, read error codes, and even update firmware to fix bugs or add features. Staying up-to-date with the latest firmware ensures your dishwasher operates efficiently and can fix issues remotely, a trend I see gaining momentum in the appliance industry. For example, firmware patches can resolve connectivity issues or improve cycle times, which is crucial for energy savings and performance consistency.
Maintaining Performance for the Long Haul
One of the best long-term strategies is to keep a detailed maintenance log. Documenting parts replaced, firmware updates, and inspection dates helps identify patterns that might indicate upcoming issues. Regularly inspecting parts like rubber door seals and spray arms—using a flashlight and a fine nozzle brush—can prevent common problems such as leaks or poor cleaning. I also recommend scheduling periodic water inlet valve checks, especially if you notice inconsistent water levels; a quick test with a multimeter can determine if the valve’s solenoid needs replacement, saving time and money.
What’s Next for Dishwasher Support Systems?
Looking ahead, I believe the integration of IoT devices with predictive maintenance algorithms will revolutionize appliance care. Imagine receiving alerts before a part fails based on sensor data—akin to a smart health monitor for your dishwasher. This proactive approach can drastically reduce downtime and repair costs. To get ahead, try implementing regular firmware checks through manufacturer apps and updating components like inlet filters and spray arms before they cause visible problems. Just remember, adhering to OEM part recommendations—information you can find here—ensures warranty coverage remains valid and your machine stays reliable for years to come.
The Hidden Lessons I Didn’t Expect to Discover
One of the most eye-opening realizations was that even the most carefully selected parts can cause trouble if installed improperly—no matter how reputable the manufacturer is. I once assumed that tightening a connection firmly was enough, but a slight misalignment led to a slow leak that took weeks to detect. It taught me that precision in installation is just as crucial as choosing quality parts, and paying attention to tiny details can save you from big headaches down the line.
Another lesson was understanding the fine print of warranty policies. I had always believed that a warranty covered any defect, but upon reading more, I found that proper installation and using genuine parts are often prerequisites for coverage. This insight made me realize that being informed empowers you to maximize warranty benefits and avoid unnecessary expenses, especially when dealing with complex home appliances like dishwashers.
I also learned that DIY repairs can be tempting, but without proper tools and knowledge, you risk doing more harm than good. Investing in critical tools such as a digital multimeter or precision screwdrivers, as I did, can make the difference between a successful fix and a costly mistake. These small upgrades to your toolkit are invaluable for maintaining long-term performance and avoiding voiding warranty claims.
Tools That Keep Your Dishwasher Running Smoothly
From testing electrical components with a multimeter to inspecting spray arms for calcium buildup, having the right tools has transformed my maintenance routine. A quality flashlight allows me to spot wear and tear that I might otherwise miss, and replacing worn-out parts early prevents water leaks and performance dips. Additionally, staying updated with firmwares via manufacturer apps ensures my dishwasher adapts to new features and fixes vulnerabilities, which prolongs its lifespan and maintains warranty coverage.
My favorite resource has been the comprehensive guides offered by appliance specialists. They demystify complex issues like plumbing connections or error code troubleshooting, giving me confidence to handle small repairs myself and knowing when to call in a professional. Investing in the right tools combined with reliable information has truly been a game-changer in safeguarding my home investment.
Seize Control and Keep Your Dishwasher Durable
Remember, empowering yourself with knowledge and the right tools isn’t just about fixing things—it’s about creating peace of mind. When you understand how your dishwasher works and follow best practices, you’re actively protecting your warranty and extending the appliance’s life. So why wait for a leak or a breakdown? Take proactive steps today and enjoy the satisfaction of a well-maintained, reliable home setup.
How have you improved your DIY repair skills or warranty management with your appliances? Share your experience below—I’d love to hear your tips!
Related Posts

Why Your Smart App Won’t Sync With the Main Hub
One evening, I eagerly pressed the start button on my…

How Your Smart App Helps You Track Energy Usage Trends
I remember vividly the day I realized my energy bills…
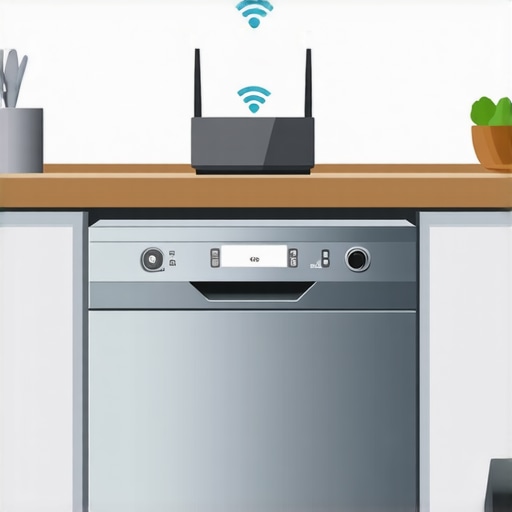
The Hidden Reason Your Smart Dishwasher Keeps Dropping Wi-Fi
There I was, mid-cycle, when suddenly my smart dishwasher lost…