
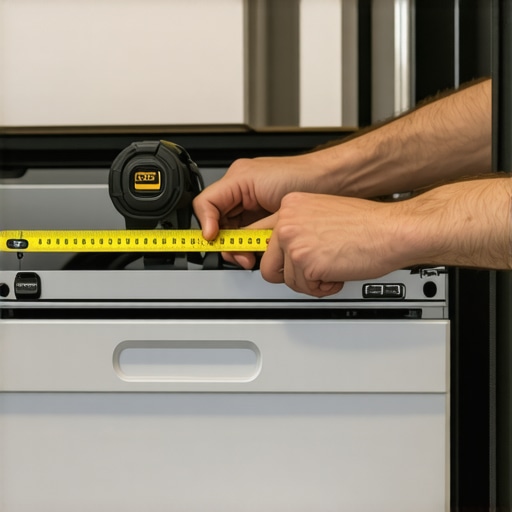
It was a frustrating weekend in my kitchen. I had finally decided to replace my old dishwasher, eagerly measuring the space to ensure a perfect fit. To my surprise, the opening measured exactly 24 inches – or so I thought. When I went to install the new unit, it was a tight squeeze. After some head-scratching and a few exasperated attempts, I realized that the opening, while marked as 24 inches, was actually slightly narrower in spots.
The Real Reason Behind the Discrepancy
This lightbulb moment taught me a crucial lesson: cabinetry and framing aren’t always as precise as those manufacturer specs claim. Many homeowners and even seasoned handymen fall into the trap of relying solely on what the tape measure says. What I learned is that factors like uneven walls, warped wood, and installation tolerances can make a space smaller or larger than the nominal measurement.
Are Practical Measurements Actually Worth the Hype?
At first, I thought it was just a minor hiccup. But then I came across a fact that stunned me: according to industry standards, a true 24-inch opening can vary by up to half an inch or more due to natural inconsistencies in construction. A report from the National Kitchen & Bath Association highlights that tolerances in cabinetry can range from 1/8 to 1/2 inch, which in a tight installation can cause big headaches. This discrepancy might seem minor, but it can make or break your project — especially with appliances like dishwashers, which are often less forgiving than we expect.
My early mistake was assuming my measurements matched the installation specs perfectly. I skipped double-checking the actual opening, and that led to delays, frustration, and a trip back to the store for a slightly smaller model. That experience pushed me to dig deeper, and now I want to share what I discovered about ensuring your new dishwasher or cabinetry fits seamlessly — even when the measurements aren’t as straightforward as they seem.
So, if you’re about to replace or install a major appliance and are feeling unsure about whether your space is truly ready, stay tuned. We’ll explore the practical steps to verify your space and prevent costly mistakes. Curious if your measurements are accurate or if you’ve faced similar surprises? Keep reading, because understanding these nuances can save you both time and money.
Double-Check Your Space Before Getting Started
Start by measuring the opening multiple times, ideally using a tape measure with a metal tab for accuracy. Don’t rely on a single measurement; inconsistency is common due to wall irregularities. For example, I once measured my space, received the dishwasher, only to find it wouldn’t fit because of minor wall warping. To avoid this, measure in three spots: top, middle, and bottom, then record the narrowest measurement to ensure compatibility.
Verify Actual Dimensions with a Test Fitting
Next, create a cardboard template or use painter’s tape to outline the opening on your floor. This visual aid helps you see precisely where adjustments might be needed. When I did this for my kitchen, I realized that slight wall unevenness could interfere with installation. This process is akin to trying on shoes before buying—no matter what the size says, test fit ensures comfort and correctness.
Assess the Space’s Tolerance and Adjust Accordingly
Remember, manufacturer specs often assume perfect conditions. Your actual space may be up to half an inch narrower or wider in places. If your measurements are tight, consider minor modifications—like shaving cabinetry or adjusting framing—before purchasing the appliance. This proactive approach prevents surprises during installation.
Prepare Your Installation Area Properly
Clear the workspace, disconnect power, and turn off the water supply. Then, check the existing hookups for compatibility. If you’re replacing an old dishwasher, remove it carefully and examine the inlet, outlet, and drain connections for corrosion or damage. Proper preparation ensures smooth installation and helps identify potential issues early.
Select and Inspect Your Parts Carefully
Invest in quality parts, like braided water hoses and certified inlet valves, to reduce the risk of leaks or failures. During assembly, double-check that all connections are tight but not over-tightened, which can damage fittings. For instance, I once overtightened a water inlet valve, causing a small leak that took hours to troubleshoot. Following the detailed parts list in this guide can help ensure you pick the right components.
Perform a Dry Run and Test for Leaks
Before fully securing the dishwasher, run a short cycle to check for leaks and proper operation. Confirm that the water fills correctly, and observe the connections. During my project, a quick test revealed a loose inlet hose that I tightened immediately, preventing water damage. This step is essential—think of it as a dress rehearsal before the main show, ensuring everything runs smoothly.
Document Your Setup for Future Maintenance
Take photos of your connections and keep your manuals accessible. If warranty issues arise, having detailed documentation like photos and installation records can expedite repairs or claims. Remember, all these steps contribute to long-term performance and ease of troubleshooting. For detailed troubleshooting tips, see this resource.
 Many homeowners believe that selecting the right dishwasher parts or following basic installation steps guarantees long-term performance. However, misconceptions and overlooked details can lead to costly mistakes. One prevalent myth is that all replacement parts are universally compatible, but in reality, even parts with similar model numbers can vary subtly, affecting warranty coverage and durability. For instance, using non-certified inlet hoses may seem harmless but can void your warranty and cause leaks, as evidenced by various case studies from industry experts.
How Can Minor Overlooked Details Void Your Warranty?
Many assume that as long as parts fit physically, they’re fine. Yet, manufacturers specify particular brands or grades of components in their warranty policies because incompatible or low-quality parts can lead to failures that aren’t covered. According to this resource, neglecting to use approved parts frequently invalidates warranties, especially if a repair is needed later. Another common mistake involves installation errors that seem insignificant but have long-term consequences. For example, failing to properly secure the water inlet or neglecting to level the machine can cause persistent leaks or uneven wear, eventually voiding warranty claims. External experts warn that improper installation, even if visually correct, can create hidden stress points and accelerate component failure, which might not be immediately apparent. Plus, many forget that warranty coverage isn’t just about parts; it also depends on proper maintenance and timely repairs. According to this article, overlooking routine inspections or ignoring signs of wear can transform warranty-covered issues into chargeable repairs. For example, many assume that warranty covers all leaks, but if a leak results from a blocked spray arm or mineral deposits due to neglect, coverage could be denied. Ultimately, understanding these nuances helps you avoid common pitfalls. It’s vital to select manufacturer-approved parts and follow meticulous installation standards, including proper leveling, secure connections, and adherence to manufacturer instructions. Being proactive about maintenance and documenting your work with photos can also strengthen your position if a warranty claim arises. Don’t underestimate the importance of these details—what might seem trivial can, in fact, be the difference between a seamless warranty process and out-of-pocket expenses. Have you ever fallen into this trap? Let me know in the comments.
Essential Tools for Reliable Dishwasher Maintenance
Achieving long-term performance with your dishwasher hinges on having the right tools at hand. I personally swear by a high-quality digital multimeter, which enables me to quickly diagnose electrical issues—especially when checking the control board or wiring connections. For plumbing, a set of slip-joint pliers and a multi-purpose wrench are indispensable, allowing precise tightening of hose fittings without damaging delicate components. Additionally, a tube of silicone grease helps in lubricating door seals and rubber gaskets, preventing leaks and ensuring smooth operation. Investing in a good flashlight, like a LED headlamp, can also illuminate those hard-to-reach areas, making inspections safer and more thorough. These tools streamline troubleshooting and prolong the lifespan of your appliance, saving you time and money in the long run.
Software and Diagnostic Procedures That Actually Work
Beyond physical tools, leveraging diagnostic software—when your dishwasher supports it—can be a game-changer. Many modern units have built-in self-diagnosis features accessible through their control panel or companion apps. If you own a smart dishwasher, I recommend using manufacturer-specific apps to run quick system checks or firmware updates, which can resolve persistent glitches and optimize performance. For non-smart models, a simple voltage tester can help verify power supply issues, while a checksum reset can often resolve minor control errors. Staying updated with firmware patches, like the ones discussed in this guide, ensures your unit runs with the latest improvements and security features. Consistent software maintenance not only enhances efficiency but also reduces sudden breakdowns.
Developing a Long-Term Maintenance Routine
Routine maintenance is the backbone of a dishwasher’s longevity. I recommend establishing a monthly inspection schedule—checking spray arms for calcium buildup, testing inlet valves with a multimeter, and inspecting door seals for cracks. A detailed parts checklist, such as the ones detailed in this resource, can guide you through all essential components that need periodic attention. Remember, early detection of issues like clogged filters or worn-out hoses can prevent costly repairs. Additionally, running an empty cycle with a descaling agent every few months keeps mineral deposits at bay. Committing to these habits helps your dishwasher serve reliably year after year.
Planning for Scaling Up Your Setup
If you’re considering expanding your kitchen, modular installations or adaptable mounting brackets can make future upgrades smoother. For example, adjustable leveling feet and versatile wiring harnesses allow you to upgrade or replace units without extensive remodels. When I upgraded my system, I ensured new parts were compatible with existing hookups to minimize downtime. Careful planning around power and water connections now can save you from significant headaches later. Utilizing flexible connectors or quick-disconnect fittings enables easier replacements or additions, making scaling a more manageable project.
Protecting Your Investment with Proper Warranty Use
Finally, understanding and maximizing your warranty coverage safeguards your investment. Always keep detailed records of parts installed and maintenance performed. Regularly consulting resources like this guide helps you verify your eligibility and ensure compliance with warranty requirements. When issues do arise, using certified parts and professional diagnostics, when necessary, strengthens your claim. Remember, preventive measures like periodic inspections and timely repairs not only extend your dishwasher’s lifespan but also keep your warranty valid. Trying out advanced diagnostic procedures, such as testing circuit boards with a multimeter, can pinpoint internal faults before they become major failures—saving you both time and money in the long run.
The Hardest Lesson I Learned About Parts,Installation,Dishwasher,Warranty
My biggest breakthrough came when I realized that even a small oversight—like ignoring manufacturer-approved parts—can jeopardize my warranty and lead to costly repairs. I once installed a non-certified inlet hose, assuming any fit was fine, only to find that it voided my coverage after a minor leak. That experience taught me the importance of double-checking compatibility and sticking to trusted components.
Lead Me to Better Choices, Here’s Where I Turned
Over time, I found tools and resources that truly support my DIY efforts. The Warranties Guide has been instrumental in understanding what qualifies as proof for warranty claims. The Parts Replacement List arms me with the exact components certified for my model, saving me guesswork. And the Troubleshooting Tips ensure that I can react quickly if something seems off during setup or operation.
The Future of Smarter Maintenance and Repairs
Taking control of my dishwasher’s maintenance has been transformative. Using diagnostic apps and regular inspections, I can often catch issues early before they become emergencies. I encourage you to embrace these tools and document your work thoroughly—photos and checklists can make all the difference when resolving warranty disputes. Remember, empowering yourself with knowledge and proper preparation not only keeps your machine running smoothly but also preserves your peace of mind. Ready to take the next step? Your dishwasher’s longevity depends on it. Have you ever experienced a warranty claim denied because of a small overlooked detail? Let me know in the comments below.
Related Posts
Why Professional Installers Never Use Teflon Tape on Compressions
I remember the first time I watched a seasoned plumber…

Why Professional Installers Refuse to Use Plastic Water Lines
I remember the first time I watched a professional installer…
Why Reusing a Drain Hose Clamp Is a $500 Mistake
I remember the exact moment I realized I had made…