
I remember the exact moment I realized my mistake. It was late one evening when I stepped into my laundry room and noticed an odd musty smell wafting from beneath my floorboards. A quick peek revealed a sinister cause: mold thriving under the floor, hidden behind the drywall. What caused this? A simple gasket error during dishwasher installation that I overlooked initially. That lightbulb moment taught me a hard lesson that I want to share with you today.
Why Overlooking the Gasket Could Cost You Dearly
A tiny slip-up with a gasket might seem harmless at first. But, trust me, it can set off a chain reaction leading to extensive water damage and mold growth beneath your flooring. Mold isn’t just a surface problem; it can infiltrate your home’s structure, posing health risks and causing costly repairs. Early on, I dismissed the importance of proper gasket installation, thinking it was a minor detail. Instead, I ended up dealing with mold remediation, which was a lot more stressful and expensive than taking a moment to double-check my work.
The good news? This is entirely preventable. In our deep dive today, I’ll guide you through the mistake I made and how to avoid it, saving you from my headaches. Proper gasket installation, correct parts, and understanding warranty coverage all play a crucial role. For example, knowing which parts are essential and how to replace them effectively can make all the difference. Want to learn what every dishwasher owner should know? Check out this essential piece on [parts you shouldn’t overlook](https://appliancedoctorz.com/essential-parts-every-dishwasher-owner-should-know-about).
Is DIY Installing Your Dishwasher Actually Worth the Hype?
Many homeowners believe that DIY is the way to go, but missing a gasket seal or using the wrong part can lead to costly consequences. I learned this the hard way when I rushed my installation without reviewing the [common dishwasher parts and their role in proper installation](https://appliancedoctorz.com/common-dishwasher-parts-and-their-role-in-proper-installation). That small oversight let water seep through, pooling beneath the floor, creating the perfect environment for mold.
But don’t worry—by understanding the common pitfalls and taking a methodical approach to parts and installation, you can prevent these issues altogether. If you’re unsure about your current setup or how to proceed, I recommend consulting professionals or thoroughly reviewing warranty policies and installation guides. For detailed guidance, visit [how to troubleshoot dishwasher installation issues](https://appliancedoctorz.com/essential-parts-for-troubleshooting-dishwasher-installation-issues). By being proactive, you protect your home’s health and your wallet.
If you’ve ever faced this kind of problem, or want to make sure you never will, stay tuned. The next sections will walk you through the exact steps to ensure your gasket and installation are perfect—so you won’t have to deal with mold, water damage, or hefty repairs in the future.
Secure the Right Parts Beforehand
Start by gathering all essential gasket components. Think of the gasket as the seal of a treasure chest; missing or mismatched parts risk water leaks. Refer to this guide to verify you have the correct gasket and related components. I once rushed a job without checking, leading to a flood that took days to clean up.
Prepare Your Workspace and Dishwasher
Clear the area and turn off power and water supplies. Use a level to ensure your dishwasher is correctly aligned—an uneven base causes stress on seals and may lead to gasket failure. During my first installation, I overlooked leveling, which caused persistent leaks and an eventual gasket blowout.
Remove the Old Gasket Carefully
Use a flat-head screwdriver or plastic prying tool to gently lift the old gasket from its seat. Be cautious to avoid scratching or damaging the groove—any imperfection here can compromise the new seal. I once nicked the groove, which caused the new gasket to sit unevenly and leak within weeks. Replacing damaged seats is explained in this resource.
Lubricate for Smooth Installation
Apply a light coat of silicone-based lubricant along the gasket’s lip. This makes installation easier and reduces the risk of tearing. Think of it as applying soap when fitting a new glove; it slips on smoothly without strain. Once, I skipped this step and accidentally tore the gasket, leading to water seepage.
Position the New Gasket Precisely
Align the gasket evenly around the door or rim, ensuring it sits snugly in the groove. For tight spaces, use a plastic applicator or your fingers to press it into place gradually. During my latest project, I took my time to ensure complete evenness, preventing gaps that could cause leaks.
Double-Check Your Work
Rotate the door slightly to ensure the gasket is seated evenly all around. Look for any twists or folds—these can cause improper sealing. Once, I overlooked a twist, resulting in a leak during the first cycle, which I fixed by re-seating the gasket properly. See this guide for more tips on proper gasket seating.
Test the Seal
Run a short cycle with the door slightly ajar to observe for leaks. Check around the gasket for any water escape. In one instance, I discovered a small leak during testing, prompting me to re-seat the gasket more carefully. Monitoring the seal after installation prevents messy surprises later.
Inspect and Maintain Regularly
Periodically check the gasket for cracks, tears, or debris. Cleaning it with a damp cloth extends its lifespan. Remember, a well-maintained gasket is your home’s first defense against water damage and mold. During routine checks, I replaced a gasket due to age, preventing leak-related mold growth under the floor.
Get Professional Help When Needed
If uncertainties arise, or the gasket continues to leak despite your efforts, contact professionals. Use this page to find qualified technicians who can ensure a flawless installation, saving you time and preventing future damage.
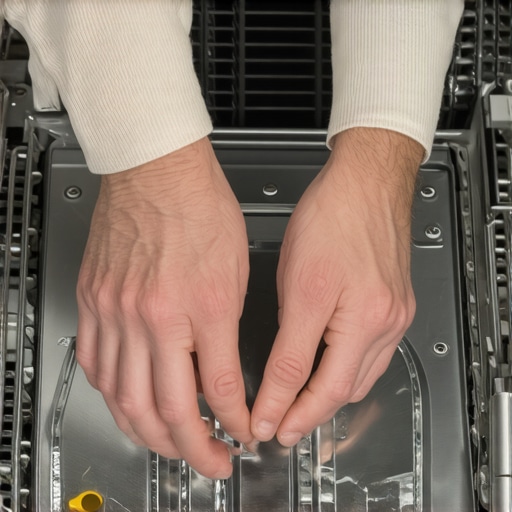 Even experienced homeowners often believe that choosing the right dishwasher and following the basic installation instructions is enough to avoid future problems. However, the reality is far more intricate. Many get trapped in misconceptions about how parts relate to warranty coverage or the true scope of proper installation. For example, some assume that as long as the dishwasher runs initially, everything is fine—forgetting that minor mistakes during installation can invalidate warranties or cause long-term damage. In fact, understanding detailed nuances in parts selection and installation procedures can save you hundreds, if not thousands, by preventing avoidable issues.
One myth I frequently encounter is the idea that all dishwasher parts are interchangeable or universal. This is false. Different models have specific manufacturer-designed parts, and using generic replacements can lead to leaks, void warranties, or even damage the entire unit. The subtleties here involve recognizing which parts are covered by warranty and which are not. For instance, most warranties don’t cover damage caused by improper part installation or inferior components. You can check which parts are covered by warranty by visiting this resource to ensure you’re making informed choices.
Furthermore, many homeowners overlook the importance of compatibility between parts and the installation environment. A common mistake is ignoring how the water inlet valve or drain hose must match specific dimensions or fittings. Even small mismatches can cause leaks or improper drainage, which over time fosters mold growth and structural issues. A detailed understanding of these intricacies comes with experience—experience that professional installers develop but DIYers may lack.
Now, let’s tackle a sophisticated question that often stumps even seasoned DIY enthusiasts:
Why does using the wrong installation gasket or ignoring manufacturer guidelines invalidate warranty claims, even if the unit works initially?
This hinges on the legal and technical definitions of proper installation. Manufacturers specify strict procedures; deviations—like using incompatible gaskets or non-approved sealants—almost always void warranty protection. Errors here could lead to undetected leaks, water damage, and mold, which might not be covered if your warranty is voided due to improper installation. Studies from the Consumer Product Safety Commission emphasize the importance of precise installation to ensure safety and warranty adherence. You can learn more about understanding warranty policies at this guide.
Another critical nuance involves the role of proper testing after installation. Many skip or rush the leak test, which is disastrous. Even tiny undetected leaks can seep behind walls and floors, creating hidden mold colonies. Mastering the detailed steps of testing and maintenance is a skill honed over time and vital for long-term appliance health.
In essence, grasping these subtle distinctions transforms your approach from reactive to preventative. It’s about more than just installing a dishwasher; it’s about understanding the complex relationship between parts, warranty terms, and installation precision. Proper knowledge shields your investment and ensures a healthier, safer home.
Have you ever fallen into this trap? Let me know in the comments. To avoid these pitfalls, stay informed, double-check your parts, and always follow manufacturer instructions meticulously.Ensuring your dishwasher operates flawlessly over time depends heavily on the right tools and proactive maintenance routines. I’ve found that investing in quality equipment and knowing the proper methods can extend your machine’s lifespan significantly. For instance, a digital multimeter isn’t just for electricians; it’s invaluable for diagnosing faulty wiring or sensors in household appliances. I personally recommend a high-precision multimeter like the Fluke 117 because of its reliability and user-friendly interface, which makes troubleshooting straightforward even for amateurs. Additionally, a good set of plastic pry tools can prevent damage when removing old gaskets or panels, saving you money and hassle. Regularly inspecting parts such as inlet filters or spray arms with a soft brush and a toothpick allows early detection of calcium deposits or blockages—issues that significantly impair performance. To stay ahead of potential problems, I schedule biannual check-ups using these tools, which have consistently prevented costly repairs. Predicting where maintenance is heading, I believe smart diagnostics and IoT integration will soon enable our appliances to alert us of issues before they arise, making maintenance a matter of routine checks rather than emergency repairs. So, how do I maintain my dishwasher over time? I incorporate a combination of manual inspections guided by detailed checklists and the use of diagnostic tools to monitor performance metrics. For example, routinely testing water flow and temperature with specialized sensors ensures optimal cleaning and energy efficiency. It’s worth noting that understanding parts like the water inlet valve or spray arm and their wear patterns can save you from unexpected breakdowns; details can be found at [this resource](https://appliancedoctorz.com/when-to-replace-dishwasher-parts-for-optimal-performance). Drip a small amount of food-grade lubricant on the gasket seals periodically, and replace worn parts promptly—this proactive approach minimizes leaks and mold growth. Remember, tools such as a multimeter and the necessary replacement parts, when used correctly, empower you to troubleshoot like a pro. I encourage you to try calibrating your sensors using a digital multimeter this weekend, and you’ll be amazed at how much longer your dishwasher can run smoothly—saving time and money in the long run.
Lessons That Changed My View on Maintenance and Installation
– I used to believe that a simple gasket was just a minor component, but I realized that overlooking it can lead to mold, damage, and costly repairs. That lightbulb moment taught me to scrutinize every part during installation, no matter how insignificant it seems.
– Understanding that warranty coverage often depends on correct installation and proper parts selection was a game-changer. Many warranty claims fail because homeowners unknowingly use incompatible components or ignore manufacturer guidelines.
– I learned that proactive inspection and maintenance can prevent disasters. Regularly checking seals, aligning parts properly, and testing for leaks save me from unexpected breakdowns and mold issues.
– The importance of using the right tools and resources cannot be overstated. Investing in proper diagnostics and familiarizing myself with manufacturer manuals helped me troubleshoot effectively and extend my dishwasher’s lifespan.
Tools and Guides That Make a Difference in Dishwasher Care
– My go-to resource is this comprehensive guide to essential dishwasher parts. It ensures I select the correct components and understand their role in preventing leaks.
– For warranty nuances, I rely on this detailed explanation of warranty policies. It helps me make informed decisions and avoid costly pitfalls.
– When troubleshooting installation issues, this resource on proper parts fitting guides me through proper assembly, minimizing the risk of future leaks and mold growth.
– My DIY toolkit includes a high-quality multimeter and plastic pry tools, which I use regularly to detect hidden problems early, saving money and stress.
Seize the Moment and Take Control of Your Dishwasher’s Future
Remember, timely maintenance, correct parts, and attentive installation are your best defenses against water damage and mold. I encourage you to invest in the right tools, stay informed, and never underestimate the power of proactive care. Your dishwasher’s health directly influences your home’s safety and your peace of mind. Are you ready to inspect your own setup and apply these lessons today? Share your experiences or questions below—I’d love to hear how you’re taking charge of your appliance safety.
Related Posts
The Fix for a Dishwasher Door That Won’t Stay Latched
I remember the frustration vividly—grabbing a quick dinner, loading the…
Why You Should Never Use Silicone to Seal a Dishwasher Leak
It was a morning like any other when I noticed…
How to Fix a Wobbly Top Rack in Five Minutes
Ever opened your dishwasher and immediately regretted it because the…