
Never underestimate how a simple mistake with water supply connections can turn your weekend into a flooded mess. I learned this the hard way when I was trying to tighten a loose water inlet pipe and ended up with water everywhere—my kitchen floor, my nerves, and a big headache. That moment was a real eye-opener, revealing just how crucial the right tool is for securing a compression fitting properly. If you’ve ever struggled with leaks or wondered whether your water supply connection is secure enough, you’re not alone. Today, I promise to share the secret weapon that made my DIY repairs easier and more reliable—saving me from future disasters.
Mastering the Proper Tool for Tightening Your Water Supply
Is Cheap or Universal Fittings Actually Worth the Hype?
Early on, I made a costly mistake: I thought I could save a few bucks by using generic tools and fittings. Big mistake. Using the wrong wrench or trying to tighten parts without the right grip often results in either over-tightening (cracking the fitting) or under-tightening (causing leaks). According to industry experts, using the appropriate tool not only reduces the risk of damage but also ensures a tight, waterproof seal. Choosing the correct tool might seem trivial, but it’s one of those small details that make or break your repair. If you’re still relying on pliers or adjustable wrenches from your toolbox, it’s time for an upgrade. Switching to a dedicated, properly sized compression fitting wrench has changed the way I approach repairs — and it might do the same for you. Want to learn exactly which tools are worth investing in? Check out this guide on selecting the right parts for dishwasher installation. Now, let’s dive into how to choose and use this game-changing tool to keep your water connections tight and leaks at bay.
Secure Your Water Supply Connections Step-by-Step
When you’re installing or repairing your dishwasher, ensuring a tight and leak-free water connection is crucial. I remember a time when I rushed through the process with a standard adjustable wrench and ended up with a leak that soaked my kitchen floor. That messy lesson underscored the importance of using the correct specialized tool for compression fittings.
Start by turning off the water supply to avoid floods. Use a dedicated compression fitting wrench that matches the size of your pipe or fitting. Unlike a generic adjustable wrench, this tool provides a firm grip without slipping, reducing the risk of over-tightening or damaging the fitting. Picture it like using a tailored glove instead of a one-size-fits-all mitt.
Identify the Correct Tool Size
Measure the diameter of your pipe or fitting with calipers or refer to the manufacturer’s specifications. Choosing the right size wrench prevents marring the fitting surface. I once mistakenly used a larger wrench which caused dents, making future leaks inevitable. Double-check before applying force for a snug fit.
Hand-Tighten Before Using the Tool
Start by tightening the nut by hand, ensuring the components are properly aligned. Then, use the wrench to give it an additional quarter-turn. Do not overdo it—the goal is to create a watertight seal without cracking the fitting. Remember, unlike plumbing connections that require multiple turns, compression fittings typically need just a firm, controlled turn.
Apply Consistent Pressure
Turn the wrench steadily, avoiding jerky movements. Think of it as tightening a screw: steady, even pressure prevents deformation. I once used quick, forceful turns, which caused a crack, leading to my original flood. Instead, focus on smooth operation, checking for leaks afterward.
Test and Adjust
After securing the connection, turn the water back on slowly. Observe for leaks over the next few minutes. If you notice even a slow drip, gently tighten the fitting a bit more. Conversely, if you see damage or cracking, loosen slightly and tighten again with less force. This iterative process ensures durability and prevents damage.
Consistently using a dedicated compression fitting wrench tailored to your pipe size guarantees a reliable, leak-free connection. When you follow these steps, you avoid common pitfalls like over-tightening, which can be as destructive as under-tightening.
For more details on selecting the right parts and avoiding premature repairs, visit this comprehensive guide. Proper tool use is essential for maintaining your dishwasher’s performance and warranty coverage, especially when considering long-term performance as outlined in key maintenance checks.Many homeowners operate under assumptions about dishwasher installation and warranty coverage that can lead to costly mistakes. Contrary to popular belief, not all parts labeled as OEM or universal are equally reliable, and relying on generic fittings can compromise your appliance’s performance and warranty. It’s a common myth that installing a dishwasher is a straightforward task; in reality, improper installation—such as misusing incompatible parts or neglecting to follow manufacturer guidelines—can void your warranty and cause long-term damage.
Why Do Most People Overlook the Nuances in Installation and Parts Selection?
A significant oversight is assuming that all parts and installation procedures are plug-and-play. Experts emphasize that selecting the right components involves understanding the specific model requirements, water pressure compatibility, and material durability. For instance, using inexpensive or incompatible water supply hoses might save money upfront but can lead to leaks, mold, or even appliance failure, ultimately voiding your warranty. According to a study by industry safety boards, improper parts or installation errors are among the leading causes of appliance malfunctions and warranty claims, highlighting the importance of precise part selection and proper setup.
Another common misconception is that warranties cover all repair costs. This is far from true. Many warranties exclude damages caused by wrong installation, misuse, or neglecting recommended maintenance routines. For example, ignoring signs of hard water deposits can deteriorate internal parts faster, resulting in breakdowns that aren’t covered under warranty. Regularly inspecting parts like the filter, spray arms, and inlet valves and replacing them before failure not only enhances performance but also ensures warranty validity. Check out this guide to know when to replace dishwasher parts for optimal longevity.
This leads to an essential question for advanced users: How can I preemptively identify installation or part issues that might void my warranty?
One effective strategy is meticulous documentation. Keeping records of the installation process, serial numbers, photos, and receipts can be invaluable during warranty claims or service disputes. Additionally, understanding the terms and limitations of your warranty—accessible through this comprehensive resource—can help you avoid pitfalls. It’s also advisable to perform routine maintenance and inspections, especially of critical components like water inlet valves and gaskets, which are prone to wear and tear. Neglecting these can lead to leaks or breakdowns that might not be covered and, worse, could damage your entire system.
In conclusion, the key to maximizing your dishwasher’s lifespan and warranty coverage lies in understanding the nuanced differences in parts quality, installation precision, and maintenance routines. Don’t fall into the trap of thinking that all parts are interchangeable or that warranty protections are all-encompassing. By investing time in proper installation and regular inspections, you protect your appliance and your investment. Remember, a well-maintained dishwasher not only saves you money but also keeps your kitchen running smoothly. Have you ever fallen into this trap? Let me know in the comments.Maintaining your dishwasher’s peak performance requires more than just occasional cleaning; it demands investing in the right tools and adopting best practices that stand the test of time. As a DIY enthusiast, I personally swear by a few specific pieces of equipment that have transformed my repair and maintenance routines. One essential tool I’ve found invaluable is the multi-function digital torque screwdriver. Unlike standard screwdrivers, this device allows me to precisely apply the correct torque when tightening components like water inlet valves or spray arms, preventing over-tightening which can cause costly damage. The digital readout provides real-time feedback, giving me confidence that each connection is secure without risking cracks or leaks. For cleaning around delicate sensors or tight spaces, I prefer a set of precision plastic pry tools. These are gentle on sensitive parts but sturdy enough to remove panels or filters without damage. Regularly cleaning parts like the filter or spray arms not only extends the lifespan of the appliance but also helps sustain warranty coverage, especially if you document your maintenance process, aligning with tips from this guide.” 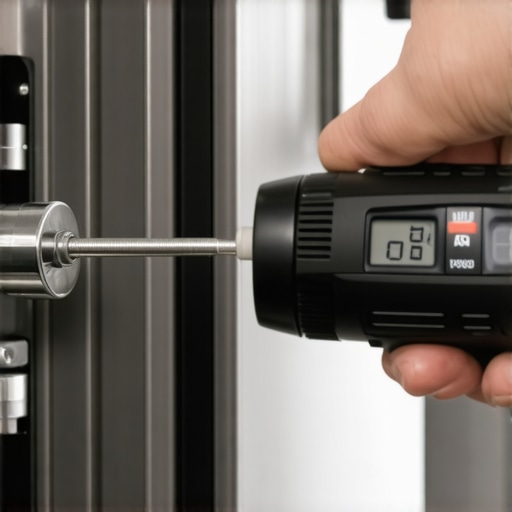 Through consistent use of these tools coupled with scheduled inspections, I’ve significantly reduced emergency repairs. Looking ahead, I believe that integrating smart diagnostic devices — like leak sensors that connect with your smartphone — will become standard, allowing proactive maintenance rather than reactive fixes. To keep your dishwasher running smoothly and preserve your warranty, I recommend developing a routine that includes annual parts checks and calibration using reliable measurement tools.
How do I maintain [long-term dishwasher performance]? Regular calibration of internal sensors and checking water pressure levels are crucial. For instance, ensuring your water pressure stays within manufacturer-recommended ranges prevents undue stress on internal components, which can void warranty coverage if neglected. Remember, using specialized tools like a pressure gauge or a calibrated torque screwdriver isn’t just for professionals; investing in these makes DIY repairs safer and more effective. For more detailed strategies, consider reviewing this comprehensive resource. In the future, I anticipate these smart tools will offer even greater insights, allowing homeowners to detect issues early and extend their appliances’ lifespan. Until then, prioritizing the right tools and maintenance routines is your best bet for keeping your dishwasher humming for years.
Lessons Only Experience Can Teach About Installing Dishwasher Water Lines
- One of my biggest mistakes was rushing to tighten connections without a dedicated compression fitting wrench. That oversight cost me hours of cleanup and a lesson in patience I won’t forget. Now I know that having the right tool isn’t just about convenience—it’s about safeguarding my home from leaks and damage.
- I used to underestimate the importance of proper part selection. Relying on generic fittings seemed economical until I faced constant drips. Investing in quality, manufacturer-recommended components has saved me countless headaches and preserved my warranty coverage.
- Regular inspections and maintenance became a game-changer. A quick check of water hoses and fittings every few months detects issues early, preventing major failures and extending the life of my dishwasher. It’s all about staying ahead of problems, not just fixing them after they happen.
- Understanding the fine details—such as water pressure compatibility and correct tightening techniques—empowered me to handle repairs confidently. Knowledge is the best tool in my DIY arsenal, making maintenance safer, easier, and more effective.
- Documentation proved invaluable when dealing with warranty claims. Keeping records of part purchases, installation dates, and photos has been a lifesaver during service inspections, ensuring I can prove proper installation and avoid unnecessary costs.
Tools and Resources That Make All the Difference
- The top guide on selecting the right parts helped me avoid inferior fittings that compromise performance. Knowing exactly what to look for saves time and money.
- My trusted toolkit includes a precision torque screwdriver to prevent over-tightening and damage, and a set of specialized compression wrenches tailored to specific fittings. These tools ensure reliability and peace of mind.
- Keeping up with proper installation routines and maintenance routines documented in comprehensive guides helps me stay on track and avoid costly mistakes that could void my warranty.
- Smart leak sensors and water pressure testers are future-facing tools I plan to incorporate, making proactive maintenance easier and catching issues before they become emergencies.
Time to Take Action and Protect Your Investment
Remember, the key to a long-lasting, leak-free dishwasher connection isn’t just about buying the right parts—it’s about proper installation, ongoing maintenance, and understanding your equipment. Your kitchen’s safety, your warranty coverage, and your peace of mind depend on these small but critical steps. Take charge now: invest in quality tools, follow expert advice, and document your process. Your future self will thank you for these wise moves. What’s the first step you’ll take to improve your dishwasher’s water connection today? Share your plans below!
Related Posts
The Critical Reason to Flush Your Water Lines Before Installation
It was a morning like any other, until I watched…

5 Mistakes Professional Installers See DIYers Make Weekly
I still remember the first time I installed a dishwasher…
The Mounting Mistake That Ruins New Kitchen Cabinets
I remember the moment vividly—standing in my kitchen, watching my…