
Ever had a dishwasher trip your breaker the moment it starts a cycle? Or noticed that your new unit runs but leaves you with constant electrical hiccups? I used to brush off these little sparks—literally and figuratively—thinking it was just normal appliance behavior. But one frustrating morning, my dishwasher wouldn’t just refuse to start; it kept tripping the entire house’s power. That was my lightbulb moment. It dawned on me that the issue wasn’t just the appliance but the way it was connected.
The Hidden Power Problem You Might Overlook
Turns out, a lot of homeowners make a critical mistake when installing major appliances like dishwashers. They assume plugging it into any nearby outlet will do, ignoring the electrical setup behind the scenes. The truth is, your dishwasher, especially high-tech or smart models, requires a dedicated circuit. Without it, you’re not just risking frequent breaker trips; you’re potentially damaging the appliance and compromising your home’s safety.
Are You Wasting Money on the Wrong Wiring?
Early in my learning curve, I installed my dishwasher without a dedicated circuit. I thought, “What’s the big deal?” Well, that mistake led to constant resets and, worse, voiding certain parts of my warranty—something I later learned could have been avoided. Proper installation isn’t just a technical requirement; it’s your safeguard against unexpected repairs and losses.
Industry experts emphasize that dedicated circuits prevent overloads and ensure appliances perform optimally. A comprehensive guide on why modern units need their own circuit covers this vital aspect in detail. Not doing so can lead to issues like reduced lifespan and increased energy consumption.
So, if you’ve faced inexplicable power trips or if your new dishwasher seems to struggle right from the start, it might be time to revisit your electrical setup. Making sure your appliance has its own dedicated circuit can be the difference between peace of mind and ongoing frustration.
Next steps? We’ll walk through how to properly set up this crucial connection and what pitfalls to avoid. But before that, let’s clear up some common doubts and fears…
Secure a Dedicated Circuit for Your Dishwasher
Start by locating your main electrical panel and identifying the circuit breaker responsible for the kitchen outlets. Turn off the power before proceeding to avoid any risk of shock. Think of this step like turning off a water valve before fixing a leak—safety first.
Remove the panel cover carefully and check if there’s an existing breaker labeled for the dishwasher or kitchen outlet. If not, you’ll need to install a new breaker. When installing a dedicated circuit, it’s like setting a private lane exclusively for your dishwasher, preventing overloads from other appliances.
Choose the Right Wire and Breaker
Use a wire gauge suitable for your dishwasher’s wattage—typically 14 or 12 gauge. The wire should be rated for the circuit’s amperage, such as 15 or 20 amps. Remember, thicker wire (lower gauge number) can handle more current—similar to how bigger pipes carry more water without pressure drops.
Pick a breaker that matches the wire’s capacity and your local electrical codes. Not selecting the proper breaker is like using the wrong size fuse—your system won’t be protected, risking electrical fires or damage.
Connect the Wiring Properly
Strip the wire ends using a wire stripper, exposing about 3/4 inch of copper. Connect the black (hot) wire to the breaker terminal, the white (neutral) wire to the neutral bus bar, and the ground wire to the grounding bar. Secure each connection tightly—loose connections are like loose bolts on a car wheel, leading to dangerous vibrations or failure.
Ensure that the wires are neatly organized inside the junction box to prevent pinching or abrasion. Think of this step as organizing cables behind a TV—tidiness prevents future headaches and hazards.
Test Before Finalizing
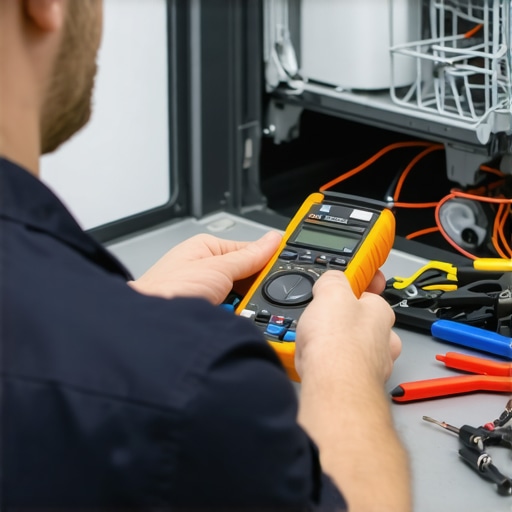
Before closing the panel, double-check all connections. Turn on the breaker and test your wiring with a multimeter or outlet tester. Confirm that the voltage is correct—around 120 volts in most homes. If readings are off, revisit your connections or consult a professional. This testing ensures your setup is safe and ready for your dishwasher’s power needs.
Connect the Dishwasher to the Dedicated Circuit
Use a UL-listed disconnect box or junction box to connect the dishwasher’s power cord to your wiring. Follow the manufacturer’s instructions precisely, matching wires to their designated terminals. Think of this connection like plugging into a dedicated power strip—only it’s built into your home’s wiring, providing reliable power delivery.
Secure all connections with wire nuts and ensure no exposed copper is visible. Insert the wires into the box without bending the conductors excessively. Once connected, you’ll have peace of mind knowing your dishwasher has a stable, dedicated power source, reducing the risk of tripping breakers or damaging parts.
Final Checks and Safety Tips
After installation, turn the breaker back on and test the dishwasher. Observe for any unusual noises, flickering lights, or error codes. Record the serial number and keep documentation of your wiring setup—this can be useful if future warranty claims arise. Remember, working with electrical systems can be dangerous; if you’re unsure, contact a licensed professional through this contact page.
Proper wiring isn’t just about compliance; it’s about safeguarding your home and extending your appliance’s lifespan. Ensuring your dishwasher runs on its own circuit reduces risks, improves performance, and keeps your household safe from unexpected electrical issues.
For more detailed insights or assistance, consider reviewing common dishwasher parts and their installation or consulting expert advice on troubleshooting installation issues.
Many homeowners assume that once their dishwasher is installed and running, their job is done. However, there are significant nuances and common misconceptions that can affect your appliance’s performance and warranty coverage. For instance, a widespread myth is that using generic replacement parts won’t impact your warranty, but in reality, using non-approved parts can void your coverage and lead to costly repairs. Experts emphasize that only manufacturer-approved parts should be used, as detailed in this guide on dishwasher parts.
One frequent oversight is the belief that the quality of water doesn’t influence dishwasher longevity. Many overlook that hard water minerals can cause buildup in spray arms and heating elements, ultimately leading to premature failure. A study by the Water Quality Association confirms that untreated hard water accelerates appliance wear, underscoring the importance of proper water conditioning—something often ignored by DIY enthusiasts.
For advanced installers, neglecting the significance of a dedicated electrical circuit is a costly mistake. Not only does this violate electrical codes, but it also risks damaging other household circuits. Ensuring your dishwasher has a dedicated, properly wired circuit is crucial, and skipping this step is a trap many overlook. Proper wiring, including selecting the correct wire gauge and breaker size, is discussed comprehensively in this installation resource.
A common question from experienced DIYers is whether they can diagnose warranty issues themselves. While troubleshooting small problems can be manageable, diagnosing complex parts—such as the control board or heater assembly—requires specialized tools and expertise. Misdiagnosis can lead to unnecessary part replacements, which might not be covered under warranty, especially if the cause was installation errors. Refer to this expert advice on warranty diagnosis.
Remember, trying to cut corners or ignoring these advanced considerations can reduce your warranty coverage and lead to expensive repairs. Always double-check that your installation complies with local codes, use the right parts, and understand the nuances of water and electrical connections. Do you think you’ve fallen for any of these misconceptions? Let me know in the comments below!
Keeping It Working: Essential Tools for Maintenance and Troubleshooting
Maintaining your dishwasher’s optimal performance over time requires the right tools and a proactive approach. Personally, I recommend investing in a high-quality multimeter, such as the Klein Tools MM6000, because it allows you to accurately check electrical components like thermostats and control boards, saving time and preventing unnecessary part replacements. Additionally, a spray arm cleaning kit, which includes a specialized nozzle and adjustable brush, can effectively remove mineral deposits and ensure even water distribution, significantly improving cleaning results and extending the lifespan of parts. I also keep a digital torque wrench on hand; many installation-related issues stem from over-tightening connections, and a torque wrench helps apply precise pressure, maintaining seal integrity without damaging components.
As the industry advances, automation and diagnostic apps are becoming more prevalent. Tools like the GE Dishwasher Diagnostics App, compatible with smartphones via Bluetooth adapters, enable remote troubleshooting, providing step-by-step guidance and real-time data. These smart diagnostics can identify issues like faulty sensors or clogged filters quickly, reducing downtime and repair costs. In my experience, combining traditional instrumentation with these emerging technologies offers a comprehensive maintenance strategy that adapts to modern appliances.
Thinking ahead, I foresee increased integration of AI-powered diagnostics and IoT connectivity in dishwasher maintenance routines. Future models may self-report issues proactively, and apps might suggest maintenance schedules tailored to usage patterns. Staying current with these trends will empower homeowners and technicians to keep appliances running smoothly for years to come.
How do I maintain my dishwasher over time?
The key to long-term performance is regular inspection and cleaning. I recommend scheduling quarterly checks of the spray arms, filters, and door seals, which can accumulate debris and mineral buildup. Using a vinegar-based descaling solution every six months can prevent hard water deposits, a common cause of wear in heating elements and spray systems. Always verify that parts like door hinges and racks move smoothly; lubrication with silicone spray can prevent squeaks and corrosion. For detailed guidance on components that require periodic attention, visit this resource.
Remember, maintaining your dishwasher is not just about troubleshooting when problems arise; it’s about implementing a proactive routine. Using precision tools and scheduled care reduces the risk of costly repairs and preserves warranty coverage. If you’re unsure about specific procedures, don’t hesitate to contact professionals through this page for expert advice.
Ready to elevate your maintenance game? Try scheduling a complete spray arm overhaul with a dedicated cleaning kit this weekend. It’s a simple step that can significantly improve wash quality and prevent future issues. Incorporate these tools and habits today to ensure your dishwasher stays in top shape for years to come.
What I Wish I Knew When I First Installed My Dishwasher
One crucial lesson I learned the hard way was the importance of dedicated circuits. Initially, I was tempted to plug my new dishwasher into a shared outlet, thinking it would be fine. That oversight led to frequent breaker trips and an eventual headache. It took me months to realize that appliances like dishwashers demand their own power lane to operate safely and efficiently. Turning this mistake into a learning moment transformed my approach to installation and saved me from costly repairs down the line.
Tools and Resources That Changed My Routine
Over time, I discovered that having the right tools makes all the difference. My multimeter from Klein Tools helps me verify proper wiring, while a quality spray arm cleaning kit keeps mineral deposits at bay. Additionally, consulting industry-specific guides like this trusted resource gives me confidence during maintenance tasks. These tools and references are my secret weapons for keeping my dishwasher running at peak performance.
Keeping the Spark Alive: A Personal Motivation
Taking ownership of my dishwasher maintenance has not only extended its lifespan but also boosted my confidence in handling household projects. Every time I successfully troubleshoot a minor issue or perform routine cleaning, I remind myself that proactive care beats reactive repairs. Embracing this mindset encourages me to stay informed and empowered. If you’re ready to tackle your appliance with a renewed sense of purpose, start today by scheduling that spray arm cleaning or checking your wiring connections. Every small step adds up toward a smoother-running home.
Related Posts

How to Verify Your Professional Installation Receipt for Insurance
It was a moment of quiet panic that finally made…
Why Your Installer Skipped the Drain Hose High-Loop
I remember the exact moment I learned about the importance…

The Critical $10 Part for Any Professional Installation
I remember the moment clearly—standing in my kitchen after a…