
Ever had that lightbulb moment where you realize fixing your dishwasher is actually within your reach? I remember the first time I tried to swap out a faulty spray arm. I was sweating bullets, worried I might damage something or worse, void my warranty. It hit me then—there’s a real sense of empowerment in understanding which parts you can safely replace yourself, and which ones are better left to the pros. Today, I want to share how you can confidently perform simple repairs and maintenance on your dishwasher without risking that precious protection plan.
Unlocking the Power of Self-Servicing Your Dishwasher
Many homeowners shy away from DIY fixes, fearing they’ll cause more harm than good. But here’s the thing—most basic parts like filters, spray arms, door seals, and inlet valves are designed to be accessible and replaceable by anyone willing to learn. Knowing exactly which parts you can swap yourself saves money, time, and often extends the lifespan of your appliance. The more I learned about dishwasher parts, the more I realized how many small issues I could handle without calling in help. If you’re curious about the specific parts that are usually safe to tackle, check out our guide on essential dishwasher parts. It’s a treasure trove of info that demystifies what each component does and how to maintain it.
What Common Mistakes Could Void Your Warranty?
Early on, I made the mistake of trying to replace a door latch without disconnecting the power — which almost led to a short circuit. That was a wake-up call. It’s crucial to follow proper procedures, like unplugging your appliance before any repair, and knowing exactly which parts are covered under warranty. Many folks overlook the fine print, risking voiding protection plans for simple fixes. To avoid making costly missteps, I recommend reviewing your warranty policies and understanding what’s covered. You can learn more about protecting your coverage in our detailed article on maximizing your dishwasher warranty.
In the next sections, I’ll guide you through the specific parts you can swap yourself, what tools you’ll need, and how to do it safely. Whether it’s replacing a worn-out gasket or cleaning out a clogged filter, getting comfortable with these basic tasks can save you hundreds. So, if you’ve ever wondered, “Can I really do this myself?”—stick around. We’re about to turn you into a confident DIYer, ready to tackle common issues without risking your warranty or calling a tech every time.
Detach Power and Water Supplies Before Starting
Always disconnect the dishwasher from electricity by unplugging it or turning off the circuit breaker. Then, shut off the water supply to prevent leaks or water damage. I learned this the hard way when I tried to replace a worn-out inlet valve without disconnecting the power—the appliance sparked, and I felt the heat of the moment. This initial safety step ensures you can work confidently without risking electrical shock or flooding.
Gather the Necessary Tools and Parts
Prepare a Phillips-head screwdriver, pliers, a bucket, and replacement parts like filters, spray arms, or door seals. Refer to essential dishwasher parts to identify which components you’ll need. Having these ready avoids unnecessary interruptions and guarantees you’re using the right equipment for each task.
Remove the Inner Panel and Access the Components
Unscrew and carefully take out the inner panel or access covers, usually located at the bottom or sides of the dishwasher. Think of this step as opening the hood of a car—you need clear access to the engine. During my first attempt, I underestimated how snugly some screws were fitted, which made disassembly a bit messy but ultimately instructive. Keep track of screws and small parts for reassembly.
Identify and Remove the Faulty Part
Inspect components such as spray arms, filters, or seals for cracks, clogs, or wear. Use pliers to detach the part carefully, twisting or unfastening as needed. For stubborn clips or connectors, gentle leverage is key. For example, I once faced a stuck spray arm; applying a bit of WD-40 eased removal without damage. Always check if the part is under warranty or if you should consider replacement options from installation tips to ensure compatibility.
Install the New Component Correctly
Align the new part precisely, ensuring all clips or connectors snap securely into place. Double-check the orientation—spray arms, for instance, must rotate freely without interference. During my last swap, I took my time aligning the gasket properly, which prevented leaks during the next cycle. Refer to the manufacturer’s instructions or repair guides for specific guidance.
Reassemble and Test Safely
Reattach the inner panel, tighten screws, and restore the water and power supply. Before running a full cycle, it’s wise to run a short test wash to check for leaks or abnormal noises. If anything seems amiss, turn off the machine immediately. I once missed a loose hose connection, which caused a minor flood—so take your time during reassembly. This step confirms your repair is successful without risking damage to your kitchen or warranty coverage.
Many DIY enthusiasts assume they understand dishwasher parts and warranties without scrutinizing the finer details. However, misconceptions about parts compatibility, improper installation procedures, and warranty coverage can lead to costly mistakes. Let’s delve into the nuanced truths that often get overlooked, and why mastery of these details can save you time, money, and frustration.
Why Not All Replacement Parts Are Created Equal
It’s common to see homeowners purchasing generic or aftermarket parts, believing they’ll work just as well as OEM components. But in my experience, the compatibility and quality of these parts vary widely. For instance, a cheap gasket might seal initially but degrade quickly, causing leaks down the line. Always cross-reference part numbers and consult trusted sources, like essential parts resources to ensure you’re selecting durable, compatible components. Using incompatible or low-quality parts might seem cost-effective upfront, but it can void your warranty and lead to repeated failures.
Common Installation Pitfalls That Undermine Performance
Many assume that installing parts is straightforward—just replace and go. But nuanced steps like proper sealing, correct torque application, and following manufacturer instructions are often neglected. A particular trap is overtightening fittings, which can crack plastic components or strip threads, leading to leaks or electrical issues. For example, when replacing inlet valves, ensuring the fitting is snug but not overly tight is crucial. Consulting detailed guides, such as DIY installation guides, can help prevent such errors that often go unnoticed until they cause major problems.
What About Warranty Coverage That Most Don’t Know About?
One of the biggest myths is that any repair done by the homeowner automatically voids the warranty. The truth is, most warranties specify that damage caused by improper repair or non-approved replacement parts void coverage. So, installing a part incorrectly or choosing an incompatible component can jeopardize your protection plan. Moreover, some warranties exclude damage caused by hard water scale or improper maintenance. To avoid unexpected expenses, familiarize yourself with your warranty’s fine print by reviewing warranty policies and maintaining detailed records of all repairs. Staying informed saves you from a nasty surprise if a fault occurs after a self-repair attempt.
Let’s also tackle a question that trips up even experienced DIYers:
How can I tell if a part is truly compatible, or if I’ve purchased a mismatch?
This requires careful research. Always check your dishwasher’s model number, serial sticker, and OEM part number before ordering replacements. Manufacturers often update designs, so a part compatible with a five-year-old model might not fit a newer version. When in doubt, contact customer support or consult trusted repair guides to verify compatibility. More than just save money, correct matching preserves your warranty and ensures optimal performance. For in-depth tips, visit seamless installation tips.
Remember, understanding the hidden nuances in parts, installation, and warranty policies isn’t just an academic exercise—it’s essential for long-term appliance health. Being attentive to these details helps you avoid common pitfalls and becomes a mark of true DIY mastery. Have you ever fallen into this trap? Let me know in the comments.
Investing in the Right Tools for Longevity
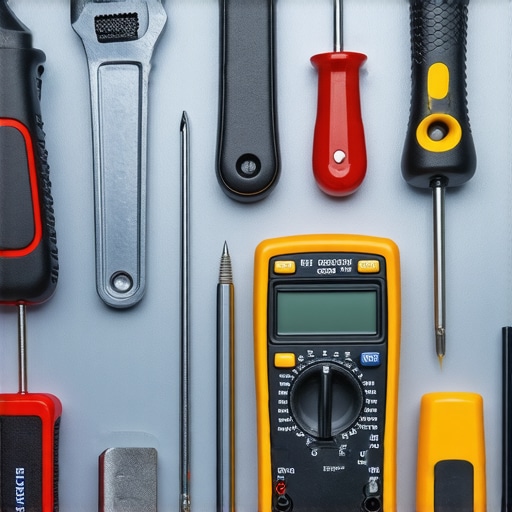
Maintaining your dishwasher doesn’t have to be complicated if you arm yourself with the right tools. I personally swear by a high-quality adjustable wrench, especially when dealing with water supply connections. Its versatility allows me to tighten or loosen fittings without risking damage, which is crucial for long-term performance here’s why. Additionally, a multimeter is invaluable for diagnosing electrical issues—ensuring safety and accuracy. For cleaning delicate components like sensors or circuits, a set of precision screwdrivers with magnetic tips keeps everything organized and prevents stripped screws.
Why Using Proper Equipment Matters
Using the appropriate tools not only makes repairs safer and more efficient but also reduces the risk of costly mistakes. For example, a cheap generic wrench might slip and damage fittings, leading to leaks. Investing in quality gear like a torque wrench ensures that fittings are tightened to manufacturer specifications, preserving warranty coverage and preventing future issues. Remember, always check your manufacturer’s manual to verify the recommended torque levels for your model—over-tightening can crack plastic parts, while under-tightening compromises seals. To stay ahead, I suggest regularly inspecting and cleaning your tools so they’re always ready for minor repairs or maintenance tasks.
Long-Term Results Through Routine Checks
Implementing a regular maintenance schedule is key. I personally set reminders every six months to inspect and replace worn parts like door seals or filters. This proactive approach prevents major malfunctions and keeps the machine operating efficiently learn more here. Using tools like a flashlight and magnifying glass, I examine critical components for cracks or buildup, ensuring subtle issues don’t escalate. Maintaining a clean and dry environment around the dishwasher also prolongs its life and performance. Remember, an ounce of prevention is worth a pound of cure.
Predicting Future Trends in Dishwasher Maintenance
Looking ahead, I predict that smart diagnostics and IoT integration will revolutionize how we maintain appliances. Features like real-time performance monitoring and predictive alerts could become standard, helping identify issues before they affect performance here’s an example. Embracing these tools now can give you a head start and elevate your DIY game. Start by exploring smart sensors compatible with your existing setup, and consider integrating them into your regular maintenance routine.
How Do I Keep My Dishwasher Running Well Over Time?
The key lies in consistent inspections and using the right repair tools. Incorporate a tool like a multimeter into your maintenance kit and familiarize yourself with its functions—it’s simpler than it sounds and can save you hours of troubleshooting. Additionally, keep an eye on your parts inventory, replacing worn components before they cause bigger issues. Want to make your repair process even more efficient? Try using a digital camera to document each step, ensuring you reassemble everything correctly and quickly here’s why documentation helps.”
}
The Hardest Lesson I Learned About parts, installation, warranty, dishwasher
One of my biggest surprises was realizing that not all dishwasher parts are equal in quality or compatibility. I once bought a cheap gasket that looked identical to OEM but failed within months, causing leaks and voiding my warranty. This taught me to prioritize genuine parts and double-check model numbers before purchasing. Also, rushing installation steps without understanding their importance often led to water leaks or electrical issues, emphasizing the need for patience and proper tools. Lastly, reading my warranty fine print was a game-changer; knowing what voids coverage saved me from unnecessary expenses and stress. These lessons, though learned the hard way, are now my guiding principles for DIY repairs and maintenance.
Related Posts
The Truth About Third-Party Dishwasher Racks and Tub Corrosion
I'll never forget the shock I felt when I opened…

The Critical Difference Between Factory and Aftermarket Gaskets
Have you ever been in the middle of a dishwasher…
The Most Reliable Aftermarket Parts for Major Brands
It was a Saturday afternoon when I finally faced the…