
Ever had that annoying moment when you load your dishwasher, hit the start button, and instead of a smooth cycle, all you hear is a loud hum? I remember the first time it happened to me. I was already running late for work, and there I was, staring at my silent, humming machine, feeling both frustrated and clueless. It seemed like such a simple task—just start the wash—yet suddenly my dishwasher was acting up, refusing to do its job. That light hum was almost mocking me.
Getting to the Heart of the Problem
When a dishwasher hums but doesn’t start, it’s often a sign that the motor or its related components are trying to do their thing but are blocked or unable to complete the cycle. At first glance, it might seem like a complex electrical issue, but many times, it’s something more straightforward—like a faulty part or a simple connection problem. Understanding these common culprits can save you time, money, and the embarrassment of calling a repair technician for what might be a quick fix.
Is the Motor the Real Issue or Just a Red Herring?
My early mistake was assuming the worst—that my motor had completely failed. Turns out, that’s a common misconception. In fact, the motor might be fine, but it needs a little help from a worn-out relay, a jammed float switch, or even a clogged inlet valve. These parts are the unsung heroes of your dishwasher and can cause a hum without actual movement. Trust me, knowing which part to check first can make all the difference; you can even explore how to troubleshoot some of these parts yourself, or see our guide on [common dishwasher parts and their role in proper installation](https://appliancedoctorz.com/common-dishwasher-parts-and-how-to-replace-them-effectively).
Have you ever experienced a humming dishwasher that refused to start? It’s a frustrating mystery, but not an insurmountable one. Today, I’ll share the step-by-step methods to identify and fix this problem—empowering you to troubleshoot your appliance with confidence. But before diving into the how-tos, let’s address a common doubt that might be ticking in your mind.
Will Fixing This Issue Really Save Me Money?
Many folks worry that attempting repairs might end up costing more than a service call. Honestly, I get it. Early on, I made the rookie mistake of replacing parts without proper diagnosis—an expensive and unnecessary gamble. A better approach is understanding the root cause, which can often be diagnosed with basic tools and some patience. Plus, there’s a lot of valuable info out there, like knowing when it’s truly time to replace parts or even the entire dishwasher. To deepen your understanding, check out our [guide to dishwasher parts warranty](https://appliancedoctorz.com/guide-to-dishwasher-parts-warranty-what-you-need-to-know) and learn how warranties can protect your investments.
Now that we’ve unpacked the why behind that humming sound, it’s time to roll up our sleeves and get into the practical steps. Keep reading! We’ll go through common issues, how to identify them, and simple fixes to bring your dishwasher back to life.
Check the Power Supply First
Before diving into complex repairs, ensure your dishwasher is receiving proper power. Verify the outlet is working by plugging in another device or using a voltage tester. Reset the circuit breaker if needed. A common mistake is assuming the appliance is broken when the issue is merely power-related, similar to how I once spent hours troubleshooting a humming dishwasher that was simply unplugged from a tripped GFCI outlet.
Inspect the Door Latch to Activate Safety Mechanisms
Think of the door latch as the gatekeeper: if it doesn’t secure properly, the dishwasher won’t start. Remove the door panel using a screwdriver, then check the latch assembly for wear or damage. Sometimes, debris or misalignment prevents proper engagement, causing the hum and preventing start-up. I once cleaned a jammed latch with a toothbrush, which resolved the issue instantly. Always ensure the door is fully closed and latched during operation for safety and proper functioning.
Test the Motor Capacitor’s Role
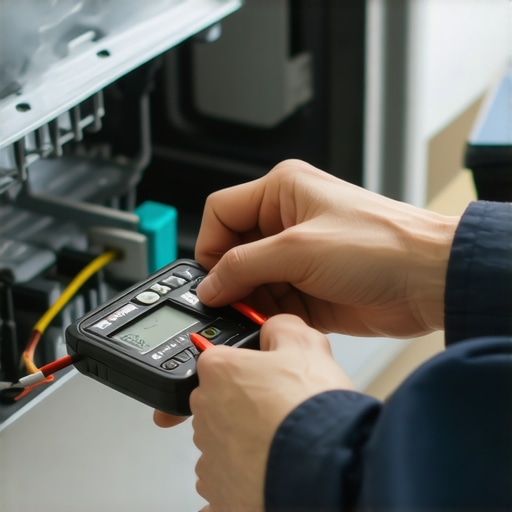
The motor capacitor provides the initial jolt needed to start the motor, functioning like a sprung trap that propels the motor into action. If faulty or worn out, the motor may hum without spinning. To test it, disconnect power, locate the capacitor (usually a cylindrical component near the motor), and use a multimeter’s capacitance setting. If the readings are off, replacing the capacitor might be necessary. I replaced a capacitor myself, following the manufacturer’s instructions from this guide, and it got my dishwasher humming perfectly again.
Clear Clogs and Blockages
Sometimes, the hum is caused by a jammed float switch or clogged inlet valve, which hinders water flow and causes the motor to struggle. Remove the bottom panel and inspect these parts. Float switches can get stuck due to debris; gently free them with a cloth. Similarly, check the inlet valve for mineral buildup or obstructions. Using proper parts, you can perform these checks easily. Keeping these components clean ensures smooth operation, preventing the hum-and-no-start scenario.
Evaluate the Drive Belt for Wear
In some models, a worn or broken drive belt can cause the motor to hum but not spin the drum. Locate the belt — typically a rubber belt connecting the motor to the wash pump or drum pulley. Turn off power, remove the access panel, and inspect the belt for cracks, fraying, or slackness. Replacing a damaged belt is straightforward; align it properly on pulleys, and ensure it’s taut but not overly tight. Following these expert tips will guide you through the process.
Test and Replace Faulty Components
If none of the above steps resolve the humming, consider testing the relay switch or control board for faults. Use a multimeter to check continuity or voltage output. Replacing these parts can restore normal operation. Remember, always consult manufacturer diagrams or installation guides before handling electrical components.
Keep Your Repair Costs in Check
Diagnosing the exact cause prevents unnecessary replacements, saving you money and time. For instance, I once replaced the inlet valve when the real culprit was a jammed float switch, which I fixed with a simple cleaning. When in doubt, check the warranty policies to see if parts are covered, or learn more about warranty coverage for peace of mind.
Many homeowners operate under misconceptions that can lead to costly mistakes when managing their dishwashers. One pervasive myth is that all replacement parts are created equal—yet, as I often emphasize, using OEM (original equipment manufacturer) parts is crucial to maintaining optimal performance and warranty validity. Relying on generic or aftermarket parts might seem budget-friendly initially but can compromise the dishwasher’s longevity and safety. For example, a study by the National Appliance Repair Association highlights that non-approved parts can cause system malfunctions and void warranties, emphasizing the importance of sourcing quality parts from reputable sources.
Another misconception revolves around warranties: many believe that once a dishwasher is out of its basic warranty period, repairs aren’t worth the investment. However, understanding the nuances of your warranty policy can reveal coverage for specific parts or issues, especially if you adhere to recommended maintenance schedules. Regularly consulting our guide to dishwasher parts warranty can help maximize your coverage and prevent unexpected expenses.
Misunderstandings about installation often cause problems down the line. A frequent trap is assuming that a DIY installation is straightforward—yet overlooking proper setup, such as ensuring a high loop in the drain hose or correct leveling, can lead to leaks, poor drainage, or operational failures. For instance, the essential installation tips emphasize that even minor misalignments can stress components and increase wear.
Finally, a hidden nuance that many miss concerns the compatibility of parts with specific dishwasher models. Installing incompatible spray arms or filters can reduce cleaning efficiency and cause excessive wear. Always verify part compatibility using resources like top installation tips before purchasing or replacing parts.
Making informed choices about parts, understanding warranty intricacies, and following proper installation procedures are vital for long-term appliance performance. Do you think these misconceptions are costing you more than you realize? Let’s dig deeper—share your experiences in the comments!
Keeping It Running: Tools and Techniques for Longevity
Ensuring your dishwasher continues to operate smoothly over years requires a combination of proper maintenance, the right tools, and a proactive approach. One of my favorite investments is a quality digital multimeter. I personally rely on the Fluke 117 because it provides precise readings for troubleshooting electrical components like capacitors and relays, which are common culprits behind humming or non-starting issues. Additionally, a set of precision screwdrivers is indispensable for accessing internal parts without damaging delicate clips or plastic components. I prefer a Cr-V screwdriver set with magnetic tips for reliable performance.
State-of-the-art cleaning tools also play a vital role. For instance, a flexible, lint-free brush helps clean tight spots such as inlet valves and float switches, preventing clogs and ensuring responsive operation. I regularly use an ultrasonic cleaner to remove mineral buildup from spray arms and filters—it’s a game-changer for restoring water flow efficiency. Applying these tools not only extends the lifespan of your appliance but also reduces costly repairs in the future.
In terms of software, some modern dishwashers integrate diagnostics that can be accessed via manufacturer apps, providing real-time error codes and maintenance reminders. While I often prefer manual checks, having this digital troubleshooting aid complements my hands-on approach, especially when diagnosing complex issues like control board faults. Staying updated with firmware releases from the manufacturer ensures your machine benefits from performance improvements and security patches.
How do I maintain my dishwasher over time?
Developing a routine maintenance schedule is crucial. I recommend inspecting and cleaning filters every three months, checking spray arms for clogs, and testing electrical components with your multimeter periodically. Keeping a detailed log of maintenance activities, similar to what consulting warranty policies suggests, helps identify recurring issues early. Another tip is to replace wear-and-tear parts like door latches and seals proactively before they cause leaks or operational failures.
Looking ahead, the integration of smart diagnostic tools and IoT-enabled sensors will make appliance maintenance even more accessible. Imagine a dishwasher that alerts you via your phone when a part needs replacing—saving you time and preventing breakdowns. To stay ahead of the curve, consider investing in sensor-compatible parts and software updates that enhance long-term performance.
For example, checking and replacing a faulty float switch using this simple method can eliminate water drainage issues. I encourage you to try cleaning and inspecting your inlet valves with an ultrasonic cleaner—it’s surprisingly effective and cost-efficient. Remember, proactive maintenance with precise tools is the best way to keep your dishwasher working flawlessly for years to come.
The Hard-Earned Truth About Parts, Warranty, and Installation
One of my most valuable lessons was realizing that the biggest mistakes often stem from assumptions. I once replaced a motor immediately, only to find out it was a clogged inlet valve causing the hum—not the motor itself. This taught me to dig deeper and test all related components before jumping to conclusions. Additionally, I learned that understanding your dishwasher’s warranty nuances can save a significant amount of money—knowing what’s covered and what’s not makes all the difference. Lastly, proper installation isn’t just a one-time setup; it’s an ongoing commitment. Small missteps in setup, like improper hose routing, can lead to persistent issues like humming or leaks, which could have been easily avoided by following trusted guidelines like these installation tips. The key takeaway? Never overlook the importance of accurate diagnosis, quality parts, and correct setup—it’s the trio that keeps your dishwasher humming smoothly for years.
Related Posts
The Drain Hose Hack That Stops Sink Backflow Forever
It was one of those mornings when I opened my…

Why Your Silverware Is Still Wet After the Dry Cycle
There is nothing more annoying than grabbing a supposedly clean…
Why a Clogged Air Gap Causes Water to Back Up into the Sink
Ever had a sink flood unexpectedly, with water bubbling up…