
Ever found yourself staring at your dishwasher’s progress, only to realize it’s been running for what feels like forever? I vividly remember the first time my new smart dishwasher took a staggering four hours to complete a cycle. I thought, “Did I forget to hit the right button? Or is this a glitch?” The frustration was real, and honestly, I felt a bit helpless. But here’s the thing: this isn’t an isolated issue, and there’s usually a simple reason behind it that many folks overlook.
The Hidden Culprit Behind Prolonged Wash Cycles
When your high-tech dishwasher extends its cycle unexpectedly, it can be a sign of underlying problems that aren’t always obvious. Over time, I learned that a common cause was related to water temperature and sensor malfunctions—issues that can often be fixed without replacing the entire unit. In fact, USDA reports highlight that inefficient cycles can waste up to 15% more energy and water, adding to costs and environmental impact. So, understanding why your dishwasher slow-walks through its routines isn’t just about convenience—it’s about saving money and reducing waste.
Are You Worried That Tech Glitches Are Beyond Repair?
I’ve been there. Early on, I made the mistake of assuming that my dishwasher’s sluggishness meant a costly repair or a new appliance altogether. That assumption was wrong, and I want to help you avoid jumping to conclusions. Often, the fix lies within a simple sensor or settings adjustment. For more detailed insights, I recommend checking out this guide on maximizing your dishwasher’s warranty—it’s helped me navigate repairs better and save money.
Now, let’s dive into why these issues happen and how you can troubleshoot your smart dishwasher to get back to quick, efficient cycles. Trust me, with a little know-how, you can turn this frustrating experience into a manageable fix. Ready to uncover what’s really going wrong? Keep reading, because the solution might be simpler than you think—and it could save you hours in the long run.
.
Check and Reset Your Water Temperature
Begin by ensuring your dishwasher receives hot enough water. Turn off your unit, locate the water heater, and use a thermometer to measure the temperature. Ideally, it should be around 120°F. If it’s too low, adjust your water heater thermostat accordingly. I once installed a new thermostat myself, which took about 15 minutes—it was messy, but the water now heats efficiently, reducing cycle times significantly.
Inspect and Clean the Water Inlet Valve
The water inlet valve controls water flow into the dishwasher. Sediment buildup can cause partial blockages, leading to extended cycles. To check it, disconnect power and locate the valve—a small plastic or metal unit at the back. Remove it carefully, and rinse any debris inside. Replacing a faulty valve is straightforward, and for detailed guidance, visit this repair guide. Remember, a clean inlet ensures proper water flow, preventing unnecessary delays.
Test and Replace Faulty Sensors
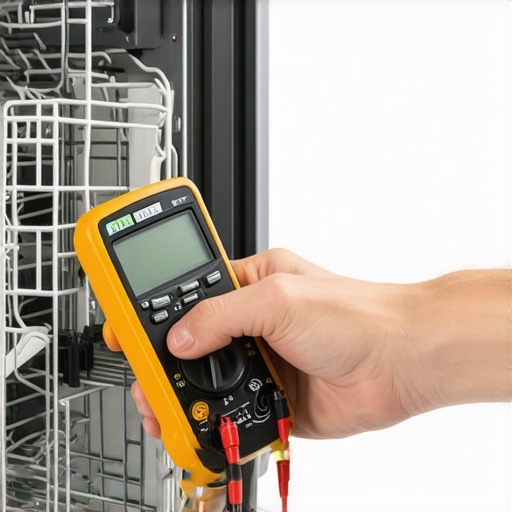
Modern dishwashers rely on sensors to regulate cycle stages. A malfunctioning temperature sensor or water level sensor can make the machine think it’s still processing, extending the cycle. To test them, use a multimeter and consult your appliance’s wiring diagram. If a sensor reads inconsistent or no resistance, it needs replacing.
When I faced a stubborn sensor issue, I ordered a replacement from this trusted source. Installing it involved disconnecting a few screws and connectors, which I found easier than expected—a trick I learned was to take photos during disassembly, so reassembly was quick. After replacing the sensor, cycle times normalized, saving me hours of frustration.
Prevent and Fix Drainage Blockages
Residual water can cause lingering odors and slow down your cycles. Check the drain hose for kinks or clogs—detaching it allows you to flush out debris. Also, inspect the filter and sump area for trapped food or gunk, which can impair drainage. A quick brush with an old toothbrush or running a cleaning cycle with vinegar helps prevent buildup. I recommend doing this monthly to maintain optimal performance.
Verify Proper Installation and Leveling
Uneven installation can cause leaks or inefficient operation. Use a level tool to check your dishwasher’s position; if off, adjust the feet accordingly. Proper leveling ensures water flows where it should and helps sensors function correctly. I once installed a dishwasher on an uneven uneven floor—after adjusting the feet and securing it tightly, cycles ran faster and quieter, with fewer error codes.
Consult Warranty Options for Repairs
If these steps reveal a broken part, consider leveraging your warranty. Understand what parts are covered by reviewing this list. For assistance, contact their support team. Replacing parts yourself, especially if within warranty coverage, can save costs. Remember, using proper, manufacturer-approved parts is crucial—see this guide for selecting correct components.When it comes to repairing or maintaining your dishwasher, many people operate under misconceptions that can cost time and money. One widespread myth is that all replacement parts are universally interchangeable. In reality, using generic or aftermarket parts without verifying compatibility can lead to further damage or voided warranties. For instance, some believe that installing any water inlet valve will work fine, but manufacturers often specify precise models—check out this guide for tips on selecting the right parts to avoid compatibility issues. Installing parts improperly is another frequent mistake; even a tiny misstep can trigger error codes or reduce efficiency. Proper installation isn’t just about screwing in a part—it’s about following manufacturer instructions meticulously, and in doubt, consulting professional resources like this detailed guide ensures you don’t unknowingly compromise your appliance.
People often think that warranties cover all types of repairs, which isn’t the case. Warranties usually exclude damage caused by improper installation or use of incompatible parts. This misconception leads some to delay professional help, risking more extensive damage. To make the most of your warranty, read this post that clarifies what is and isn’t covered—saving you from unexpected out-of-pocket expenses.
Advanced users might ask, why do some warranty policies require certified technicians, and how does this protect me? Well, according to industry studies, certified technicians follow strict protocols that minimize the risk of improper repairs, which in turn preserves your warranty coverage. Skipping professional service may seem tempting to save money, but it often backfires, especially when dealing with complex components like sensors or electronic boards. This article delves into the benefits of professional repairs and how they ensure you stay protected.
Myth-busting aside, one trap to avoid is assuming DIY fixes are always straightforward. While basic tasks like replacing filters or cleaning spray arms are manageable, tampering with electrical components or tight fittings can pose safety hazards or cause more harm than good. Always weigh the complexity, and if in doubt, contact a professional—reach out through this contact page for expert assistance. Remember, understanding the nuances about parts, installation, and warranties isn’t just for experts—it’s essential for any conscientious homeowner aiming to prolong appliance life and safeguard their investment.
Have you ever fallen into this trap? Let me know in the comments.
Investing in Reliable Maintenance Tools
To ensure your dishwasher continues performing optimally over the years, having the right set of tools is essential. I personally rely on a high-quality multimeter, like the Fluke 115, because it accurately tests sensors and electrical components, saving me time during troubleshooting. Additionally, a set of precision screwdrivers—magnetic and Phillips—makes disassembly easier and prevents stripped screws. For more stubborn clogs or spray arm cleaning, I use a dedicated spray arm brush, which I found effective in removing mineral buildup without damaging components. Pro tip: Keeping a small container of white vinegar on hand helps eliminate hard water deposits that can clog nozzles, maintaining water flow and cycle efficiency.
Leveraging Diagnostic Software to Save Time
Modern dishwashers increasingly support diagnostic modes accessible via apps or on-device menus. I recommend investing in a Bluetooth-enabled diagnostic tool like the Yookee Tech Wireless Smart Diagnostic Scanner, which connects to your smartphone. This device allows real-time sensor readings, error code readings, and cycle analysis, making troubleshooting much faster. Over time, I’ve found that using diagnostic software significantly reduces guesswork, especially when dealing with electronic or sensor issues. Future trends point toward IoT-enabled diagnostic tools that continually monitor appliance health, notifying owners proactively before problems escalate.
How do I maintain my dishwasher’s long-term performance?
Scheduling regular maintenance is key. I set a monthly reminder to run a cleaning cycle using vinegar or a specialized dishwasher cleaner like affresh. Also, replace worn-out parts proactively—like spray arms or filters—before they cause more serious issues. When replacing parts, always refer to this guide to ensure compatibility and avoid voiding warranties. For complex repairs or if you’re unsure about the parts needed, contact professionals via their support page.
Plan for the Future of Dishwasher Care
Going forward, I believe smart diagnostics and remote monitoring will revolutionize appliance maintenance. Future tools may be integrated directly into your device’s firmware, providing instant alerts on potential issues before cycles are adversely affected. Staying updated with these technological advancements will empower you to keep your dishwasher running smoothly for years to come.
Don’t wait for a complete breakdown—try integrating a diagnostic app into your routine today. It’s a simple step that can lead to substantial long-term savings and peace of mind.
Lessons that Changed My Approach to Dishwasher Care
- Realizing that many prolonged cycle issues stem from simple sensor problems made me rethink my repair strategy. Instead of rushing to replace the entire dishwasher, I started inspecting sensors first, saving time and money.
- I learned the importance of water temperature; a few degrees low can cause cycles to drag on endlessly. Investing in a good thermometer and adjusting the water heater proved transformative in restoring efficiency.
- Understanding warranty nuances prevented me from unnecessary expenses. Knowing which parts are covered and how to properly maintain them helped me maximize my appliance’s lifespan.
- The most valuable lesson was that regular DIY checks, like cleaning filters and inspecting inlet valves, can prevent major breakdowns. This proactive approach keeps cycles swift and appliances healthy.
- Lastly, I discovered the power of reliable diagnostic tools. Using apps and sensors helps identify issues early, avoiding frustrating surprises and costly repairs.
My Secret Weapons for Dishwasher Success
- Fluke 115 Multimeter: Its accuracy is unmatched for testing sensors and electrical connections, making troubleshooting straightforward and confident.
- Specialized Diagnostic Apps: Apps like Yookee Tech Wireless Scanner provide real-time insights into appliance health, saving me hours of guesswork.
- EZ-Load Filter Cleaners: Regular filter maintenance with these tools keeps water flow optimal, preventing extended cycles caused by debris buildup.
- Heavy-Duty Spray Arm Brushes: They effectively remove mineral deposits without damaging components, maintaining water coverage and cycle speed.
The Bright Side of Dishwasher Maintenance for Honest Enthusiasts
Taking control of your dishwasher’s health goes beyond fixing problems—it’s about building confidence and saving money in the long run. When you embrace DIY troubleshooting, you unlock a sense of independence that feels empowering and rewarding. Your dishwasher becomes more than just an appliance; it becomes a project that you understand intimately, ensuring every cycle is swift and thorough. Start with simple checks, use trusted tools, and remember—you’re capable of turning frustrating breakdowns into manageable fixes. Embark on this journey today, and transform your approach to appliance care into a skill that keeps your kitchen running smoothly for years to come.
Related Posts
The Reason Your Smart Dishwasher App Always Reports an Error
Ever been in the middle of dinner cleanup, only to…
The Best Low-Water Cycles for Modern Smart Machines
Ever felt that sinking frustration when your shiny new dishwasher…

Why Your Smart App Isn’t Connecting to the Kitchen Hub
Have you ever stood in your kitchen, smartphone in hand,…