
Ever had that moment when you’re unloading your dishwasher and notice the lower rack is dragging or wobbling? It’s almost like your dishwasher is mocking you with every squeaky, uneven slide. I remember the first time it happened to me—I reached in, trying to retrieve a plate, only to have the whole rack come out of its tracks, leaving me frustrated and vowing to fix it myself. That lightbulb moment spun into a project that I thought was going to be complicated and expensive, but turned out to be surprisingly straightforward. Today, I want to share how replacing those pesky wheels on your dishwasher’s lower rack can be tackled with simple tools and a little know-how.
Why Replacing Dishwasher Rack Wheels Is More Important Than You Think
Your dishwasher’s lower rack is a workhorse—holding all those pots, pans, and dishes we use daily. Over time, the wheels that let it glide smoothly start to wear out or break. When this happens, you might notice the rack sticking or, worse, falling out during a cycle. Not only does this hinder your cleaning process, but it can also lead to further damage and costly repairs if ignored. Replacing these small parts enhances the lifespan of your dishwasher and keeps your kitchen running smoothly. Alongside this, making sure you’re using the right parts can even help you maximize your warranty benefits—something I learned early on after a costly misstep. You can check out how to maximize your warranty coverage for dishwasher parts to ensure you’re making the best choices for repairs.
Could This Issue Actually Be Worth Fixing?
Before rushing out to buy a new dishwasher, consider the cost-effectiveness of a simple wheel replacement. It’s a small fix with big benefits, especially if your unit is still under warranty or if the wheels are the only thing failing. A common mistake I made initially was attempting to fix the entire rack assembly when only the wheels needed replacing, which cost me unnecessary time and money. If you’re worried about tackling such repairs, know that most of these steps are manageable for DIY enthusiasts. Plus, knowing exactly what to look for helps you avoid common pitfalls—like installing the wrong parts that void warranty coverage. For more tips, see our guide on selecting the right parts for your dishwasher’s maintenance.
Now, let’s get into how you can replace those wheels with confidence and get your dishwasher sliding like new again. Trust me, it’s easier than you think—and it could save you a ton of money in the long run.
**Do you have a stubborn, squeaky, or wobbly dishwasher rack that’s been nagging at you? Let’s solve it together with this simple DIY fix!**,
Remove the Dishwasher Lower Rack
Begin by carefully pulling out the lower rack from your dishwasher. To avoid damaging the track, gently tilt and lift the rack at a slight angle. When I first did this, I realized the rack was heavier than expected—so I supported it with both hands and took my time to prevent dropping or scratching the tub.
Identify the Damaged Wheels
Inspect Each Wheel Carefully
Examine all wheels on the lower rack, looking for cracks, wobbling, or missing pieces. Often, only one or two wheels are broken or worn out, but others may be close to failure. I found that the front left wheel was cracked, causing the wobble I’ve been noticing for weeks. This step is crucial to ensure you’re replacing only what needs replacing, saving time and money. For a comprehensive list of warranty-covered parts, visit this guide.
Order the Correct Replacement Wheels
Use your dishwasher’s model number to select the right wheels. Compare the old wheels with the available replacements—look for identical size, attachment type, and color if aesthetics matter. I recommend consulting this resource to ensure compatibility. Remember, choosing the correct parts can impact your warranty coverage, as explained in this article.
Remove the Old Wheels
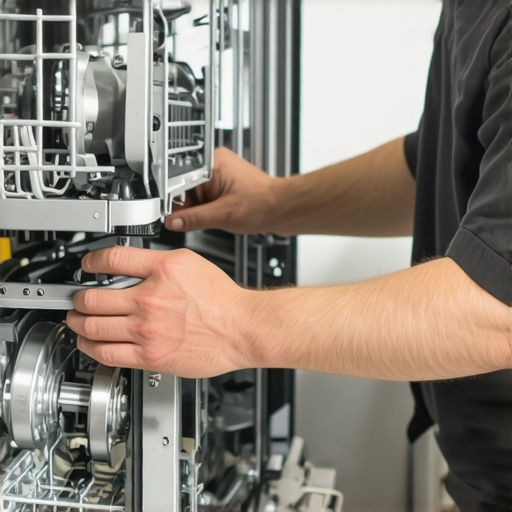
Find the attachment clip or screw holding the wheel in place. Depending on your model, you might need a Phillips screwdriver or a flat-head tool. When I replaced mine, I used needle-nose pliers to pry out the broken wheel gently. Be cautious not to damage the rack frame. If the wheel is held with a clip, carefully compress it and slide the old wheel out.
Attach the New Wheels
Insert the new wheel into the frame or slot, aligning it correctly. Push or clip it firmly until you hear or feel it snap into place. For secured attachment, double-check by gently pulling on the wheel. If it feels loose, re-seat it. Proper installation ensures smooth operation and prolongs the part’s life. To verify your work or troubleshoot similar issues, visit this guide.
Reassemble and Test
Carefully slide the lower rack back into the dishwasher, ensuring wheels align with the tracks. Gently push in until it is fully seated. Run a short cycle with an empty dishwasher to observe the rack’s glide. During my test run, I noticed the rack moved smoothly and silently—much better than before. This step confirms your repair was successful and prevents future issues. For additional tips on warranty claims and maintenance, see this resource.
 Many homeowners assume that warranties cover all repair parts and that following the manufacturer’s guidelines ensures smooth repairs—but in reality, several often-overlooked nuances can trip you up. First, a common misconception is that all third-party replacement parts automatically void your warranty. While some manufacturers insist on original parts, others are more flexible, especially if you use detailed documentation and select quality-compatible replacements. Always consult your warranty policy, as misconceptions here could lead to unnecessary expenses. To verify what’s covered, visit this comprehensive warranty list. Additionally, many believe that installation must be done exclusively by professionals to maintain warranty validity. However, some brands empower DIY enthusiasts with clear instructions and tools, provided you follow safety protocols and use approved parts. For more insights on proper installation, see this guide. The real nuance often lies in understanding your appliance’s specific warranty coverage—most people overlook detailed warranty clauses that exclude damage caused by improper maintenance or non-approved parts. This oversight can cost you your warranty benefits if you’re not careful. A particularly common trap is assuming that the cheapest generic part is always suitable. Cutting costs on parts can lead to premature failure or even damage your unit further, thus unintentionally voiding your warranty. Selecting the right parts, based on your dishwasher’s model and manufacturer recommendations, is crucial; check this resource for guidance. Finally, be aware that many do-it-yourself repairs are common but are not always straightforward. Installing a part incorrectly or failing to follow calibration procedures can lead to malfunctions, which warranties often exclude from coverage. Mastering these nuances not only extends your dishwasher’s lifespan but keeps your warranty intact. Trust me, this subtle yet vital knowledge can save you significant time and money. Have you ever fallen into this trap? Let me know in the comments.
Invest in Precision Tools to Keep Your Dishwasher Running Smoothly
Having the right tools on hand transforms dishwasher maintenance from a daunting chore to an empowering DIY project. I personally swear by a digital caliper for measuring replacement parts accurately, ensuring compatibility, especially when sourcing third-party components. A precision caliper helps avoid installing mismatched wheels or seals, which can cause long-term issues and void warranties. Additionally, a quality Phillips head screwdriver is essential; I prefer a magnetic-tip version to prevent dropping tiny screws into hard-to-reach areas—an experience I’ve had multiple times! These tools might seem basic, but their reliability and accuracy are critical for correct installation and ongoing upkeep.
Keep Your Parts in Top Shape with Proper Cleaning and Inspection
Routine inspections of parts like spray arms, filters, and gaskets prevent minor issues from escalating. I recommend a soft brush and a mild vinegar solution for cleaning mineral buildup—avoiding aggressive chemicals that can damage rubber and plastic. Regularly inspecting parts for cracks or wear means you catch problems early, extending the lifespan of your appliance. Consider maintaining a maintenance log, documenting part replacements and inspections—this practice can be invaluable when warranty claims are necessary, as detailed records support your case and demonstrate proper care, aligning with expert advice from this resource.
Plan for Scalable Repairs and Upgrades in the Future
As your dishwasher ages, anticipate which parts might need upgrading, especially in high-use areas. Investing in modular components or upgrade kits from reputable suppliers can save time and money later on. For instance, upgrading your water inlet valve or sensors before failure becomes critical can keep your dishwasher performing optimally without unexpected breakdowns. Staying informed about the latest parts and repair techniques ensures you’re prepared for future maintenance. Looking ahead, advancements like smart diagnostic tools and IoT-connected sensors are poised to make proactive maintenance more accessible—predicting issues before they manifest physically. Regularly checking manufacturer updates and warranty policies ensures your investments remain protected, as detailed in this article.
How do I maintain my dishwasher’s performance over time?
Routine cleaning, timely part replacements, and using the correct troubleshooting tools are key. I find that scheduling a bi-annual check-up helps catch minor issues before they become major repairs, saving time and money. Advanced diagnostic apps compatible with smart appliances can analyze error codes and suggest specific parts requiring attention—saving guesswork. For the ambitious DIYer, trying out a method like adjusting the water softener settings can improve cycle performance significantly, especially if you notice mineral deposits or scaling. Don’t forget to reference manufacturer warranty policies to ensure your efforts don’t inadvertently void coverage—detailed insights are available at this link. For example, reprogramming your dishwasher’s firmware using manufacturer-approved tools may extend the machine’s lifespan further while maintaining warranty validity.
Remember, the right tools and proactive maintenance are your best allies in keeping your dishwasher performing reliably. Equip yourself with a precision caliper and gentle cleaning supplies, and stay informed about upgrade options. Over time, these practices will save you frustration and expenses, ensuring that your appliance works seamlessly for years to come. Start today by inspecting your water inlet valve with a digital multimeter—an easy, effective way to diagnose potential trouble before it disrupts your dishwashing routine!
Lessons That Changed My Approach to Dishwasher Repairs
- Not All Warranty Facts Are Clear-Cut: I realized that manufacturer policies can be nuanced. While many believe using generic parts voids warranties, some brands are more flexible than you think—so always double-check your warranty details. This insight saved me from unnecessary expenses and made me more confident during repairs.
- The Power of Proper Tools: Investing in quality, precise tools like a digital caliper transformed my repair process. Accurate measurements prevented mismatched parts and extended the life of the fix. It’s a small step that makes a huge difference, and I encourage every DIY enthusiast to prioritize their toolkit.
- Routine Maintenance Is a Hidden Goldmine: Regular inspection and gentle cleaning of parts like spray arms and door gaskets keep your dishwasher performing at its best. I learned that early detection of wear can prevent costly damage—saving money and stress in the long run.
- Understanding Your Parts Can Prevent many Mistakes: Knowing which wheels, clips, or seals are compatible with your model avoids installing incompatible replacements that void warranties or cause further issues. Resources like this guide helped me select the right parts with confidence.
- Patience Is Key for DIY Success: Rushing can lead to damaging delicate components. Taking my time, supporting the rack properly, and following step-by-step instructions resulted in a smooth repair cycle. Remember, a calm approach yields the best results, especially when handling tiny clips or fragile wheels.
Resources That Elevate My DIY Game
- Diagnostic Tools from Appliance Doctorz: Their comprehensive troubleshooting guides and recommended tools, like digital calipers and magnetic screwdrivers, are my go-to. They combine reliability with practical advice, making complex repairs manageable.
- Warranty Coverage Insights: The detailed articles on warranty policies (this page) have saved me from costly mistakes, ensuring I use approved parts and procedures that keep my coverage intact.
- Maintenance Checklists: Regular inspections documented with checklists from trusted sources keep my dishwasher in peak condition. Staying proactive prevents surprises and extends appliance lifespan.
- Community Forums and Expert Blogs: Engaging with experienced DIYers has provided practical tips and encouragement. Sites like Appliance Doctorz foster a sense of shared learning that motivates me to tackle repairs confidently.
Empower Your Dishwasher Repair Journey Today
Taking on dishwasher wheel replacements might seem daunting at first, but with patience, the right tools, and informed choices, you’re capable of extending your appliance’s life and saving money. Every successful fix builds your confidence and deepens your understanding—proving that DIY isn’t just about repairs, but about taking control of your home maintenance. Embrace the learning process, consult reliable resources, and remember—each small repair contributes to a smoother, more efficient kitchen experience. Ready to give it a try? Your future self will thank you for taking charge of your dishwasher’s health!
Related Posts
The Case for Braided Stainless Steel Over Plastic Hoses
I remember the moment clearly—my dishwasher suddenly leaked during the…
The Plastic Part That Always Fails on German Dishwashers
It happened on a quiet Tuesday morning. I opened my…
The Benefits of Installing a Water Hammer Arrestor Behind the Sink
It was a morning just like any other when I…