
I walked into my kitchen last Tuesday and thought a wet dog had decided to move into my cabinets. It was that thick, stagnant, swampy odor that hits you right in the back of the throat. I had just finished what I thought was a successful DIY dishwasher installation, and I was feeling pretty proud of myself. The machine was shiny, the dishwasher parts were all brand new, and the cycles were running smoothly. But that smell? It was a visceral reminder of a rookie mistake I am embarrassed to admit I made. I had ignored the high loop. I thought gravity was just a suggestion, not a law of plumbing. Most homeowners don’t realize that the way you route your hose is just as important as the parts you select for installation. Today, I am going to show you how to kill that stench for good with a five-minute fix that costs exactly zero dollars.
That Rotten Egg Smell is Actually Your Sink Water
The problem usually isn’t the dishwasher itself; it is the refuse from your kitchen sink. When you wash your hands or rinse a greasy lasagna pan, that dirty water travels down the drain. Without a high loop, some of that nasty gunk flows right back into your dishwasher’s hose. It sits there. It festers. It creates a microbial party you definitely weren’t invited to. I learned the hard way that why your dishwasher smells like a swamp usually boils down to this one simple geometry trick. If your hose enters the drain or disposal at a downward angle without peaking first, you are essentially inviting the sewer into your wash tub. It is a mistake that can lead to mold issues under your floorboards if the backflow gets bad enough.
Does a simple hose curve really matter that much?
You might be skeptical. I certainly was. I assumed my fancy modern machine had internal valves to handle everything. I even checked my warranty policy thinking I could just call a technician for a repair. Spoiler alert: they won’t cover a bad installation. The reality is that according to the International Residential Code (IRC), a drain hose must be properly elevated to prevent cross-contamination. Without this physical air gap or high loop, siphoning can occur, pulling dirty water back into the machine even when it is off. It is a health hazard, plain and simple. Have you ever noticed a pool of grey, cloudy water sitting in the bottom of your machine after a day of not using it? If so, you are currently living my past nightmare.
Stop the Siphoning Before It Ruins Your Morning
The fix is remarkably simple, and you do not need to be a master plumber to do it. It is all about the critical importance of the high loop. You just need to ensure the hose peaks above the level where it enters the sink drain or garbage disposal. I remember sweating under the sink with a flashlight, realizing that my lazy “straight line” approach was the culprit. By simply anchoring the hose to the underside of the countertop, I stopped the backflow instantly. If you are struggling with this, don’t worry—most people overlook how parts play a role in proper installation until things start to stink. Have you ever opened your dishwasher and been hit by a wave of odor that made you want to order takeout forever? It is time to get under that sink and fix it.
Clear the Path and Trace Your Drain Line
Before you can fix the stench, you need to see what you are working with. Grab a flashlight and clear out the mountain of cleaning supplies under your sink. You are looking for the corrugated plastic tube—the drain hose—that runs from your machine to either your garbage disposal or the sink tailpiece. I remember my first attempt at fixing the swamp smell; I was so focused on buying new dishwasher parts that I didn’t even look at the hose’s path. It was draped across the cabinet floor like a lazy garden hose. When you find it, trace it from the point it exits the cabinet wall to where it connects to the drain. If that hose stays low and then goes up to the disposal, you have a gravity problem. You are basically creating a trap where old sink water can settle and rot. To prevent this, you need to ensure you have the correct hose length for a proper dishwasher installation. If the hose is too short, you can’t create the necessary arc; if it is too long, it will kink and trap debris.
How to Stop Your Drain Hose From Siphoning Dirty Water Back In
The magic height for a high loop is about 32 to 34 inches above the floor, or as high as the underside of your countertop will allow. Think of it like a mountain pass. If the peak of the hose is higher than the entry point to the disposal, the dirty water from your sink cannot climb over the hill to get into your dishwasher. During my second attempt, I tried using a single zip-tie and a prayer. It worked for three days until the tension snapped the tie, the hose flopped down, and I woke up to a kitchen that smelled like a wet basement again. This is why parts to check when installing a dishwasher for long-term performance include more than just the motor or the pump; it includes the fasteners you use to secure the line. 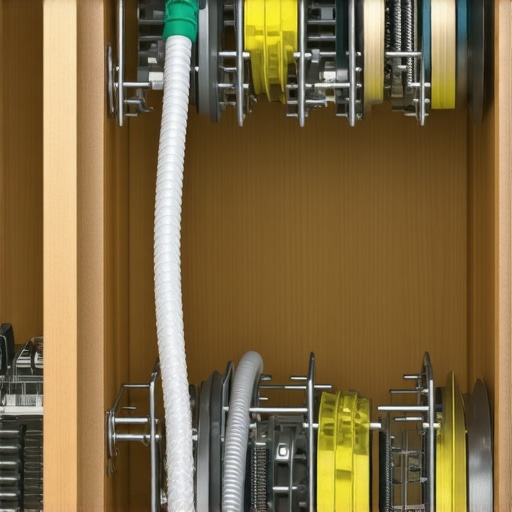
Fasten the Peak to Save Your Floorboards
To do this right, you need a sturdy plastic mounting bracket or a heavy-duty pipe strap. Do not just tape it. Screw the bracket into the cabinet sidewall or the underside of the counter (if it’s wood). If you are dealing with stone, you might need to look into the proper way to secure your machine to quartz countertops using specialized adhesive clips. Once the bracket is in place, pull the hose up so the loop peaks well above the disposal inlet. This simple geometry prevents backflow and is one of those essential parts for troubleshooting dishwasher installation issues that pros never skip. If you notice the hose is resisting, you might need the 2-part that prevents your drain hose from kinking, which is usually a simple plastic guide that holds the curve’s shape. By doing this, you are providing the physical barrier gravity requires to keep your machine clean. You are also installing the 5-part that prevents your kitchen floor from rotting, because a properly routed hose reduces the risk of joint leaks under pressure. When I finally used a real mounting clip instead of my makeshift zip-tie, the difference was immediate. No more cloudy water in the tub, and finally, no more smell. This is the core of how to stop your drain hose from siphoning dirty water back in without spending a dime on a plumber.Most people assume that hiring a professional installer is a magic shield against future headaches. I’ve seen homeowners hand over a check, tuck their receipt into a drawer, and assume they are fully covered. But here is the uncomfortable truth: a receipt doesn’t mean your machine was installed to the manufacturer’s rigid specifications. In my experience, even high-end installers occasionally miss the finer points of how to prepare your kitchen for dishwasher installation. A technician might level the machine and connect the water, but did they check your house’s static water pressure? I’ve found that the difference between a lemon and a faulty installation is often a paper-thin margin of error. If your pressure is too high, you might be slowly blowing out the inlet valve while the warranty clock ticks down. Knowing how to prove your water pressure is too high for your valve can save you hundreds, because if the manufacturer finds evidence of high-pressure damage, they’ll call it a ‘home plumbing issue’ and deny the claim immediately.
Why does your warranty claim fail despite ‘perfect’ maintenance?
It usually comes down to environmental factors you can’t see. For example, the Association of Home Appliance Manufacturers (AHAM) notes that modern energy-efficient cycles depend on precise incoming water temperatures—typically 120°F—to activate detergents effectively. If your water heater is set too low, or if the plumber didn’t purge the line, the machine works twice as hard and results in poor cleaning. I learned that why your warranty claim depends entirely on your water temperature is one of the most common reasons claims are denied. It isn’t a ‘part’ failure; it’s a site failure. If you haven’t checked your tap temp lately, you’re gambling with your coverage. 
The $0 mistake that kills brand-new motors
There is one specific trap that even seasoned DIYers fall into, and it is the most embarrassing service call you will ever pay for. If you just installed a new garbage disposal alongside your dishwasher, you must remember to knock out the plastic plug inside the disposal’s drain port. If you don’t, your dishwasher will try to drain against a solid wall, overheating the pump and potentially blowing a gasket. This is the hidden drain plug that kills your motor during setup. I’ve seen people replace perfectly good essential parts for troubleshooting dishwasher installation issues when the problem was actually a thirty-second task they missed with a screwdriver and a hammer. Even if you paid a pro, always double-check this. It’s worth knowing how to verify your professional installation receipt for insurance purposes if the installer’s negligence caused this kind of damage. Have you ever fallen into this trap? Let me know in the comments. We’ve all had those ‘facepalm’ moments when a complex problem had a dead-simple cause, and sharing them helps the next person avoid a $200 service fee.
The three tools that saved my knuckles
After years of fumbling with standard kitchen pliers and getting soaked in the process, I finally invested in a few specific items that changed my DIY life. If you are serious about avoiding leaks, you need the proper tool for tightening your water supply compression fit. A standard wrench often slips on those delicate brass fittings, but a dedicated flare nut wrench or a small, thin-profile adjustable wrench makes all the difference. I also keep a telescopic inspection mirror in my junk drawer. It sounds overkill until you are trying to see if there is a drip behind the motor without pulling the whole 80-pound machine out of the cabinet. These aren’t just gadgets; they are the baseline for expert advice on dishwasher installation troubleshooting. Whenever I hit a snag, I reach for these instead of a hammer. Dealing with common dishwasher parts and how to replace them effectively becomes a breeze when you aren’t fighting your own equipment.
How do I maintain my machine’s performance for the long haul?
Maintenance isn’t just about cleaning the filter; it is about documentation. I keep a small folder in my kitchen cabinet where I log every deep clean and part swap. This might seem neurotic, but why your warranty claim fails without this specific maintenance log is a reality many homeowners face when a major component dies prematurely. According to the Association of Home Appliance Manufacturers (AHAM), consistent use of high-quality rinse aids and monthly descaling cycles can extend the life of your internal sensors by up to 30%. I personally recommend keeping a small stash of the replacement parts every dishwasher owner should keep on hand, like a spare door gasket or a drain pump seal. If a leak happens at 9:00 PM on a Sunday, you’ll be glad you have a $10 part ready to go. 
Why your next dishwasher will call for help itself
We are entering an era where you won’t have to guess why your machine is beeping. I’ve already started using my phone to listen to the ultrasonic frequencies of my motor to check for bearing wear. Learning how to use your smartphone to diagnose a failing motor is the future of home maintenance. In the next five years, I predict that ‘predictive maintenance’ will be standard, where your dishwasher orders its own replacement filters or gaskets before they even fail. Until then, we have to rely on our own eyes and ears. My best advice? Go check your sump filter right now; if you find a stray cherry pit or a piece of broken glass, you just saved your drain impeller from certain death. It’s a five-second habit that keeps your kitchen dry and your wallet full.
The Expensive Reality of Cutting Corners Under the Sink
I used to think that as long as the water went down the hole, I was a plumbing genius. I was wrong. The most expensive lesson I learned was that what your dishwasher warranty doesn’t cover is almost always the result of a lazy install. If you don’t secure that high loop, you aren’t just inviting smells; you are inviting a denied claim if the motor burns out from backflow. Another lightbulb moment? Realizing that maximizing your dishwasher’s warranty through proper parts selection means using the specific heavy-duty clips designed for your cabinet type, not just whatever is in your junk drawer. Finally, never trust a ‘pro’ blindly; verify their work against the manual because dishwasher parts warranty coverage depends on it.
The Three Non-Negotiables in My Maintenance Kit
You don’t need a massive toolbox, but you do need the right stuff. First, I swear by the proper tool for tightening your water supply compression fit—a dedicated flare wrench will save your brass fittings from stripping. #IMAGE_PLACEHOLDER_E# Second, always keep a small digital thermometer in your kitchen drawer to check that 120-degree water temp; it’s the secret to improving performance and keeping the sensors happy. Lastly, I highly recommend starting a physical logbook. Knowing the critical reason to document your serial number before a repair can be the difference between a free fix and a $400 bill. I trust these tools because they move maintenance from ‘guessing’ to ‘knowing’.
Final Steps to Reclaim Your Fresh Kitchen Air
Fixing that swampy smell isn’t about being a professional; it’s about paying attention to the small physics of your kitchen. By taking ten minutes to ensure seamless dishwasher installation in 2025, you are protecting your home from mold and your bank account from unnecessary repairs. Don’t let a simple hose curve stand between you and a fresh-smelling kitchen. You have the knowledge and the essential parts every dishwasher owner should know about to do this right. Your dishwasher is a workhorse—give it the setup it deserves.
Have you ever spent hours troubleshooting a drain issue only to find that the disposal plug was still inside? Let me know your biggest ‘facepalm’ moment in the comments below!
Related Posts
Stop Over-Tightening: How to Seat a Compression Nut Properly
One afternoon, I leaned under my kitchen sink, ready to…
Stop the Banging: Installing a Water Hammer Arrestor
It was a quiet Saturday morning when I suddenly heard…
The Proper Height for a Sink Air Gap Installation
It was a morning just like any other, until I…