
I was sitting on my couch, finally relaxing after dinner, when I heard it. A low, rhythmic growling coming from the kitchen. It sounded like a disgruntled stomach, but I knew my dishwasher was mid-cycle. I walked over, pressed my ear to the door, and realized my evening was about to get a lot more expensive—or so I thought. That metallic scraping noise is the universal language of a circulation motor crying for help. We rely on these machines to keep our lives running smoothly, but when the ‘heart’ of the appliance starts to fail, it speaks to us in rattles, hums, and shrieks. Today, I am going to help you decipher that language so you can figure out if you are facing a simple fix or a full-scale replacement. Have you ever heard your dishwasher make a sound so scary you immediately ran to pull the plug?
That Grinding Sound Is More Than Just Annoying
It is easy to ignore a little extra noise, but a circulation motor is the literal workhorse of your machine. While the drain pump handles the exit strategy, the circulation motor is responsible for pushing water through the spray arms to actually get your dishes clean. Years ago, I jumped the gun and replaced an expensive control board when the real culprit was just a tiny piece of glass jammed in the motor impeller. I wasted two weeks of my life hand-washing plates because I didn’t listen to the machine. If you are hearing a persistent hum, you might be dealing with the common part that causes a dishwasher to hum but not start, which is often a seized motor bearing.
Is it actually worth trying to fix this myself?
Skepticism is healthy here because modern appliances feel like sealed black boxes. However, identifying the sound is 90% of the battle. You do not need to be a master plumber to know that a high-pitched squeal is a bearing on its last legs. The good news is that many of these components are accessible. You can often find the parts you can swap yourself without voiding your protection, saving you a $200 service call.
Your Ears Are the Best Diagnostic Tool You Own
Every sound tells a story. A grinding noise usually points to a physical obstruction or worn-out bearings, while a loud buzzing might mean the motor is getting power but the internal components are stuck. According to a study by Consumer Reports, mechanical failure is one of the primary reasons consumers replace appliances prematurely, yet many of these issues are solvable with a little patience. I highly recommend learning how to use your smartphone to diagnose a failing motor by recording the sound and comparing it to online databases. Knowing when to replace dishwasher parts for optimal performance is the difference between a machine that lasts five years and one that lasts fifteen. If the noise is localized to the bottom center of the tub, you are likely looking at the motor. In some cases, you can even learn how to swap a noisy motor without removing the whole unit, which is a total game-changer for your weekend plans.
Clear Out the Junk Jamming the Impeller
Think of the circulation motor as the heart of your appliance’s circulatory system. If a stray toothpick or a piece of broken glass gets past the filter, it acts like a stick in the spokes of a bicycle wheel. Before you start ordering expensive replacements, you need to verify the motor can actually spin. I remember a Saturday afternoon where I was convinced my motor was fried because of a low-frequency hum. After pulling the unit and digging into the sump, I found a tiny, hard-plastic bread tie wrapped around the shaft. It took ten seconds to remove but would have cost me $150 to replace the whole unit. You should always learn how to recover a dropped screw from your sump assembly before you start pulling wires, as these tiny stowaways are usually the real villains. If you have reached into the sump and can’t find the culprit, check the impeller blades for chips. A single missing tooth on that plastic fan can cause an imbalance that sounds like a jackhammer.
Does the Motor Even Want to Turn?
If the impeller is clear but you still get a hum, it’s time to check if the motor is ‘seized.’ You can often reach the motor’s cooling fan or the shaft from underneath. With the power disconnected, try to rotate it by hand. If it’s stiff or feels like it’s grinding through sand, the internal bearings are toasted. This is where common dishwasher parts and how to replace them effectively becomes your survival guide. If the motor spins freely by hand but doesn’t start when powered, you might actually be looking at a bad start capacitor rather than a dead motor. Testing this with a multimeter is the gold standard for avoiding unnecessary purchases.
Master the Art of the Under-Sink Access
Most people think you have to pull the whole machine out to touch the motor, but that’s not always true. If you have enough slack in your lines, you can often tip the machine back and work from the bottom. Just ensure you know the proper tool for tightening your water supply compression fit before you start tugging on things. I once forgot to check the slack on my drain line and ended up snapping a plastic connector, turning a simple motor check into a kitchen-wide flood. 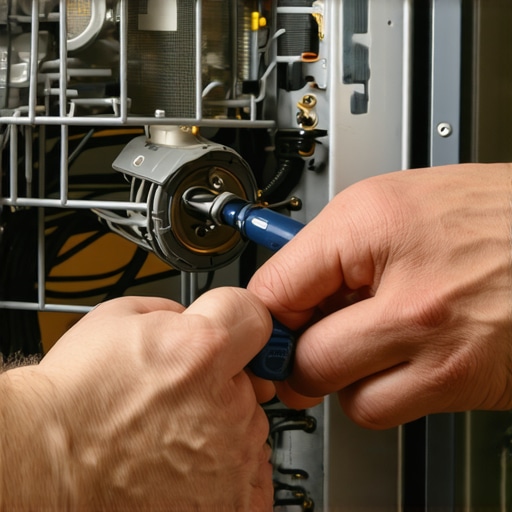
Avoid the Newbie Mistakes During Reassembly
Once you’ve cleared the jam or decided to swap the motor, the way you put it back together determines how long it lasts. For instance, if you are installing a brand new unit, never forget the hidden drain plug that kills your motor during setup. If that plug isn’t knocked out of your garbage disposal, the motor will work against a wall of backpressure, burning itself out in weeks. While you’re under there, it’s also a perfect time to see how to replace a faulty heating element by yourself, since you’ve already done the hard work of gaining access. Dealing with these essential parts every dishwasher owner should know about isn’t just about saving money; it’s about having the confidence that your kitchen won’t turn into a lake while you’re sleeping. Make sure your hose clamps are seated perfectly on the motor housing, or you’ll be dealing with a slow drip that rots your subfloor over the next six months.Beyond the physical assembly, there is a psychological trap many of us fall into: the assumption that a new machine is bulletproof. The truth about those 10-year motor stickers on the door is that they often only cover the physical motor itself, excluding the labor or the peripheral sensors that are far more likely to fail. I have seen homeowners spend hours arguing with customer service only to realize they didn’t understand what your dishwasher warranty doesn’t cover and how to avoid fees. You might think you are protected, but if your installation doesn’t meet the ultra-specific fine-print specifications regarding drainage or electrical supply, you are essentially on your own when the motor starts to squeal.
The Danger of Using Universal Parts on Premium Machines
Many people believe that a hose is just a hose, but in my experience, that is where the ‘oops’ factor usually starts. If you own a high-end European unit, the problem with universal hoses for high-end European models becomes apparent during the first high-pressure rinse cycle. These generic kits often use thinner rubber gaskets that degrade rapidly under the high-heat cycles modern machines use to sanitize. Furthermore, if you haven’t learned how to prove your water pressure is too high for your valve, you might blow a seal and find your warranty claim denied because the ‘house conditions’ exceeded the machine’s design limits. A simple pressure regulator could have saved a $500 repair bill. 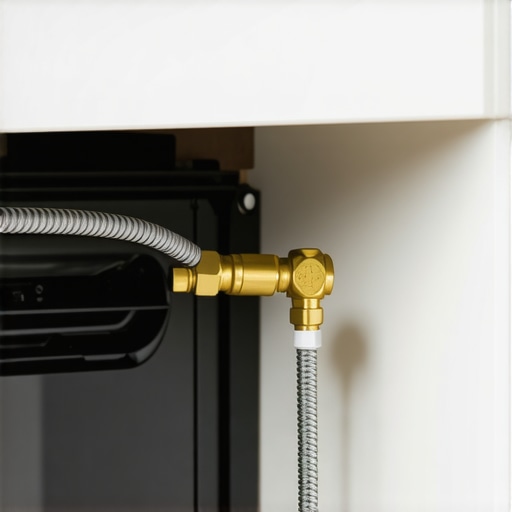
Don’t Trust Every Professional Receipt
Everyone says you must hire a professional to keep your warranty valid, but that is a common misconception. In reality, most manufacturers allow DIY installation as long as you follow the manual and keep records of using essential parts every dishwasher owner should know about. The real risk isn’t the DIY aspect; it’s the lack of documentation. Even a pro can make a mistake, and without a verified installation checklist, you have no leverage when a part fails prematurely. I always suggest understanding dishwasher warranty policies for peace of mind before you even unbox the unit.
Does your water temperature dictate your warranty status?
This is the nuance that separates the pros from the amateurs. Many homeowners assume that as long as the water is running, the machine is healthy. However, why your warranty claim depends entirely on your water temperature is a technical detail that many ignore. According to the Association of Home Appliance Manufacturers (AHAM), most modern detergents require an incoming water temperature of at least 120°F to properly activate enzymes and dissolve fats. If your water heater is set too low, grease accumulates inside the internal motor housing and spray arms. When a technician sees this sludge during a service call, they may label it as ‘poor maintenance’ rather than a part failure, which effectively voids your coverage. Learning how to diagnose dishwasher parts during warranty periods is about more than just finding a broken clip; it’s about proving you’ve operated the machine within its required parameters. Have you ever fallen into this trap? Let me know in the comments.
The Three Tools I Never Start a Repair Without
If you are going to take the DIY route, you need more than just a rusty screwdriver and a prayer. I personally never touch a machine without my digital multimeter and a set of nut drivers. The multimeter is your eyes; it tells you if the motor is actually receiving 120V or if you are wasting time on a component that isn’t the problem. I’ve seen too many people buy expensive motors when the real issue was a $15 door switch. Beyond the electronics, you need to think about the physical build. I always recommend parts to check when installing a dishwasher for long-term performance, specifically focusing on the quality of your hose clamps. Standard spring clamps are prone to weakening over time, so I prefer stainless steel worm-gear clamps that I can tighten myself. Having the replacement parts every dishwasher owner should keep on hand, like a spare drain hose and a pack of gaskets, can turn a potential flood into a five-minute fix.
How do I maintain my dishwasher’s performance over the long haul?
Maintenance isn’t a one-time event; it’s a rhythm. Every three months, I run a heavy-duty cleaning cycle using citric acid. It’s significantly more effective than vinegar for breaking down the calcium that builds up on the heating element and inside the motor’s internal seals. You can find more on the eco-friendly way to descale your machine with citric acid to ensure your pump doesn’t have to work twice as hard to move water through narrowed, scaled-up lines. Also, check your spray arms for debris. Even a tiny seed can block a jet, leading to poor water pressure that makes your motor run longer than necessary. I use a simple toothpick for this—it’s the easiest way to clean a clogged spray arm without scratching the plastic.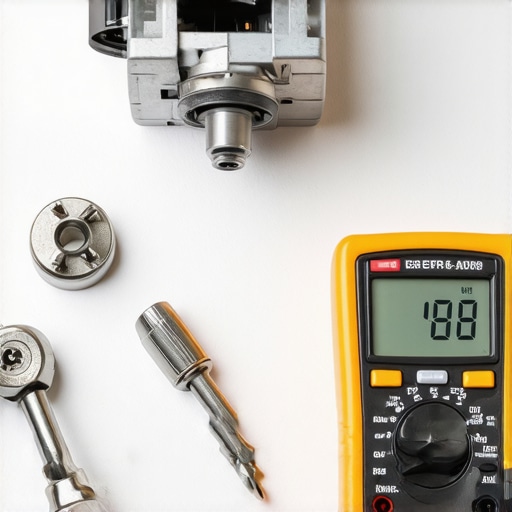
Stop Over-Tightening Everything You Touch
One of the most common mistakes I see during a repair is the ‘gorilla grip.’ People think that if they crank down on a plastic nut, it will be more waterproof. In reality, modern dishwasher components are often made of high-density polymers that will crack under excessive torque. The National Electric Code (NEC) Section 210.8(D) actually highlights the importance of proper installation for safety, and that extends to your plumbing connections. If you crack a housing because you over-tightened a fitting, you’ve just created a leak that no amount of silicone can fix. Make sure you are maximizing your dishwashers warranty coverage today by using the correct tools and following the manufacturer’s torque specs. If you are unsure, look into understanding dishwasher parts a key to effective maintenance to learn which components are most fragile.
The Smart Tech Coming for Your Kitchen
Looking forward, I predict we are going to see a massive shift toward predictive maintenance sensors. We are already seeing why your smart app is reporting a leak that is not there, but soon these apps will monitor the decibel levels of your motor to tell you a bearing is failing weeks before you can hear it with your own ears. This ‘digital twin’ technology will help you know when to replace dishwasher parts for optimal performance without the guesswork. For now, take control of your machine’s health today: I challenge you to go into your kitchen right now, pull out the bottom rack, and inspect the fine-mesh filter for any trapped debris—your motor will thank you.
Real Lessons from the Sump and My Flooded Kitchen
The manufacturer does not care if you are handy; they care about your paper trail. Always keep your receipts for parts to check when installing a dishwasher for long-term performance because proving correct part usage is your only real shield against a denied claim. A 10-year warranty sticker is often just a marketing ghost. I have learned that the truth about those 10-year motor stickers on the door is that they usually cover the physical motor housing, not the expensive electronics that actually fail. Finally, water temperature is the silent killer. If your water isn’t hitting 120 degrees Fahrenheit, you are begging for grease buildup, and this is why your warranty claim depends entirely on your water temperature when technicians inspect your machine for failure.
The Reliable Toolkit That Saves Your Weekend
I never start a diagnostic without a few specific tools. My digital multimeter is my best friend for how to use your smartphone to diagnose a failing motor, as it turns auditory guesswork into real data you can act on. I also swear by the eco-friendly way to descale your machine with citric acid once every few months to keep internal seals from drying out and cracking under pressure. Lastly, it is wise to stock up on the replacement parts every dishwasher owner should keep on hand before something breaks; having a spare gasket or hose clamp ready is the difference between a five-minute fix and a ruined Sunday afternoon spent mopping up a mess.
Take the Lead and Save Your Machine Today
You now have the technical knowledge to move from a frustrated homeowner to a confident DIYer. By recognizing the essential parts every dishwasher owner should know about, you have already taken the biggest step toward a stress-free kitchen and a longer-lasting appliance. Don’t wait for the next grinding sound to act. Go into your kitchen now, pull out the bottom rack, and check that filter for any trapped debris—your motor will thank you later. Have you ever found a truly bizarre object jammed in your dishwasher’s impeller? Let me know in the comments below!
Related Posts

Why Your Dishwasher Drain Is Smelling Like Rotten Eggs
It was a Saturday morning, and I was about to…

The Reasons Behind Recurring Error Codes on Modern Units
I remember the exact moment my dishwasher decided to throw…

Why Your Machine Smells Like Burning Plastic During the Dry Cycle
Ever opened your dishwasher at the end of a cycle…