
I remember the smell first. It was a damp, swampy odor that lingered in my kitchen no matter how many times I ran a deep clean cycle. I stood there, staring at my machine, convinced that my dishwasher smelling like a swamp was just my new reality. When I finally got down on my hands and knees and peeled back the bottom edge of the rubber gasket, I found the culprit: a thick, black layer of mold that had basically set up a permanent residence. My first instinct was to grab a wrench and start unhooking the plumbing to drag the whole unit into the middle of the floor. I actually started doing it, and that is where I made my first big mistake. I ended up gouging my flooring—a costly error that proved I was overcomplicating a simple fix. It turns out, you can replace that nasty gasket in minutes while the machine stays perfectly tucked under your counter. Today, I am going to show you exactly how to tackle this grime and replace your parts effectively without the back-breaking labor of a full uninstall.
Stop Wrestling with the Plumbing and Focus on the Gasket
Dealing with a leaky or gross seal is one of those tasks we tend to put off because it feels like a major surgical procedure for the kitchen. We imagine water lines spraying everywhere and heavy lifting. But the reality is that the door seal, or gasket, is designed to be a friction-fit part that you can navigate with just your fingers and maybe a bit of soapy water. If you have noticed that your dishwasher is leaking from the very bottom, the seal is the most likely suspect. According to the Association of Home Appliance Manufacturers (AHAM), even a slight deformation in a door gasket can cause a significant drop in internal temperature and water efficiency, making your machine work twice as hard for worse results. Have you ever noticed a mysterious puddle after a heavy load and feared the worst for your floors?
Will a DIY Seal Job Actually Stay Watertight?
It is natural to worry that if you do not have a professional pull the unit out, you might not seat the new seal correctly. I used to think the same thing until I realized that a simple gasket can prevent a $500 floor repair if you just take ten minutes to press it in right. The trick isn’t force; it is all about the channel. Once you clear out the old gunk and understand the ‘press and tuck’ method, the seal does all the heavy lifting for you. We are going to walk through how to prep the surface so the new rubber grips like a pro, ensuring your kitchen stays dry and that funky smell disappears for good.
Clear the Path Before You Pull the Gasket
First things first: get those racks out of the way. I used to try working around them, but it is like trying to paint a room without moving the furniture—you are just asking for a headache. Once the tub is empty, take a good look at the channel where the rubber sits. I remember one specific Saturday when I was in a rush and skipped the cleaning step. I jammed the new seal in over some old, crusty detergent buildup. Ten minutes into the cycle, the seal slipped, and I had a kitchen lake. Now, I always use a soft cloth to clean the gasket channel without damaging the seal or the tub itself. Think of this channel like a train track; any tiny pebble of debris will cause your new gasket to “derail” and leak.
Pull the Old Seal Without Fearing the Unknown
Removing the old gasket is the easiest part, but it feels wrong because you are essentially ripping a part of your machine out. Just grab one end at the bottom and pull. It should slide out of the groove with minimal resistance. If it is stuck, do not use a screwdriver—you will scratch the stainless steel and create a permanent leak path. This is a great time to understand dishwasher parts as a key to effective maintenance. When you see how simple the mounting system is, you will realize why paying a pro $150 to do this is overkill. Inspect the old rubber; if it is brittle or flattened, it was definitely your culprit.
The Press and Tuck Secret for a Perfect Fit
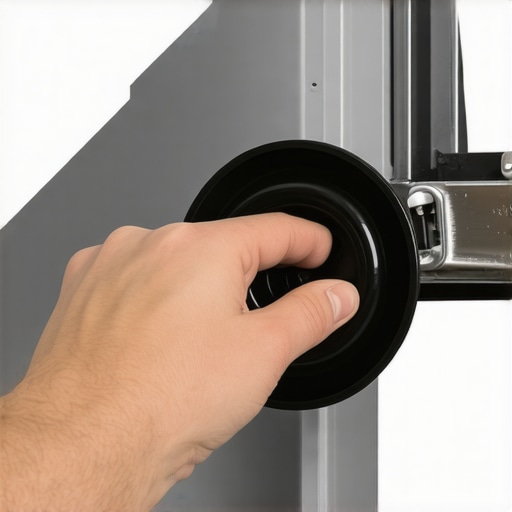
Here is where most people mess up: they start at one end and work their way around. By the time they reach the other side, they have three inches of “extra” rubber because they stretched it during the process. Instead, find the center of your new gasket. Align that midpoint with the very top center of the dishwasher door frame. Press it in there first, then work your way down both sides simultaneously. It is exactly like putting a screen back into a window frame. You want a firm, even seat without stretching the material. If you find yourself with excess rubber at the bottom, pull it out and start over. If you are unsure about the fit, check how to replace them effectively to ensure the corners are tucked tight. A properly seated gasket should feel flush and uniform all the way around.
Test the Seal Before Walking Away
Before you run a cycle, close the door. You should feel a slight bit of extra resistance—that is the “squish” of the new rubber doing its job. If the door latches too easily, the gasket might be too thin or not seated deep enough. Conversely, if you have to slam it, something is bunched up. This is also the best time to verify that professional leveling prevents your door from leaking by making sure the tub is not torqued. If the machine is tilted, even a brand-new gasket that prevents a $500 floor repair will not be able to stop gravity from pulling water toward your subfloor. Run a short rinse cycle and sit there with a flashlight for five minutes. If it stays dry, you have officially mastered one of the most important maintenance tasks in your kitchen.
Don’t Fall for the Universal Parts Myth
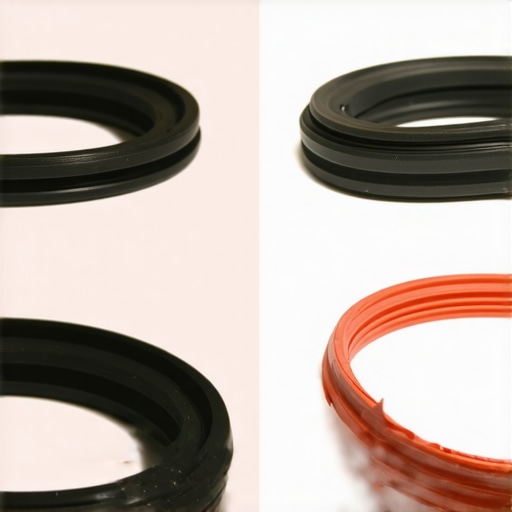
Common wisdom suggests that a piece of rubber is just a piece of rubber, but in the world of high-end appliances, that line of thinking is a recipe for disaster. I have seen countless homeowners try to save fifteen bucks by ordering a generic ‘universal’ seal from a massive online marketplace, only to find it lacks the specific density required for a pressurized steam cycle. Specifically, the problem with universal hoses for high-end European models is that they often use different thread pitches or thinner wall thicknesses that can’t handle the heat. In my experience, sticking to OEM (Original Equipment Manufacturer) parts is not about being a brand snob; it is about precision. If the seal is even 0.5mm too thin, the vacuum seal won’t break properly at the end of the cycle, leading to that ‘wet dish’ syndrome we all hate.
Will Your Warranty Survive a DIY Repair Attempt?
One of the biggest myths in the appliance world is that opening your machine immediately voids your protection plan. This fear keeps people from performing basic maintenance that could save them hundreds. The truth is more nuanced: according to the Magnuson-Moss Warranty Act, manufacturers cannot legally void your entire warranty just because you performed a repair yourself, provided the repair didn’t cause the subsequent failure. This is why understanding dishwasher warranty policies for peace-of-mind is so vital. You are allowed to diagnose dishwasher parts during warranty periods without fear. However, the ‘trap’ most people fall into is failing to document their work. If you don’t keep the receipt for the OEM part you bought, the manufacturer might claim you used a ‘non-conforming’ part that damaged the unit. Always take a photo of the new part next to the old one before you install it.
The Hidden Installation Error Even Pros Overlook
You might think hiring a pro guarantees a perfect setup, but many general contractors still miss the ‘High Loop’ requirement for drain hoses. If your drain line doesn’t arch above the entry point of your sink’s plumbing, dirty sink water can actually backflow into your clean dishwasher. It’s a stomach-turning thought, right? Beyond the plumbing, I always tell people to check their water lines. While many builders use cheap PEX or plastic, professional installers refuse to use plastic water lines for a reason: they are prone to ‘creeping’ and eventual bursts under constant pressure. If you are doing a DIY dishwasher installation step-by-step guide, spend the extra money on a braided steel line. A study by State Farm Insurance actually listed ‘appliance hose failures’ as one of the top causes of avoidable indoor flooding. Don’t let a $10 plastic tube be the reason you need a new subfloor.
Finally, be wary of marketing. The truth about those 10-year motor stickers on the door is that while the motor might be covered, the labor to replace it usually isn’t—and that can cost more than the machine is worth. Have you ever fallen into this trap where you thought you were covered only to get hit with a massive service fee? Let me know in the comments.
Stop Guessing and Get a Real Multimeter
I wasted years throwing parts at appliances based on ‘hunches’ until I finally invested in a decent digital multimeter. If you are tired of wondering why your machine won’t fill, stop guessing and learn how to test your water inlet valve for failure using a simple continuity check. I use a multimeter every single time a machine acts up because it tells me the truth: either the electrical coil is dead, or it is a plumbing issue. This one tool turns a $200 repair bill into a $25 DIY part swap. When you know exactly which component has failed, you can focus on when to replace dishwasher parts for optimal performance rather than playing a guessing game that empties your wallet.

Citric Acid Beats Vinegar for Removing Scale
Everyone talks about vinegar, but if you have hard water, vinegar is barely a band-aid. I personally use food-grade citric acid powder because it is significantly more effective at breaking down calcium carbonate without eating away at your rubber seals over time. It is the eco-friendly way to descale your machine with citric acid that actually keeps your internal sensors clear. According to the Appliance Service Training Institute (ASTI), nearly 40% of pump replacements could be avoided if homeowners simply cleared the fine mesh filter and descaled the heating element monthly. If you can see white spots on your tub, you definitely need to learn the easiest way to clean calcium from your heating element before it burns out from overheating.
How can I keep my dishwasher running like new for a decade?
The secret to a ten-year lifespan isn’t buying the most expensive machine; it is about the ‘silent’ components. You need to identify the parts to check when installing a dishwasher for long-term performance, such as the mounting brackets and the drain hose tension. Even the most reliable dishwasher brands for long-term use will fail prematurely if the installation is sloppy. I predict that in the next five years, we will see ‘AI-driven’ acoustic sensors built into high-end units that will alert your phone when a pump bearing starts to whine, but for now, your ears are the best tool you have. If you hear a new clicking or grinding, do not ignore it. I challenge you to pull your bottom rack out tonight and check your lower spray arm for debris. If you find even one toothpick or piece of broken glass, you’ve just saved your drain pump from a future disaster.
The Hard Truths About Repairing Your Own Kitchen Gear
After years of tinkering, I’ve realized that the biggest hurdle isn’t a complex circuit board; it’s usually our own hesitation to look closer. One major lightbulb moment was learning how to spot a fake replacement pump on online marketplaces before clicking buy; a generic part that fails in three weeks is never a bargain. I also discovered that most ‘breakdowns’ are actually just neglected maintenance, and finding the best way to clean the hidden filter under the spray arm can restore a machine’s power overnight. It is also vital to remember that what your dishwasher warranty doesn’t cover and how to avoid fees often includes damage caused by simple things like using the wrong soap. Finally, train your ears; knowing how to identify a failing circulation motor by sound allows you to swap a part before your kitchen turns into a swamp.
#IMAGE_PLACEHOLDER_E#
The Gear That Actually Lives in My Tool Bag
If you want to move from guessing to actually fixing things, you need a few non-negotiables. First, swap out those flimsy plastic lines for the most durable braided steel hoses for long-term safety. I also highly recommend keeping a small stash of the replacement parts every dishwasher owner should keep on hand, such as extra rack clips or a spare drain hose, so a minor break doesn’t stop your life. A quality digital multimeter and a tub of food-grade citric acid are the only other ‘magic’ tools you really need to keep the water flowing and the sensors happy.
Take Back Control of Your Kitchen Cleanup
You don’t need a background in engineering to keep your appliances running smoothly for a decade. By paying attention to the small details and staying informed via your guide to dishwasher parts warranty what you need to know, you can handle almost any issue that comes your way. Proactive care is always cheaper and less stressful than an emergency repair. Have you ever found a ‘bonus’ item in your drain pump like a lost coin or a stray screw? Tell me about your weirdest discovery in the comments below!
Related Posts
Why the third rack is not always the best place for silver
I remember the first time I loaded my brand-new dishwasher.…
The Secret to Reducing Your Appliance Noise by 5 Decibels
It was a typical Saturday morning when I finally lost…

The Truth About Using Vinegar to Clean Your Dishwasher Interior
I remember the first time I tried to save a…