
I’ll never forget the Tuesday night my kitchen sink decided to recreate a miniature version of Old Faithful. I was right in the middle of loading the dessert plates when a disgusting, greyish sludge started bubbling out of that little chrome cylinder next to the faucet. If you’ve smelled it, you know—it’s like a mix of old gym socks and week-old broccoli. My first instinct? Panic. My second? I grabbed a butter knife and tried to poke the gunk back down. Huge mistake. I nearly snapped the plastic cap and almost jeopardized my dishwasher warranty policies before I even understood the basics of how these parts connect. I learned the hard way that a little finesse goes a lot further than brute force when you’re dealing with delicate plumbing components.
Today, I’m going to show you how to handle this ‘gunk’ situation properly. We’re going to stop that overflow, kill the smell, and make sure your dishwasher actually drains the way it’s supposed to. No expensive house calls, no specialized tools, just a little bit of neighborly advice from someone who’s been in the trenches (and the sludge). You don’t need to be a master plumber to keep your kitchen running smoothly, you just need to know which common dishwasher parts require a little monthly TLC.
[image_placeholder_1]
That Slimy Chrome Cylinder is More Important Than You Think
The air gap is the unsung hero of your kitchen plumbing. Its only job is to make sure dirty sink water doesn’t crawl back into your dishwasher, yet most of us ignore it until it starts spitting at us. When that gunk—a lovely cocktail of grease, food particles, and hard water minerals—builds up, your machine has to work twice as hard to pump out water. I’ve seen people waste hundreds of dollars replacing perfectly good pumps or scouring for replacement parts they didn’t actually need when the real culprit was just a handful of trapped coffee grounds in the air gap.
Cleaning this device is one of the easiest ways to maintain your unit. If you’ve ever noticed that your dishwasher smells like a swamp, this little cylinder is likely ‘Patient Zero.’ We’ll also touch on why the real clog might be in your garbage disposal connection rather than the gap itself. By the time we’re done, you’ll know the drain hose trick that stops backflow for good, keeping your dishes sanitary and your floor dry.
Does cleaning this thing really matter for my dishwasher’s health?
You might be thinking, ‘It’s just a little bit of water, can’t I just wipe it up?’ Well, besides the bacteria, a clogged air gap creates backpressure that can destroy your motor over time. According to the International Association of Plumbing and Mechanical Officials (IAPMO), air gaps are a primary defense against cross-contamination in residential plumbing systems. If you let it stay blocked, you’re essentially inviting greywater to sit in your machine, which is a recipe for mold and expensive repairs. I made the mistake of letting mine go for six months, and the resulting backup was enough to make me consider ordering takeout forever. It’s also one of those parts to check during installation to ensure long-term performance.
Have you ever seen water leaking from that little silver cap and just assumed it was ‘normal’? Let me know if you’ve been ignoring a puddle, because I felt the same way until my floor started warping! It’s a common frustration, especially if you didn’t have expert advice during your dishwasher installation. Now, let’s roll up our sleeves and get into the actual cleaning process before that gunk hardens into something permanent.
Pop the Chrome Cap to Reveal the Real Mess
The first step is simpler than most people think: just pull the decorative chrome cap straight up. It’s like taking the lid off a jar that isn’t screwed on. Underneath, you’ll find a plastic inner cap, usually held on by two small tabs. I remember the first time I did this; I was so convinced I needed a heavy-duty wrench that I almost stripped the plastic threads entirely. Don’t do that. Simply unscrew it or pinch the tabs with your fingers. Understanding dishwasher parts is a key to effective maintenance, and knowing that this piece is just delicate plastic will save you a lot of frustration and a trip to the hardware store for a replacement.
Use a Bottle Brush to Clear the Grime
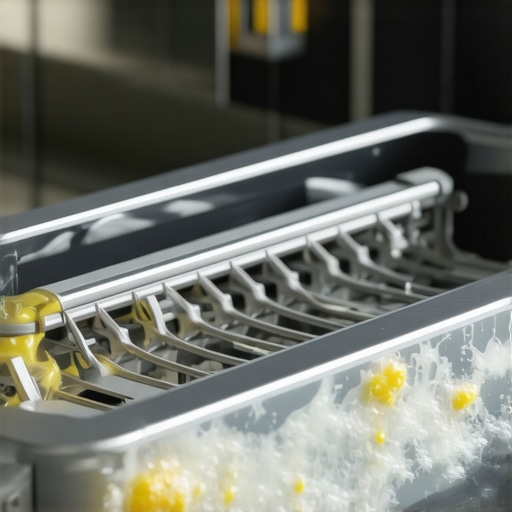
Once the cap is off, look down into those two holes. One brings water up from the dishwasher, and the other sends it down into the disposal. This is usually where the ‘sludge’ lives. Grab a small bottle brush or even a pipe cleaner. I once tried using a pressurized air canister to blow the gunk out—bad idea. I ended up with a face full of old pasta sauce and greywater. Now, I stick to the manual brush method. It’s truly the $10 fix for a dishwasher that won’t drain properly. Scrub inside both tubes vigorously until you stop seeing black or grey residue on the bristles. You’ll know you’re successful when you can pour a cup of water down the hole and hear it splash directly into the disposal without any gurgling.
Check the Disposal Port Before You Finish
If you’ve cleaned the air gap and water is still backing up, the problem is likely a few inches further down the line. The hose from your air gap connects to a small nipple on the side of your garbage disposal. Food particles often get jammed right at that connection point. I spent three hours once diagnosing a ‘broken’ pump only to find a single cherry pit wedged in that plastic port. Take a screwdriver, loosen the hose clamp, and pull the hose off. Use a small screwdriver or a needle-nose plier to clear any debris from the disposal’s inlet. The drain line clog that is actually in your garbage disposal is one of those common dishwasher parts and their role in proper installation that DIYers often overlook, but it’s a total game-changer for restoring full drainage speed.
Ensure Your Drain Hose Has the Necessary High Loop
While you’re under the sink checking the disposal, look at the path of the hose. It should travel from the air gap down to the disposal in a relatively straight line, but if you don’t have an air gap, you absolutely need a high loop. Even with an air gap, ensuring the hose isn’t sagging under the weight of trapped water prevents ‘stinky water’ from pooling near the machine. Why your drain hose needs a high loop to stop the smell is simple: it uses gravity to keep the gross stuff from backsliding into your clean dishwasher tub. If your hose is drooping like a wet noodle, use a zip-tie to secure it to the top of the cabinet frame. This keeps the path clear and ensures that once the waste water leaves the dishwasher, it stays gone for good.
Let’s dig deeper into the nuances of kitchen plumbing. Most homeowners think that once the water is flowing and the sludge is gone, the job is completely finished. But here is a contrarian truth: your air gap might be clean, but your cleaning method could be quietly eating away at your machine’s longevity. Everyone recommends white vinegar as a ‘miracle’ descaler for those stubborn calcium deposits in the air gap tubes. In my experience, and according to many modern manufacturer specifications, you should actually stop using vinegar in your high-end smart machine. High acidity can degrade the rubber seals and internal gaskets over time, leading to those mysterious ‘ghost leaks’ that show up months later. Have you ever fallen into this trap? Let me know in the comments! I’ve seen beautiful stainless steel tubs pitted and ruined because owners thought they were being ‘natural’ with their cleaning. It is far better to look into the eco-friendly way to descale your machine with citric acid which is significantly gentler on those sensitive components.
Is my weekend plumbing fix actually voiding my protection plan?
This is where things get complicated for the DIY enthusiast. Under the Magnuson-Moss Warranty Act, you generally have the right to maintain your own appliances, but manufacturers often hide ‘professional installation’ clauses in the fine print that can be used against you. One of the biggest risks of skipping the professional installation receipt is that if a major component like the wash motor fails, the company might claim the failure was caused by improper drainage pressure resulting from a non-certified repair. They essentially look for any reason to label a breakdown as a ‘user-induced defect.’ I’ve talked to folks who saved $100 on a plumber only to have a $600 claim denied because they couldn’t provide a professional installation receipt for insurance or documented proof of maintenance. A guide to dishwasher parts warranty: what you need to know is that the burden of proof often shifts back to the homeowner the moment you disassemble a factory-sealed part.
Why Your 10-Year Warranty Sticker is Mostly Marketing
Another nuance many miss is the distinction between a part failure and a simple installation error. You can spend weeks researching the most reliable dishwasher brands for long-term use, but if the air gap wasn’t integrated correctly from the start, even the best machine will fail prematurely. There is a huge difference between a lemon and a faulty installation. Don’t fall for the truth about those 10-year motor stickers on the door; they usually only cover the stainless steel tub or the motor assembly itself, not the sensors, the control board, or the expensive labor to swap them out. If you find yourself cleaning your air gap every single month, the issue isn’t the ‘gunk’—it’s likely a misaligned drain hose that is allowing food to settle in the bends. It’s also vital to know when to replace dishwasher parts for optimal performance rather than waiting for a total flood. One small oversight, like a slightly kinked hose or a poorly seated gasket, is the difference between a dry kitchen and a ruined subfloor. If you’re ever in doubt, getting expert advice on dishwasher installation troubleshooting before you seal up the kickplate can save you thousands in future repairs.
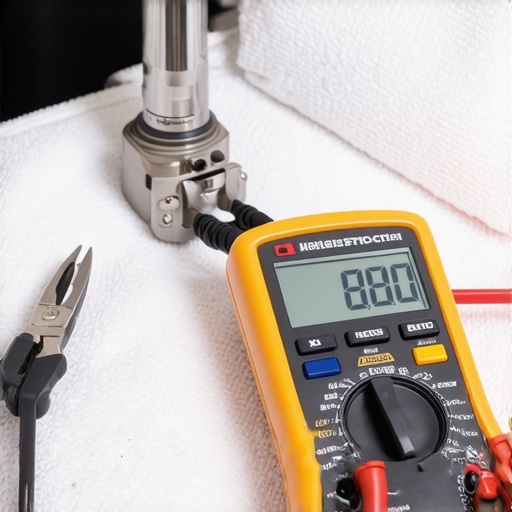
When I tell people to keep a $20 digital multimeter in their kitchen junk drawer, they usually look at me like I’ve grown a second head. But here’s the reality: if your machine stops filling with water, you can either call a tech for $150 or you can spend two minutes learning how to test your water inlet valve for failure yourself. I use a multimeter because it takes the guesswork out of electronics; it tells you exactly if a part has continuity or if your control board is simply refusing to send the signal. It’s one of those essential parts every dishwasher owner should know about, even if it’s technically a tool rather than a component. Beyond the electrical side, I always keep a pair of long-reach needle-nose pliers handy. These aren’t just for ‘fixing’ things; they are for reaching the cherry pits and bone fragments that inevitably bypass the filter and jam the impeller. Knowing common dishwasher parts and how to replace them effectively is less about being a professional plumber and more about being prepared for the inevitable Wednesday night breakdown.
Don’t Let Hidden Residue Kill Your Efficiency
Proper maintenance isn’t just about the parts you can see. According to the National Kitchen & Bath Association (NKBA) in their ‘Kitchen & Bath Systems’ technical manual, local water hardness is the number one silent killer of appliance lifespans, often causing internal scaling that no surface-level wipe-down can fix. This is why I’m such a stickler for checking the heating element and the spray arms every few months. If you’re looking at top tips for seamless dishwasher installation in 2025, you’ll notice that high-end models are increasingly requiring dedicated filtration systems to mitigate this. But even with a basic setup, maximizing your dishwasher’s warranty through proper parts selection starts with keeping the internals free of calcium. If that element gets coated in white crust, it has to run longer to heat the water, which eventually fries the control board. It’s a domino effect that most people don’t realize is happening until the machine just won’t turn on.
How do I maintain my dishwasher’s performance over the long haul?
Consistency is more important than intensity. Instead of a once-a-year ‘deep clean’ that involves taking the whole unit apart, I recommend a five-minute monthly check. Clear the filter, poke a toothpick through the spray arm holes, and run a cycle with a dedicated descaler. This proactive approach is the secret to when to replace dishwasher parts for optimal performance—you replace them because you want to, not because your kitchen is flooded. I predict that in the next five years, we’ll see AI-driven acoustic sensors integrated into smart machines that can ‘hear’ the specific frequency of a failing bearing or a clogged pump before the user even notices a drop in cleaning quality. We are moving toward a future of predictive maintenance where your phone will tell you to clean the air gap before it ever starts spitting sludge.
My Expert Tip: Take a flashlight and look at your heating element right now. If it looks like it’s covered in chalk, it’s working overtime and costing you money on every bill. Go check out my guide on the easiest way to clean calcium from your heating element and get that efficiency back before the part actually snaps. You’ll thank me when your dishes actually come out dry and spot-free!
Taking care of that little chrome cylinder might seem like a minor chore, but it is the frontline of defense for your kitchen hygiene. By following these steps, you aren’t just clearing out ‘gunk’; you are extending the life of your motor and ensuring your family stays safe from greywater backflow. Consistency is the real secret here—a few minutes once a month will save you from the headache of a flooded floor or a denied insurance claim later down the road.
[image_placeholder_5]
Hard-Won Secrets from My Kitchen Floods
Over the years, I’ve realized that the ‘gunk’ isn’t just an aesthetic problem; it’s a performance thief. I used to think a quick wipe-down of the cap was enough, but understanding dishwasher parts a key to effective maintenance taught me that the internal build-up in the tubes is what really kills the pump. Also, never underestimate the power of a professional paper trail; I once lost out on a major repair because I didn’t have a professional installation receipt for insurance handy to prove I hadn’t tinkered with the main lines. Finally, if you’re constantly fighting odors, remember that maximizing your dishwasher’s warranty through proper parts selection starts with keeping the drainage pathway clear—it’s the simplest way to avoid that dreaded ‘swamp’ smell that persists even after a cycle.
The Tools That Saved My Sanity (and Floors)
You don’t need a truck full of heavy gear to keep things running, but a few specific items changed my life as a homeowner. First, ditch the vinegar and switch to the eco-friendly way to descale your machine with citric acid; it’s much gentler on those expensive rubber seals that prevent leaks. Second, I highly recommend keeping a digital copy of the complete list of dishwasher parts covered by warranty on your phone; it makes those conversations with customer service much smoother when you know exactly what is protected. Lastly, a simple $5 bottle brush is the only tool that can truly reach deep into the air gap tubes to clear out the grease that causes backflow.
Take Control of Your Kitchen’s Longest-Running Employee
Your dishwasher works harder than almost any other appliance in your home, and with just ten minutes of monthly attention, you can keep it in peak condition for a decade or more. Don’t wait for a puddle to appear before you check your common dishwasher parts for wear and tear. By staying proactive and clearing that air gap before it overflows, you’re not just saving money; you’re ensuring your home stays dry and your dishes stay sanitary. Have you ever found something truly bizarre—like a cherry pit or a stray plastic clip—clogging your dishwasher’s drain line? Let me know in the comments below!
Related Posts

The Hidden Filter Most People Forget to Clean Twice a Year
Ever opened your dishwasher to find it smelling sour, or…
How to Clean a Turbidity Sensor Without Scratching the Lens
Have you ever looked at your dishwasher's maintenance routine and…

The Best Way to Clean the Hidden Filter Under the Spray Arm
I'll never forget the sinking feeling in my gut when…