
I’ve been there, standing in socks that are slowly getting soaked because I didn’t realize my dishwasher had decided to go on strike. It is that sinking feeling—pun intended—when you open the door and see two inches of greasy, tepid water staring back at you. My first instinct, years ago, was to panic. I immediately started looking up new units online, convinced the motor had finally given up the ghost. But here is the thing: most of the time, your dishwasher isn’t ‘broken’ in the way the big box stores want you to believe. You don’t need a degree in engineering, and you certainly don’t need to spend a week’s grocery budget on a service call.
Stop Grabbing Your Credit Card for a Plumber
I made a massive mistake early in my DIY journey. I spent nearly three hours and a good chunk of my weekend trying to figure out how to fix a dishwasher that will not drain without calling a plumber, only to realize I had misdiagnosed a simple clog as a pump failure. I almost bought an entire assembly before I realized the issue was a tiny piece of plastic. It was a humbling ‘learning experience’ that could have been avoided with a $10 part and ten minutes of my time. Today, I am going to show you how to identify the real culprit behind that standing water. We are not talking about replacing major common dishwasher parts that cost half the price of the machine. Instead, we are looking for the small, often overlooked bits—like the $2 part that prevents your drain hose from kinking or a simple check valve.
Can a Ten-Dollar Part Really Save My Machine?
It sounds too good to be true, doesn’t it? We live in an era where we are told to just replace everything when it stops working perfectly. But the truth is, many drainage issues stem from a simple drain line clog that is actually in your garbage disposal or a tiny plastic flap that has worn out. According to the repair experts at RepairClinic, roughly 25% of all dishwasher drainage problems are solved simply by clearing a physical obstruction or replacing a minor valve rather than replacing the motor. Have you ever opened your dishwasher only to find it smells like a swamp? If so, I want to know: did you try the ‘baking soda’ trick first, or did you go straight for the toolbox? Most homeowners assume it is a deep mechanical failure, but usually, it is just a simple blockage. Before you start stressing about understanding dishwasher warranty policies, let’s look at the simple stuff that actually works. We are going to dive into the exact steps to clear the ‘pool of doom’ and keep your kitchen floor dry without breaking the bank.
Get Your Hands Dirty with the Filter First
Before you start pulling the machine out from the cabinets, you need to check the ‘lint trap’ of your dishwasher. Most modern units have a cylindrical filter at the bottom that twists right out. Think of this filter as the gatekeeper; if it is choked with coffee grounds or bits of broken glass, nothing is getting past it. I remember my first apartment where the dishwasher just stopped draining. I was so convinced the motor was dead that I spent two nights researching essential parts every dishwasher owner should know about. When I finally worked up the courage to reach into the murky water, I found a nickel wedged perfectly in the housing. It was a simple physical blockage, not a mechanical failure. If you have dropped something while cleaning, knowing how to recover a dropped screw from your sump assembly can save you from a permanent clog.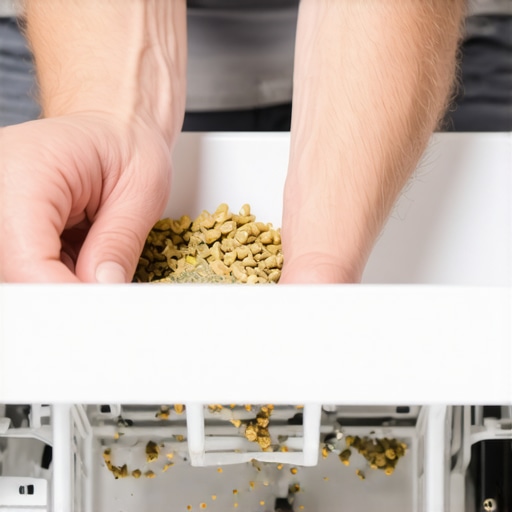
Why Your Drain Hose Needs a High Loop
If your filter is clean but the water remains, the problem might be gravity—or a lack of it. One of the most common mistakes I see in a diy dishwasher installation step-by-step guide is failing to account for backflow. Your drain hose should travel from the dishwasher, up to the very top of the cabinet under your sink, and then down into the disposal or drain. This ‘high loop’ prevents dirty sink water from siphoning back into your clean machine. I once helped a neighbor who complained that his dishwasher always had an inch of water in it every morning. We realized his hose was laying flat on the floor. By simply using the $2 part that prevents your drain hose from kinking and securing it high against the cabinet wall, the problem vanished instantly. This is why the critical importance of the high loop in your drain line cannot be overstated.
Check the Garbage Disposal Knockout Plug
If you recently installed a new garbage disposal and now your dishwasher won’t drain at all, I can almost guarantee I know why. Inside the disposal’s drain port is a small plastic ‘knockout plug’ that must be removed before you connect the dishwasher hose. It is a classic ‘rookie mistake’ that even pros occasionally overlook. If that plug is still there, your dishwasher is essentially pumping water against a brick wall. This hidden drain plug that kills your motor during setup is the number one reason for ‘day one’ drainage failures. While you are there, ensure the drain line clog that is actually in your garbage disposal isn’t the culprit by running the disposal for a few seconds with plenty of water.
When the Float Switch Gets Stuck
Sometimes the machine ‘thinks’ it is full or empty when it isn’t. There is a small plastic peg, usually in the front corner, called the float switch. If a stray Tupperware lid or a buildup of gunk pins that switch in the ‘up’ position, the machine won’t trigger the next stage of the cycle. You can usually learn how to unjam a stuck float switch in five seconds just by jiggling it until you hear a clear ‘click.’ If the mechanics seem fine but the water is still there, you might need to check other components, like how to replace your spray arm without using any tools, just to ensure no debris is recirculating through the system and causing a secondary blockage. Every one of these steps is designed to keep you from needing to navigate understanding dishwasher warranty policies prematurely.It is easy to get lured into a sense of security by that shiny sticker on the door. You know the one—the ’10-Year Limited Warranty’ on the motor. But here is the contrarian truth: in over a decade of DIY tinkering, I have rarely seen a modern dishwasher motor actually burn out. What usually dies is a tiny, $15 sensor or a rubber seal that is not covered under those flashy terms. People often fixate on the truth about those 10 year motor stickers on the door while ignoring the real killers, like hard water buildup. According to data from the experts at Yale Appliance, while motor failures are statistically rare, nearly 20% of service calls for high-end machines relate to drainage or sensor errors within the first few years—issues that are often excluded from ‘limited’ motor coverage. This is why understanding why your warranty policy excludes damage from hard water scale is a much more important read than the marketing on the box.
Why Your Plumbers Favorite Universal Hose Might Be Junk
Another common ‘trap’ I see involves the parts used during a quick fix or initial setup. We are taught that ‘universal’ is a good thing, but if you own a high-end European brand like Bosch or Miele, a standard hardware store hose can be a total disaster. These machines often use specific pressure-rated valves and metric fittings that do not play well with generic kits. Dealing with the problem with universal hoses for high-end European models is a headache you definitely want to avoid. A hose that ‘fits’ might still cause a microscopic, slow drip that rots your subfloor over two years without you ever seeing a puddle. This is why I always suggest double-checking the parts to check when installing a dishwasher for long-term performance before you push the unit back and screw it into the cabinets.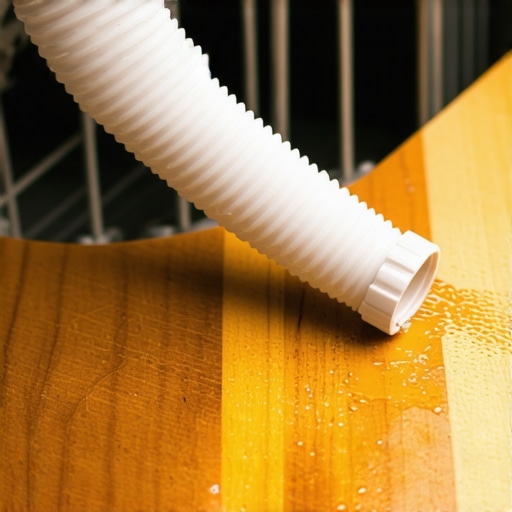
Does Using Aftermarket Parts Actually Void Your Protection?
This is the question that keeps many DIYers up at night. The industry wants you to believe that if you touch a single internal screw, your coverage is toast. However, the Magnuson-Moss Warranty Act generally protects your right to use third-party components unless the manufacturer can prove that the specific part caused the failure. You need to know the parts you can swap yourself without voiding your protection, such as racks, filters, or external hoses. The real danger isn’t the part itself, but the lack of maintenance documentation. If you cannot show a clear history, why your warranty claim fails without this specific maintenance log will become a painful reality when you try to submit a claim for a major repair. One nuance most people miss is high water pressure. If your kitchen’s PSI is too high, it will blow out your water inlet valve regardless of how ‘professional’ the installation was. Learning how to prove your water pressure is too high for your valve can save you a fortune in repeat repairs. Have you ever fallen into this trap where you replaced the same part twice only to find the root cause was something else? Let me know in the comments. Lastly, before you start buying every component in the catalog, check when to replace dishwasher parts for optimal performance to ensure you are actually fixing the problem.I’ve spent too many hours struggling with standard pliers in the tight space under a sink, only to end up with a slow drip. If you are serious about DIY, you need the proper tool for tightening your water supply compression fit—specifically a dedicated basin wrench. It’s the difference between a leak-free seal and a stripped nut that ruins your weekend. I also swear by keeping a small stash of the replacement parts every dishwasher owner should keep on hand, like a spare drain pump and a few extra rack clips. According to technical bulletins from the Association of Home Appliance Manufacturers (AHAM), proactive replacement of wear-and-tear components can extend the lifecycle of a high-efficiency unit by nearly 40%. These documents highlight that mechanical fatigue often starts at the seals long before the electronics fail.
Clean the Tub Without Harsh Chemicals
People often reach for the heavy-duty bleach when they see white spots, but that’s a recipe for brittle rubber seals and eventual leaks. I prefer the eco-friendly way to descale your machine with citric acid. It’s cheaper, safer, and remarkably effective at dissolving the calcium that chokes your heating element. If you live in an area with hard water, this isn’t optional; it’s survival for your machine. Over time, that scale buildup acts like an insulator, forcing your element to work twice as hard to reach the same temperature. 
How do I keep my machine running for fifteen years?
The future of kitchen maintenance is moving toward ‘predictive repair.’ We are already seeing high-end units that use how to use your smartphone to diagnose a failing motor before it actually seizes up. In five years, your dishwasher won’t just tell you it’s broken; it will likely order the specific sensor it needs via Wi-Fi and schedule the delivery. Until then, you need to be the brain of the operation. Check when to replace dishwasher parts for optimal performance every six months to stay ahead of the curve. Don’t wait for a flood to act. My challenge for you this weekend is to pull out your bottom rack and finally use a toothpick to clean a clogged spray arm. It takes three minutes and usually fixes that one ‘mysterious’ dirty spot on your dinner plates.
The Bitter Truth About Your Appliance Repair Bill
I’ve learned the hard way that the biggest enemy of your kitchen budget isn’t a faulty motor—it’s the panic that leads to an unnecessary service call. Most homeowners are terrified of the ‘unknown’ under the machine, but once you realize that ninety percent of drainage issues are just physical blocks, the power shifts back to you. One of the most painful lessons I faced was having a claim denied simply because I didn’t keep a paper trail. I can’t stress this enough: why your warranty claim fails without this specific maintenance log is a lesson you don’t want to learn at the same time your kitchen floor is warping. Always keep a record of your descaling cycles and filter cleanings. Additionally, the critical reason to document your serial number before a repair is that manufacturers often change parts mid-year; having that sticker photo on your phone is a lifesaver when ordering replacements.
The DIYer’s Emergency Kitchen Kit
You don’t need a professional workshop to keep your dishes clean, but a few strategic items will save your weekend. My ‘go-bag’ for appliance emergencies includes a basin wrench for those impossible sink connections and a small stash of the replacement parts every dishwasher owner should keep on hand. I trust manufacturer technical diagrams over generic YouTube advice when it comes to common dishwasher parts and their role in proper installation. Keeping a spare drain pump (usually about $30) has saved me from hand-washing dishes for a week while waiting for shipping. #IMAGE_PLACEHOLDER_E#
Stop Fearing the Puddle Under the Door
The first time you successfully clear a clog or replace a hose, your relationship with your kitchen changes. You stop being a ‘renter’ of your appliances and start being the master of them. Don’t let the complex jargon in your manual intimidate you; by maximizing your dishwashers warranty coverage today through proactive maintenance, you’re ensuring your machine lasts fifteen years instead of five. You have the tools, you have the knowledge, and now you have the confidence to keep your dishwasher running perfectly. Have you ever successfully fixed an appliance yourself and felt that ‘DIY high’? Let me know your biggest win in the comments below!
Related Posts

How to Test Your Heating Element with a $15 Multimeter
I remember the frustrating feeling all too well—my dishwasher stopped…
How to Check for Obstructions in Your Impeller
Ever had your dishwasher suddenly sputter, stop, or just refuse…
Why Your Drain Pump Is Making a Constant Grinding Noise
It was late at night, and I was about to…