
I was standing in my kitchen at midnight, staring at a tub full of grey, soapy water that refused to go anywhere. My dishwasher door was shut tight, but the machine was convinced it was wide open. It’s a helpless feeling. It’s that sinking feeling in your gut when you realize the machine isn’t going to cooperate, and you’ve got work in six hours. I remember my first time dealing with this; I panicked and started pulling at the plastic trim, nearly snapping the whole assembly off. Talk about a lesson learned! I’ve spent more nights than I’d like to admit hunched over a kickplate with a flashlight, trying to understand why a machine designed to save me time was now stealing my sleep. I quickly realized that the door latch is one of those essential parts every dishwasher owner should know about, but it’s also incredibly finicky. Today, I’m going to show you exactly how to trick that sensor just long enough to get the water out of your tub so you aren’t waking up to a stinky kitchen. We aren’t looking for a permanent fix yet—we’re looking for survival. Standing water is more than just a nuisance; it can harbor bacteria and lead to mold if left for even twenty-four hours.
Get Your Machine Draining When the Latch Quits
If you’ve just gone through a diy dishwasher installation, you might be worried you’ve already broken something. Don’t beat yourself up. Think of the door latch as the gatekeeper of your kitchen’s safety. It’s a simple switch, but its job is vital. These sensors fail for reasons ranging from steam damage to simple mechanical wear. I once had a client whose latch failed simply because the unit wasn’t level, which is why professional leveling prevents your door from leaking and keeps the latch aligned. According to data from Consumer Reports, nearly 15% of dishwasher service calls involve door or latch mechanisms within the first five years of use. If you’re in a pinch, knowing how to bypass a faulty door latch for emergency drainage can save your hardwood floors from a nasty overflow and a very expensive repair bill. I’ve seen people lose entire sections of cabinetry because they thought they could just wait until Monday to call a pro. Have you ever been stuck with a full tub of water and a door that won’t lock? Drop a comment and let me know—I’ve been there![IMAGE_PLACEHOLDER]
Is This Hack Going to Ruin My Control Board?
I get it—you’re worried about flooding the floor or frying the expensive electronics. I made the mistake of using a makeshift jumper on a live circuit once, and the spark alone was enough to make me rethink my DIY career. You have to be smart about this. While we can use a temporary bypass to run a drain cycle, you should never try to run a full wash cycle this way. You’re essentially telling the computer the door is shut when it might not be, which is a recipe for a flooded kitchen. It is always better to eventually look at common dishwasher parts and how to replace them effectively once the emergency is over. Before you start poking around, you might even want to check if you are maximizing your dishwashers warranty coverage because a DIY bypass could potentially void those protections if not done carefully. If the latch is physically broken, you’re likely looking at a replacement, but for right now, let’s just get that water moving and your kitchen back to normal.
Clear the Basin Without the Professional Price Tag
If you are staring at a mini-lake inside your machine, you don’t have time for a full teardown. You need that water out before it ruins your flooring. The latch is essentially a bouncer at a club; it won’t let the ‘party’ (the drain pump) start until it’s absolutely sure the door is locked tight. To get around this, you have to convince the control board that the door is shut, even when it’s not. I remember one humid July night when my own unit failed. I was using a wooden chopstick to hold the sensor down while I desperately pushed buttons with my other hand. It was messy, and I ended up with a sleeve full of grey water, but it saved me from a $200 emergency plumber visit. Before you dive in, you might need to how to find your units hidden model number for replacement parts later, but for now, let’s focus on the bypass.
Find Out What Kind of Latch You Are Fighting
Most modern machines use one of two systems: a mechanical hook or a magnetic reed switch. Think of the mechanical hook like a physical deadbolt. When the door closes, it pushes a small plastic lever. If that lever is jammed with grease or a stray toothpick, the machine thinks the door is wide open. You can often clear this by using a small, non-conductive tool—like a plastic spatula or that chopstick I mentioned—to gently toggle the hook back and forth. This is why understanding dishwasher parts a key to effective maintenance is so important; you need to know what you’re poking. If your machine is high-end, it might use a magnetic sensor. These are trickier because they don’t move. They just look for a magnet in the door. If the door has sagged or you’ve recently done a the step-by-step guide to installing a dishwasher in an island where the leveling is slightly off, the magnet won’t line up.#IMAGE_PLACE_HOLDER_B#
Use the Manual Engagement Trick
To force a drain, you need to manually engage that sensor. If it’s a mechanical switch located on the top frame of the tub, use your tool to depress the internal button and hold it there. While holding it, press the ‘Cancel’ or ‘Drain’ button on your control panel. You should hear the distinct hum of the pump kicking in. If you don’t hear anything, you might be dealing with a blown fuse instead of just a bad latch. In that case, you should learn how to test your thermal fuse with a basic multimeter to see if the electricity is even reaching the brain of the machine. I once spent twenty minutes holding a latch down only to realize the breaker had tripped. Don’t be like me; check the power first.
Force the Drain Cycle Through the Control Panel
Once you have the sensor engaged, the control board is the next hurdle. Many machines require a specific sequence to enter a service mode or a force-drain. For most Whirlpool or Maytag units, pressing ‘Cancel’ twice or holding it for three seconds is the secret handshake. If you have a Bosch, you might need to hold ‘Start’ until the display changes. It’s a bit like a video game cheat code. If the door keeps popping open during this process, it’s a sign you may need to how to replace the door hinge springs yourself because the tension is fighting the latch. This isn’t just about convenience; it’s about parts to check when installing a dishwasher for long term performance. If the latch is failing now, it’s a warning shot that other components are under stress. Keep that tool steady, wait for the gurgling sound of the water leaving the drain, and only let go once the tub is bone dry.Once you have successfully cleared the standing water, you might think the worst is over. However, this is where most people fall into a false sense of security. I’ve seen countless DIYers fix a latch only to find their machine failing six months later because they ignored the deeper nuances of the system. Let’s talk about a major contrarian point: everyone tells you hard water is the enemy of appliances. While scale is a nightmare, in my experience, overly soft water can be just as destructive. Soft water is effectively ‘hungry’ water; it lacks minerals, so it begins to leach them from the dishwasher’s interior components and even your glassware. This is why why soft water is ruining your dishwasher interior faster than hard water in some modern, high-efficiency units. If you aren’t balancing your water chemistry, you’re essentially slowly dissolving your machine from the inside out.
The Installation Error Even the Pros Frequently Miss
The most common ‘oops’ factor I encounter during a expert advice on dishwasher installation troubleshooting visit isn’t a loose screw—it’s the drain hose geometry. Most people assume the pump is strong enough to push water uphill under any condition. But if you skip the high loop, you risk siphoning dirty sink water back into your clean tub. This isn’t just gross; it’s a health hazard. Furthermore, a failure to secure the unit properly can lead to it shifting, which is how to stop your dishwasher from moving when you open the door and preventing latch misalignment. According to the Association of Home Appliance Manufacturers (AHAM), proper installation and regular filter maintenance can extend the life of a dishwasher by nearly 30%, yet many homeowners overlook the simple the one maintenance task that doubles the life of your gasket until it’s too late.
Can a third-party replacement part actually fry your control board?
This is a question I get constantly. The short answer is: yes, if you aren’t careful. While generic parts are tempting because of the price tag, you need to know how to spot a fake replacement part before it fries your control board. A sub-standard solenoid can draw more current than the board was designed to handle, turning a $20 savings into a $400 repair. This is also where your warranty becomes a minefield. You might think you’re covered, but why your warranty claim fails without an authorized receipt is a reality many face when trying to save a buck on labor. Manufacturers are incredibly strict about who touches the machine during the first year. Even if you use essential parts every dishwasher owner should know about, if they aren’t OEM (Original Equipment Manufacturer), you might be handing them a ‘get out of jail free’ card for your claim.
Don’t Let the Service Trip Fee Blindside You
Another nuance people get wrong is the ‘free’ repair. You might have a part covered under a 5-year limited warranty, but you’ll still be staring at a bill. It’s vital to understand why your warranty covers parts but not the 150 service trip fee. I’ve had clients get furious when the tech asks for payment after replacing a covered motor. Before you call for help, check your understanding dishwasher warranty policies for peace of mind so you know exactly what’s coming out of your pocket. Have you ever fallen into this trap or had a warranty claim denied for a silly reason? Let me know in the comments—I’m curious to see how many of you have had to fight for a repair! Knowing how to diagnose dishwasher parts during warranty periods yourself can sometimes give you the leverage you need to get the manufacturer to pay up.Once you stop fighting the emergency and start thinking about the future, you realize that owning a dishwasher is less about fixing breaks and more about preventing them. I don’t just mean cleaning the filter; I mean knowing when to replace dishwasher parts for optimal performance before they fail on a Saturday night. I’ve seen too many people wait until they have a flood to realize their supply line was brittle. According to the International Association of Certified Home Inspectors (InterNACHI), the average life expectancy of a dishwasher is about 9 years, but I’ve kept my own units running for 15+ years just by being picky about what’s under the hood. It starts with the right gear.
The Diagnostic Kit I Keep Under My Sink
I’m a bit of a tool snob because I’ve seen cheap tools strip expensive screws. I never troubleshoot a machine without my Fluke multimeter. While a $10 hardware store tester might tell you if there is power, it won’t give you the precision needed when you are looking for the most reliable way to test a thermal fuse or a failing solenoid. I also keep a set of offset screwdrivers for those cramped spaces during a diy dishwasher installation where a standard driver won’t fit. My ‘survival kit’ also includes a specialized torque wrench; modern plastic sumps are incredibly sensitive to over-tightening. If you crank down too hard, you’ll crack the housing, and suddenly you’re maximizing your dishwashers warranty through proper parts selection just to cover up a DIY mistake. I’ve learned that the hard way—cracking a brand new Bosch sump because I thought ‘hand tight’ meant ‘muscle tight.’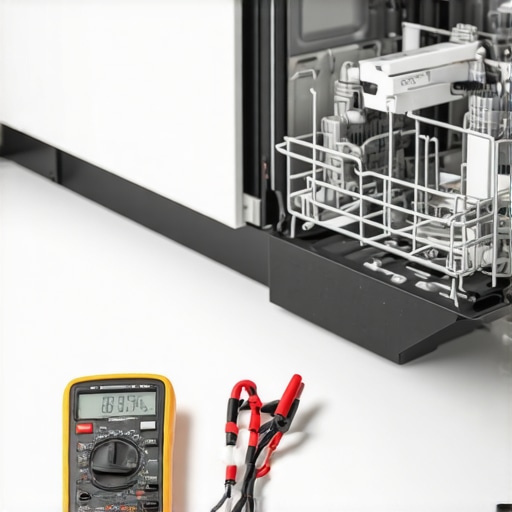
How Do I Keep This Thing Running for Ten Years?
The secret isn’t a magic chemical; it’s mechanical hygiene. Most people ignore their spray arms until the top rack comes out dirty, but I use the 3-minute hack to clear your spray arm nozzles every three months using a simple dental pick. It’s about maintaining the right water pressure inside the tub. Also, stop using the cheap plastic water lines that come in the box. I only install the most durable braided steel hoses for long-term safety because they handle the ‘water hammer’ effect much better than vinyl. This is especially true if you are doing a the step-by-step guide to installing a dishwasher in an island where the plumbing might be more exposed to temperature shifts. Looking ahead, I predict we are entering an era of ‘predictive parts.’ We are already seeing smart sensors that can detect the early vibration of a bearing failure. Soon, your machine will likely send you a notification saying ‘Order a new wash motor now’ three weeks before it actually dies. It sounds like science fiction, but it’s the only way manufacturers can keep these high-efficiency machines running past the five-year mark. If you really want to stay ahead of the game, I highly recommend trying the multimeter test on your heating element today even if it’s working; knowing your ‘baseline’ resistance can tell you exactly when that part is starting to degrade.
Hard Lessons from My Midnight Appliance Battles
One of the biggest ‘lightbulb moments’ for me was realizing that the paperwork is often just as important as the physical wrench. You can perform the most perfect installation in the world, but why your warranty claim fails without an authorized receipt is a lesson you do not want to learn during a kitchen crisis. It is also vital to realize that mechanical components have a definitive shelf life; knowing when to replace dishwasher parts for optimal performance can prevent that midnight panic I experienced. I have found that being proactive—even when the machine seems fine—is the only way to stay out of the exhausting ’emergency repair’ cycle.
The Under-Sink Toolkit That Saves Me Thousands
I never step foot in a kitchen without a few specific items that I trust implicitly. First, my digital multimeter is non-negotiable because it provides the most reliable way to test a thermal fuse or any other failing electronic component. Second, I always swap out factory plastic lines for the most durable braided steel hoses for long-term safety. These simple upgrades turn a standard machine into a much more reliable unit. Finally, I always maintain a digital folder of my manuals to navigate what your dishwasher warranty doesn’t cover and how to avoid fees effectively.
Take Back Your Kitchen Confidence
Troubleshooting your own appliances is about more than just saving a few dollars—it is about the peace of mind that comes with knowing you are not helpless when a sensor acts up. Whether you are managing a complex warranty claim or simply swapping out minor parts, you now have the insider knowledge to handle it like a professional technician. Don’t let a minor glitch turn into a major flooring renovation. Your kitchen should work for you, not the other way around! [IMAGE_PLACEHOLDER]
Have you ever had a warranty claim denied because you could not find a specific piece of paper? Let me know in the comments below—I would love to hear your survival stories!
Related Posts

The Reasons Behind Recurring Error Codes on Modern Units
I remember the exact moment my dishwasher decided to throw…
Why Your Inlet Valve Is Leaking Behind the Cabinet Unnoticed
I remember the moment clearly—standing in my kitchen, my eyes…
How to Identify a Leaking Inlet Valve Before It Ruins Your Floor
It was a quiet Sunday morning when I first noticed…