
I remember the exact Tuesday evening my dishwasher decided it wanted to move into the living room. I pulled the heavy bottom rack out to unload the dinner plates, and—crunch—the whole machine lurched forward. Those flimsy plastic mounting brackets, the ones that come standard in so many builder-grade kits, had finally surrendered. They didn’t just break; they turned into a sad, shredded confetti of white polymer. It’s a sinking feeling when your hundred-pound appliance starts acting like a seesaw.
Stop Putting Up With a Shaky Machine
If you have ever felt that slight wobble when you tug the door open, you are on borrowed time. Most people assume they just need to tighten a stripped mounting hole, but if the bracket itself is plastic, you are just fighting a losing battle against physics. We are going to fix this for good today by moving to metal alternatives. I made the classic rookie mistake of trying to beef up the plastic with bigger screws, but I quickly learned you should stop using standard wood screws because they just chew through the material faster and can even void your warranty coverage if you damage the frame.
Is metal really worth the extra effort?
You might be thinking that plastic worked for a few years, so why change the game now? According to materials engineering data from sources like AZoM, polymers used in appliance housings can undergo thermal degradation over hundreds of heat cycles, making them significantly more brittle than stainless steel or galvanized options. Metal does not care about the steam from your sanitize cycle; it stays rigid. By the time we are done, you will know exactly how to stop your dishwasher from moving permanently. Have you ever opened your dishwasher and had it try to give you a hug because the mounts failed? Let me know your most frustrating kitchen hardware fail. Moving forward, we will look at which metal kits actually fit your specific model.First things first, you need to identify the bracket style your machine supports. Most modern units come with universal mounting slots on both the top and the sides of the frame. When I finally threw my plastic brackets in the trash, I spent about twenty minutes hunting for the specific part number because I wanted a perfect fit. You can save yourself a headache by looking at top tips for selecting the right parts for dishwasher installation before you head to the hardware store. Not every ‘universal’ kit is truly universal, and getting the gauge of the metal right ensures the machine won’t vibrate against your cabinetry. The actual installation is a bit like a game of Operation. You have to slide the unit out just enough to reach the mounting points without snagging the water line. I learned the hard way that if you don’t prepare your kitchen for dishwasher installation by clearing the area and checking your hose slack, you’ll end up with a kinked line and a puddle. Once you have access, swap those flimsy plastic tabs for the metal ones. They usually snap right into the frame’s pre-drilled slots. If you find your cabinets are slightly wider than the machine, you might need to use spacers or shim the brackets. This is one of those critical parts to check when installing a dishwasher for long-term performance.
Side Mounting Saves Your Stone Counters
If you have granite or quartz, you cannot screw into the bottom of the counter. You’ll crack the stone and cry. This is where side mounting comes in. You secure the brackets to the adjacent cabinets instead. I remember helping my neighbor with his new kitchen; he was about to take a masonry bit to his expensive marble until I showed him the mounting bracket trick for shaky granite countertops. It saved his renovation. When side mounting, ensure you are drilling into the structural frame of the cabinet, not just the thin decorative trim. If you hit a snag, you can always look for expert advice on dishwasher installation troubleshooting to find a workaround for non-standard gaps. 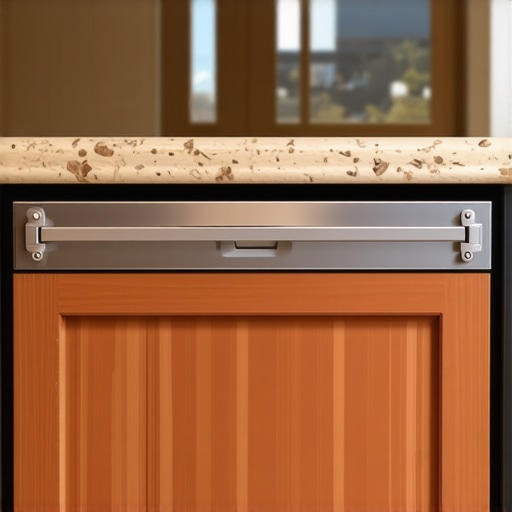
Avoid the Clearance Trap
One tiny detail people miss is the screw head height. If the screw sticks out too far, it will catch on the dishwasher door or the gasket. This is the mounting screw mistake that blocks your top rack from closing properly. I once used a heavy-duty pan-head screw thinking ‘stronger is better,’ only to find the door wouldn’t latch. Use flat-head screws that sit flush against the metal bracket. Also, verify that your new metal brackets don’t interfere with the door springs or the insulation blanket. Keeping everything compact and tight is the secret to a professional-grade finish. Before you drive the final screw, double-check your leveling. A machine that is perfectly mounted but slightly tilted will eventually leak or cause the door to hang unevenly. I always recommend checking the common dishwasher parts and their role in proper installation to ensure you haven’t overlooked a stabilizer or a gasket that shifted while you were wrestling the machine into place. If you are worried about the future of the appliance, remember that knowing the complete list of dishwasher parts covered by warranty can save you money if something else fails down the line, but a physical mounting error is usually on the installer, not the manufacturer.I’ve spent years fixing DIY disasters, and the most common myth I encounter is the belief that brute force equals stability. Everyone says that tightening your mounting screws as hard as possible is the key to a rock-solid install, but in my experience, that’s the fastest way to warp your dishwasher’s frame or snap the very brackets you just bought. According to the Association of Home Appliance Manufacturers (AHAM), excessive torque on mounting points can lead to structural stress that affects door alignment and seal integrity over time. When you over-tighten, you aren’t just securing the machine; you’re essentially putting the frame into a constant state of tension that it wasn’t designed to handle.
Stop Over-Tightening Your Mounting Screws
If you find yourself leaning into that screwdriver with all your weight, take a breath. You only need to be snug. The metal brackets are there to prevent the unit from tipping, not to fuse it to your house. This is a crucial part of maximizing your dishwashers warranty through proper parts selection because any sign of frame warping from over-torqued screws can give a manufacturer an easy out when you try to file a claim. I’ve seen homeowners lose hundreds in coverage because they used an impact driver where a simple hand tool would have sufficed.
Can a Simple Installation Error Void Your Whole Warranty?
This is the advanced question every DIYer needs to ask. Most people assume that as long as the machine turns on, they are in the clear. However, the nuance lies in the paperwork. Many brands specify that if a failure is caused by external factors—like a vibrating unit hitting a cabinet—your coverage vanishes. You need to know why your warranty claim fails without an authorized receipt and, more importantly, how your installation method plays into it. For example, if you’re working with a smart unit, using non-OEM brackets can lead to grounding issues that fry sensitive electronics. Always learn how to spot a fake replacement part before it fries your control board to ensure your sensors stay protected. 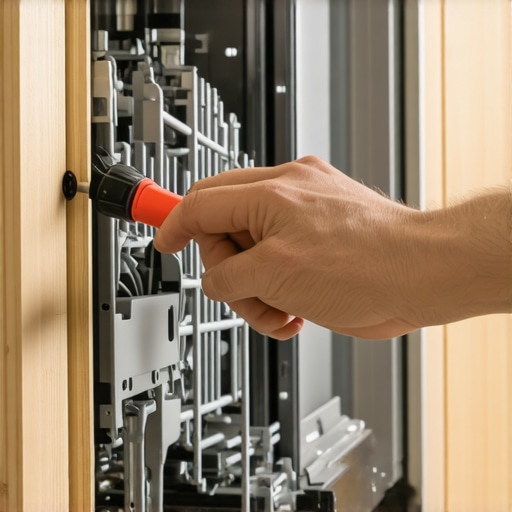
The Hidden Floor Trap Most People Ignore
Here is the oops factor that gets even the pros: the subflooring. If your kitchen has new hardwood or tile that doesn’t run all the way under the dishwasher, your machine is sitting in a pit. When you mount it, the brackets might look fine, but the legs are actually dangling or uneven. You have to learn how to balance a dishwasher on unfinished subflooring before you ever touch those brackets. If the base isn’t level, the brackets will be under constant shear stress, and you’ll be back to square one with a shaky machine in six months. This is exactly the way to protect your warranty during a kitchen remodel—ensuring the foundation is as solid as the hardware. Have you ever fallen into this trap where the floor heights didn’t match up? Let me know in the comments how you bridged that gap!Once you have solved the mounting crisis, you need to think about the long game. I used to be a ‘fix it when it breaks’ guy, but three flooded kitchens later, I have realized that a few specific tools make the difference between a ten-minute tweak and a $500 repair bill. First, stop guessing about electrical issues. I always keep a digital multimeter in my kitchen drawer now. If the machine won’t start after all that wrestling, you need to know how to test your thermal fuse with a basic multimeter. It is a five-minute check that saves you from calling a pro for a $15 part. Similarly, if you hit a drainage snag during the install, skip the chemical cleaners. I have found that why a shop vac is the best way to clear a clog is the single most useful piece of advice I ever received; it sucks the obstruction out rather than pushing it deeper into the pump housing.
The Three Tools I Will Not Start Without
You really only need a few essentials to do this like a pro. A 1/4-inch nut driver, a small level (please, do not eyeball the tilt), and the proper tool to use when tightening your water supply line—usually a small adjustable wrench or dedicated channel locks. I personally avoid power drills for the final tightening; the tactile feedback of a hand tool prevents the over-tightening nightmare we discussed earlier. According to the ANSI/AHAM DW-1-2020 technical standard, even slight deviations in rack loading or water pressure can drastically alter cleaning efficiency, so your goal is to keep the machine perfectly static and level for years to come. 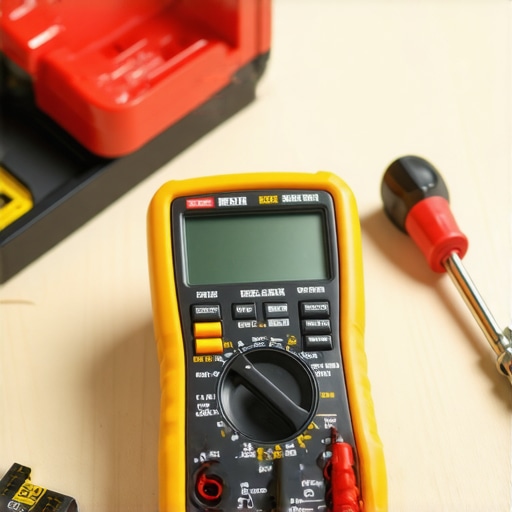
How do I maintain the internal parts over time?
Maintaining the machine is not just about the brackets. You have to look at the ‘soft’ parts that actually do the sealing. I have found that the one maintenance task that doubles the life of your gasket is simply wiping away the hidden detergent buildup at the very bottom of the door. If you ignore this, the gunk hardens, the seal fails, and your fancy new metal brackets won’t matter because the water will just bypass them. This kind of understanding dishwasher parts a key to effective maintenance is what separates a DIYer from a master of the house. You should also keep an eye on your spray arms; a quick poke with a toothpick is the 3-minute hack to clear your spray arm nozzles that fixes 90% of those annoying ‘my dishes are still dirty’ complaints.
The Future of the Self-Healing Kitchen
Looking ahead, we are moving toward appliances that will alert your phone the second a bracket loses tension or a seal starts to weep. I predict that by 2030, ‘mounting’ will be handled by magnetic stabilization systems rather than manual screws. Until then, you have to be the brain of the operation. Check when to replace dishwasher parts for optimal performance every six months. My advanced tip? Grab that multimeter today and map out your thermal fuse and door switch; knowing their ‘healthy’ resistance levels now will make troubleshooting a breeze later. Go ahead and test that fuse tonight—it is the best way to get comfortable with the guts of your machine.
Hard Truths About Shaky Racks and Stripped Screws
I have realized that the small gap between your cabinet and the machine is often your biggest enemy. If you try to bridge a half-inch gap by simply pulling the screw tighter, you will bow the metal frame and ruin the alignment. Always use a spacer or shim to fill that void first. I also make it a habit to snap a high-resolution photo of my final mounting points and the serial number before sliding the unit fully into place. This documentation is a lifesaver when you need to know what your dishwasher warranty doesnt cover and how to avoid fees if a component fails later. Finally, remember that a quiet machine is a properly mounted machine; if you hear a rattle, something is touching a cabinet wall that shouldn’t be.
Gear That Makes Dishwasher Life a Breeze
If you want to move from amateur to expert, stop reaching for the power drill for every task. My personal kit always includes a dedicated 1/4-inch nut driver because it provides the tactile feedback needed to avoid stripping those sensitive mounting holes. I also swear by a small torpedo level; even a tiny 2-degree tilt can lead to pooling water and drainage errors. For those looking to truly bulletproof their setup, I recommend looking into essential parts every dishwasher owner should know about to identify which high-durability brackets and gaskets are worth the investment. I trust these specific tools because they have kept my own kitchen floor dry and my appliance silent for over a decade.
Take Control of Your Kitchen Stability
You do not have to be a master plumber to ensure your machine stays exactly where you put it. By choosing metal hardware over flimsy plastic and respecting the torque limits of your cabinetry, you are ensuring your appliance runs efficiently for its entire lifespan. Take the time to apply these top tips for seamless dishwasher installation in 2025 and say goodbye to that annoying wobble once and for all. Your kitchen and your peace of mind are well worth the extra twenty minutes of precision work. Have you ever had a mounting bracket fail on you at the worst possible moment? Tell me your dishwasher horror stories in the comments below!
Related Posts
The $20 Valve That Stops Your Dishwasher from Siphoning
It happened to me during a busy weekend—my brand-new dishwasher…
The One Tool That Makes Spray Arm Removal Effortless
It happened to me on a busy Saturday afternoon —…
The Problem With Universal Hoses for High-End European Models
It was a morning like any other—until I heard that…