
I was standing in my kitchen last Tuesday, staring at a plate that was supposed to be “sparkling” but was instead covered in a fine, sandpaper-like grit. It’s that sinking feeling every homeowner knows—the machine ran for two hours, I heard the water sloshing, but the dishes are still filthy. I almost grabbed my phone to call a repairman, thinking my pump had finally given up the ghost. I’ve been there before, worrying about essential parts for troubleshooting dishwasher installation issues and wondering if I’d have to tap into my emergency fund. But then I stopped myself. I remembered the last time I paid a $150 service fee just for a guy to tell me my nozzles were clogged with a single piece of popcorn. It was embarrassing. Today, I’m going to show you how to avoid that same “dummy tax” with a three-minute hack that fixes 90% of poor cleaning issues.
The moment I realized I was wasting hours pre-rinsing
We’ve all been told that we need to rinse our dishes until they’re practically clean before they go into the machine. That’s a total myth. In fact, why the heavy cycle is actually better for your machine health often comes down to the sensors needing something to actually “eat.” My big mistake early on was thinking that if the dishes were dirty, I just needed more detergent or a hotter setting. I didn’t realize that the tiny holes in those spinning plastic arms were packed with calcium and old spinach. When those holes are blocked, the water doesn’t spray; it just kind of limps out. You can have the world’s most powerful motor, but if the exit point is blocked, you’re just wasting electricity. Understanding dishwasher parts isn’t just for mechanics; it’s for anyone who wants to save money on water bills.
Is this 3-minute trick really better than a professional repair?
I get it. You’re skeptical. You think if it were that easy, everyone would do it. But here’s the thing: most people don’t even know the best way to clean the hidden filter under the spray arm, let alone the arms themselves. A study by the Water Quality Association found that 85% of North American homes have hard water, which leads to mineral buildup that acts like “artery clogging” for your appliances. This hack isn’t about a deep-dive mechanical overhaul; it’s about basic physics and restoring the flow. Have you ever noticed your top rack specifically coming out worse than the bottom? That’s almost always a nozzle issue.
Your spray arms are likely gasping for water
If you’ve ever wondered why the eco mode might be leaving grit on your plates, it’s because lower water pressure in those cycles can’t always clear out the gunk. Before you start looking into common dishwasher parts and how to replace them effectively, you need to check the spray path. I spent years thinking my machine was just a “lemon” until I actually looked at the underside of the arm. It was disgusting—seeds, plastic bits, and lime scale. But it took me less time to fix than it takes to brew a pot of coffee. Have you ever opened your dishwasher mid-cycle and seen the arms aren’t even in a different position? That’s your first clue. Tell me, have you ever felt like your dishwasher is just a glorified drying rack lately?
Get those spray arms out of the way first
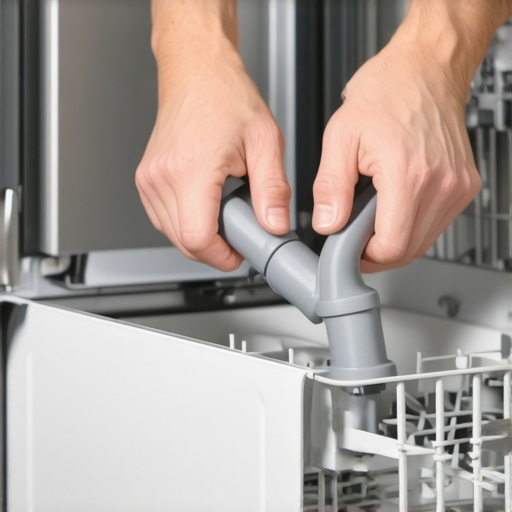
The first thing you need to do is reach into the belly of the beast and remove the spray arms. Most bottom arms just pop off with a firm tug or a quick unscrewing of a plastic center nut. It’s one of those essential parts every dishwasher owner should know about because if you can’t remove it, you can’t maintain it. Think of the spray arm like the showerhead in your bathroom; if you never scrubbed the nozzles, eventually the water would just spray at weird, weak angles. I once spent forty minutes wrestling with a top arm because I didn’t realize it had a specific side-clip mechanism. If you find yourself forcing it, stop and search for common dishwasher parts and how to replace them effectively to see if your specific model has a unique twist-and-lock feature that you’re missing.
Clear the gunk without buying expensive tools
Once the arm is in your sink, you’ll see the culprits staring back at you in the form of tiny, clogged holes. If you live in an area with heavy mineral content, you’ll see white, crusty rings around these exits. This is where the trick to removing hard water scale without chemical descalers becomes your best friend. I use a simple toothpick or a straightened paperclip to poke through each individual jet. I remember one Saturday morning, I was hunched over the sink, picking out what turned out to be a fragment of a broken glass bowl and a very stubborn sticker from a peach. It was slightly gross, but deeply satisfying to watch the debris fall out. You want to poke each hole and then run high-pressure water through the center of the arm to flush the debris out the way it came in, rather than pushing it deeper into the plastic housing. If the scale is really stubborn, soak the whole assembly in a 50/50 mix of warm water and lemon juice. If you decide the part is beyond saving and want to buy a new one, make sure you know the truth about third-party replacement spray arms—sometimes the generic versions lack the internal baffling needed for proper water distribution.
Check for smooth spinning before you close the door
After you’ve cleared the blockages, snap the arms back into their mounts. But here is the part everyone skips: give them a manual spin with your hand. They should whirl freely like a propeller. If they catch or feel gritty, you likely have sand or seeds stuck in the mounting bracket. This is a common oversight during top-tips for selecting the right parts for dishwasher installation, as even a slightly misaligned arm can cause the motor to struggle. If the arm is actually cracked or the plastic has warped from a high-heat cycle, you might need to look into understanding dishwasher warranty policies for peace of mind to see if a replacement part is covered before you spend your own money. While you’re down there, take thirty seconds to check the hidden drain screen you probably forgot to clean. If that screen is blocked, the gunk you just cleared from the arms will just get sucked back into the pump and redeposited on your plates in the next five minutes.
But even if your spray arms are spinning like a dream, there’s a much larger trap waiting for you in the fine print of your owner’s manual. Most people assume that hiring a pro means they are 100% protected. That’s a dangerous gamble. I’ve seen homeowners lose thousands because they didn’t realize the risks of skipping the professional installation receipt. If that piece of paper disappears, so does your leverage. In fact, why your warranty claim fails without an authorized receipt is the single most common story I hear from frustrated neighbors. They have the proof of payment in their bank app, but without the itemized ‘Authorized Installer’ stamp, the manufacturer just sees a ‘DIY’ risk.
Don’t assume a professional installer solves every warranty headache
Beyond just the receipt, there’s a huge difference between what the manufacturer covers and what your ‘home warranty’ promises. I see people get burned daily because they don’t know what your dishwasher warranty doesn’t cover and how to avoid fees. Often, the labor for a $5 sensor is $200, and your ‘comprehensive’ plan might exclude the service call entirely. This is why I always suggest maximizing your dishwashers warranty coverage today by registering the unit within 30 days of purchase. Many brands extend the parts coverage for free just for signing up for their newsletter. It sounds like a nuisance, but that 5-year motor warranty is worth the three minutes of dealing with marketing emails.
Why your water softener might actually be eating your dinnerware
Let’s dig deeper into the contrarian truth about water: everyone obsesses over hard water, but why soft water is ruining your dishwasher interior faster than hard water is a secret most salespeople won’t tell you. If your water is *too* soft, the detergent has nothing to react with and starts ‘etching’ the glass, permanently clouding your favorite wine glasses. It’s not a film you can wash off; it’s actual structural damage to the glass. According to the Association of Home Appliance Manufacturers (AHAM), over-softening water combined with high heat is the leading cause of ‘glass disease’ in modern appliances. You have to find that sweet spot in your settings to avoid destroying your inventory while trying to keep it clean.
Can you actually win a fight with a manufacturer over backordered parts?
I once waited six weeks for a control board, only to be told it was ‘indefinitely out of stock.’ Most people just give up and buy a new machine, which is exactly what the manufacturer wants. Don’t do that. Knowing how to negotiate a replacement when your warranty parts are backordered can often result in the company offering you a pro-rated credit toward a brand-new model. You just have to know the magic words—’unreasonable repair timeline’—to trigger their internal replacement protocols. If they can’t provide the part to honor the contract, they owe you a functional solution.
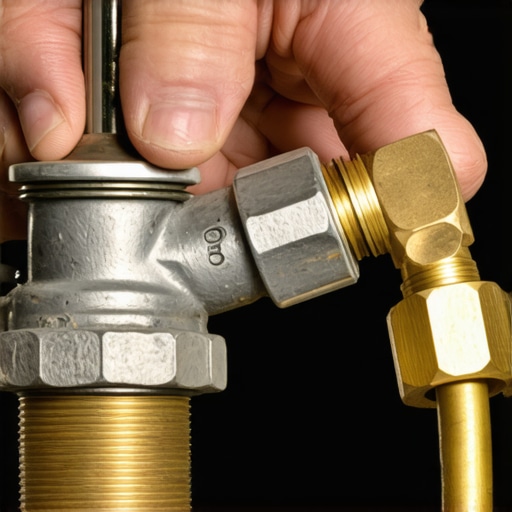
Finally, let’s talk about the ‘Oops’ factor that kills machines within the first year: the water valve. I’ve had friends try to save $30 by reusing the old brass fitting from their 1990s unit. It’s a disaster waiting to happen. Why your professional installer insists on a new water valve isn’t about padding the bill; it’s because old gaskets have a ‘memory’ of the previous seal. Once you break that seal, it will never sit perfectly again on a new unit. This is the mistake that voids your lifetime tub warranty faster than anything else because a slow drip behind the kickplate causes the floor to rot long before you see a puddle. Have you ever fallen into this trap? Let me know in the comments.
Stop guessing and start using a $15 multimeter
I used to be terrified of electrical components until I realized that a basic multimeter is the only ‘crystal ball’ you’ll ever need for your kitchen. I keep a cheap one in my junk drawer specifically because it’s the most reliable way to test a thermal fuse without having to pay a technician to do the exact same thing. If your machine won’t even turn on after a power surge, don’t assume the motor is dead. Nine times out of ten, it’s a $10 fuse that blew to protect the expensive bits. You aren’t just fixing a part; you are understanding dishwasher parts so you can diagnose the ‘brain’ of the machine before you call for backup. It’s also important to remember that the proper tool to use when tightening your water supply line isn’t always a heavy wrench; often, it’s your hand followed by a very specific quarter-turn with pliers to avoid cracking the plastic valve housing.
How can I make my dishwasher last ten years or longer?
Maintenance isn’t a one-time event; it’s a rhythm. Every six months, I make a point of reviewing parts to check when installing a dishwasher for long-term performance, specifically looking for those tiny pinhole leaks that don’t reach the floor but can corrode the motor over time. The Association of Home Appliance Manufacturers (AHAM) recently pointed out in their 2024 technical brief that the shift toward high-efficiency ‘smart’ units means our traditional cleaning methods must change. We’re moving toward a future where the machine will literally text your phone when the filter is 80% clogged, but until that becomes standard, you have to be the sensor. I’ve even started teaching my kids how to identify a failing circulation motor by sound—if it sounds like a rhythmic thumping instead of a smooth whoosh, there’s likely something stuck in the impeller. Staying ahead of these sounds is the difference between a $20 DIY fix and a $600 replacement.
Don’t let a missing piece of paper kill your coverage
If you take nothing else away from my experience, remember this: your warranty is a legal contract, and manufacturers look for any reason to void it. I’ve seen people lose out on free motor replacements because they couldn’t produce the risks of skipping the professional installation receipt. Even if you did a perfect job yourself, many high-end brands require a signature from a licensed plumber to validate the ‘lifetime’ tub warranty. I always recommend maximizing your dishwashers warranty through proper parts selection by keeping every single tag and manual in a gallon-sized freezer bag taped to the back of the cabinet. If a part fails, you’ll need to know how to diagnose dishwasher parts during warranty periods so you can tell the service agent exactly what’s wrong, which usually speeds up the parts-ordering process by weeks.
The future of kitchen maintenance is predictive
We are already seeing a massive shift toward units that monitor their own internal pressure. Soon, the idea of manually poking a toothpick into a spray arm will seem as ancient as hand-cranking a car. But for now, we have to bridge that gap with manual checks. My big ‘pro tip’ for you this week: grab a flashlight, pull off that bottom kickplate, and check for any signs of white crusty buildup around the water inlet. If you see it, you’ve caught a slow leak before it ruined your subfloor. Go ahead and try it tonight—it takes thirty seconds and could save you three thousand dollars in flooring repairs. If you find a drip, don’t panic; just look into when to replace dishwasher parts for optimal performance to see if it’s just a loose clamp or a failing valve.
Hard Truths from a Decade of Dishwasher Triumphs
I spent years thinking the ‘Heavy’ cycle was just for burnt lasagna pans. I learned the hard way that running it once a week actually keeps the internal drainage lines clearer than any chemical cleaner could. My expert advice on dishwasher installation troubleshooting always starts with a simple reality check: look at your usage habits before you blame the hardware. Another lightbulb moment for me was realizing that the ‘Clean’ light doesn’t always mean the water was hot enough to sanitize; it just means the timer finished. Always snap a photo of your model and serial tag before you push the unit into the cabinetry. You will be grateful for that photo when you are ordering the most popular dishwasher parts and how they improve performance while relaxing on your couch, rather than wrestling with the machine’s kickplate. Finally, remember that the most expensive part of a repair isn’t the plastic—it’s the labor. Knowing why your warranty covers parts but not the 150 service trip fee can save you hundreds if you learn to swap simple sensors yourself.
The Gear That Keeps My Kitchen Running Smoothly
You don’t need a professional workshop to maintain a modern appliance, but a few specific items are essential. First, a basic digital multimeter is the only way to truly test components without guessing. I also highly recommend upgrading to stainless steel braided hoses immediately; they are a small investment that prevents the nightmare of a flooded kitchen. I keep a physical maintenance folder in my pantry that contains the complete list of dishwasher parts covered by warranty and every itemized receipt from my installer. This paper trail is your only shield if a major component fails prematurely. For those just starting out, check out this guide on how to prepare your kitchen for dishwasher installation to ensure your setup doesn’t accidentally void your future coverage.
Take Control of Your Home Maintenance Journey
Stepping into the world of DIY appliance care can feel intimidating at first, but every small fix builds your confidence. There is a unique satisfaction in hearing your machine run perfectly, knowing you saved a service fee with nothing more than a toothpick and a little bit of patience. By understanding dishwasher parts and how they interact, you transition from a frustrated owner to a savvy household manager. Don’t be afraid to get your hands a little dirty today to ensure a clean kitchen tomorrow. Have you ever successfully diagnosed a dishwasher issue yourself using a multimeter? Let me know your story in the comments below!
Related Posts
How to clean a clogged spray arm with a toothpick
Ever opened your dishwasher after a cycle and wondered why…

Why Hard Water Is the Enemy of Your Smart Sensor
It was a quiet Sunday afternoon when I first noticed…

The easiest way to remove hard water buildup from the tub
Ever stepped into your shower and felt that gritty, slimy…