
I still remember the smell of singed plastic. It was a Saturday morning, and my brand-new dishwasher was finally sitting in my kitchen, waiting for its maiden voyage. I had skipped the professional setup to save a few bucks, splicing the old wiring into the new unit myself. Within ten minutes of turning it on, a loud pop echoed from beneath the kickplate, followed by a thin wisp of smoke. I had completely bypassed safety protocols and ignored how crucial fresh electrical connections are. That day, I learned a costly lesson about why specialized dishwasher parts and secure enclosures are not optional if you want to keep your home safe and preserve your peace of mind.
The Real Reason Behind That Extra Junction Box Charge
When an appliance pro walks into your kitchen and immediately tells you that your old direct-wire setup won’t cut it, it is easy to assume they are just trying to pad the bill. But here is the truth: modern electrical codes, specifically the National Electrical Code (NEC 210.8), now strictly mandate a dedicated, accessible junction box or a GFCI-protected outlet for new installations to prevent electrical fires. Older homes often have wires running straight out of the drywall directly into the machine, which leaves live connections vulnerable to vibration, moisture, and extreme temperature swings. Over time, those shaky wires rub against the metal frame, leading to a hazard that can easily ruin your appliance or cause a fire. If you are preparing your home, understanding how to prepare your kitchen for dishwasher installation will help you anticipate these electrical safety requirements before the delivery truck arrives.
Is a new junction box just a costly contractor upcharge?
It is completely normal to feel skeptical when a technician insists on changing parts that seem to be working perfectly fine. However, reusing an old, degraded junction box is one of the quickest ways to void your manufacturer protection. In fact, many homeowners do not realize that what your dishwasher warranty doesn’t cover often includes any damage resulting from faulty external electrical hookups or improper installation methods. When I tried to reuse my old, corroded wire nuts years ago, I almost fried the entire control board on day one, a blunder that would have cost me hundreds of dollars out of pocket because no manufacturer covers installation errors.
Protecting Your Kitchen and Your Investment
Insisting on a dedicated junction box is not about making things difficult; it is about creating a stable, isolated environment for your appliance’s delicate electronics. Modern dishwashers run complex heating cycles that draw significant current, and a dedicated, pristine connection point ensures that electrical surges do not disrupt your wash cycles. Have you ever had an installer refuse to hook up an appliance because of your existing kitchen wiring? Let me know in the comments below! If you want to make sure your entire setup is done right from start to finish, be sure to check out our top tips for seamless dishwasher installation in 2025 to keep your home safe and your warranty fully intact.
Step-by-Step Mastery of Your Junction Box Installation
Installing a junction box is like building a miniature fortress for your home’s electrical connections. You are wrapping live, high-voltage wires in a protective steel or heavy-duty plastic casing to ensure that moisture and movement never cause a spark. To do this right, you need to first route your home’s Romex cable through a strain relief clamp into the metal box. I remember the first time I rushed this step; I skipped the clamp entirely, and within six months, the vibration of the wash cycles rubbed the wire insulation thin against the metal knockout edge. That tiny mistake tripped my breaker and nearly ruined my machine. To avoid this, pull about six inches of wire into the box, strip the outer jacket back, and expose the copper ends. Secure the box tightly to the dishwasher frame using the manufacturer’s mounting bracket. Then, match the black hot wire to black, white neutral to white, and twist the bare copper ground wire firmly under the green grounding screw.
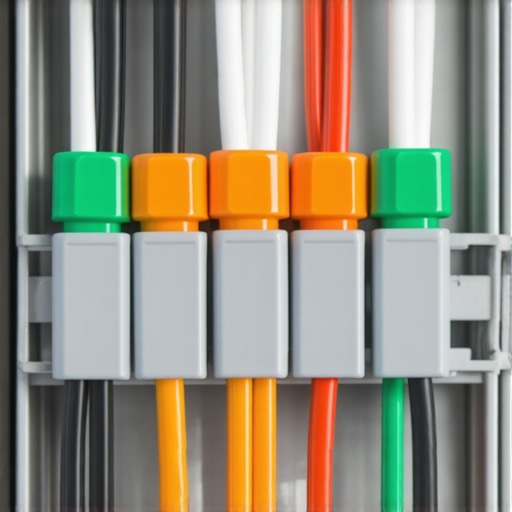
The critical terminal connection you cannot skip
Once your main wires are inside the junction box, you must secure them with rated wire nuts. Think of wire nuts as the seatbelts for your electrical current. Do not just twist them together with your fingers; use lineman’s pliers to pre-twist the copper strands together clockwise before threading the nut on. Give each wire a gentle tug to ensure it is locked in place. Loose connections generate heat, and high resistance is the leading cause of fried control boards, a disaster that is easily preventable. Preparing your home properly before you begin will save you hours of troubleshooting later. If you are handling the process yourself, reading a solid diy dishwasher installation step-by-step guide can give you a clear roadmap of how these electrical connections fit into the overall setup.
The Water Line Connection That Prevents Floods
Connecting the water supply is where many well-meaning DIYers make critical errors that can ruin expensive flooring. Your dishwasher relies on a brass inlet valve, and threading your supply line onto this valve requires extreme precision. Always use a brand-new compression fitting or a braided stainless steel water line. Reusing old copper tubing or brass fittings is a major gamble because metal deforms slightly under pressure to create a seal, and once it is disturbed, it rarely seals properly a second time. This is exactly why your installer refuses to reuse your old brass fittings when putting in a new unit.
How to seal the water elbow without cracking the valve
When you screw the brass elbow joint into your dishwasher’s water inlet valve, apply two wraps of Teflon tape around the threads clockwise. Hand-tighten the elbow first to ensure you do not cross-thread the delicate plastic housing of the valve. Once it is hand-tight, use an adjustable wrench to give it one more full turn. Do not over-tighten this connection, as too much force can crack the plastic valve body, leading to a slow, hidden leak behind your kickplate. For a foolproof seal, knowing the proper tool to use when tightening your water supply line will keep you from warping the fittings. Always run a test cycle and watch this joint with a flashlight for at least ten minutes before pushing the dishwasher fully into the cabinet cavity.
Protecting your warranty through professional-grade parts
Using cheap, generic hoses or skipping critical installation steps can cost you dearly. Manufacturer warranties are strict, and they will reject claims instantly if they find that water damage or electrical failure was caused by subpar aftermarket accessories. Taking time for maximizing your dishwashers warranty through proper parts selection protects your wallet and keeps your coverage intact if a factory component ever fails. Always double-check that your water supply line is rated for high-temperature domestic hot water to avoid premature degradation under pressure.
When most people think about setting up a new kitchen appliance, they assume the hardest part is physical labor—lifting the heavy unit or making sure it sits level. In my years of working with home appliances, I have realized that the physical installation is rarely where things go off the rails. Instead, the real danger zone lies in the unseen nuances of warranties and structural mechanics. Many homeowners fall into a massive trap by believing that as long as the machine physically turns on and runs a cycle, their home is safe and their financial investment is protected. This is a costly misconception.
The Great Handyman Myth of the “All-Inclusive” Coverage
Everyone tells you that buying an extended service plan or relying on the manufacturer’s backing means you are completely covered against any future failure. But in my experience, the opposite is true if you don’t pay close attention to the installation details. A manufacturer’s protection policy is not a blanket insurance policy; it is a highly specific legal contract. If you use a cheap, unbranded component during setup, you are essentially tearing up that contract. Manufacturers frequently deny claims if they discover that a minor, non-certified component caused or contributed to a system failure. To truly safeguard your household budget, you need to understand understanding dishwasher warranty policies for peace of mind and how easily those policies can be voided by a single non-standard part.
Why does your warranty cover parts but leave you with a massive bill?
This is the ultimate “gotcha” of the appliance world. You wake up to a puddle of water, call the manufacturer, and they happily tell you the replacement valve is free under warranty. Then, the service technician arrives, spends twenty minutes swapping the part, and hands you a bill for nearly two hundred dollars. This happens because of a very specific industry loophole: why your warranty covers parts but not the 150 service trip fee. Labor and trip charges are rarely covered past the first year, even if the physical part itself has a lifetime guarantee. Understanding this dynamic before you buy can help you decide whether to tackle minor fixes yourself or invest in a more comprehensive store protection plan.
The Countertop Trap That Slowly Destroys Your Cabinets
Here is an advanced mistake that even some experienced builders make: mounting a heavy dishwasher directly to delicate premium surfaces without the right hardware. When dealing with modern, high-end kitchens, traditional wood screws will ruin your day. If you have quartz, marble, or granite counters, trying to anchor your appliance directly upward into the stone is a recipe for cracked countertops or a shaky, vibrating machine. Instead, smart installers use alternative side-mounting techniques to secure the unit to the flanking cabinetry. Failing to do this properly not only ruins your expensive stonework but also warps the dishwasher frame over time, preventing the door latch from sealing properly. If you are dealing with premium stone, learning the proper way to secure brackets to quartz countertops will save you thousands of dollars in cabinet repairs.
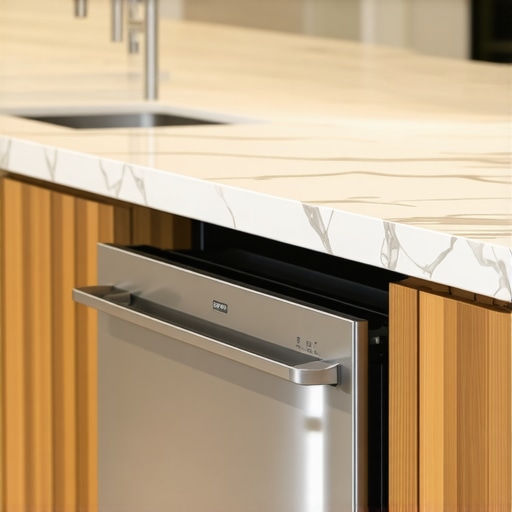
This structural stress is a major reason why doors begin to leak after just a year or two of heavy use. Have you ever fallen into this trap or had a technician tell you your warranty was voided over a simple installation mistake? Let me know in the comments below! If you are currently troubleshooting an older machine or planning a fresh setup, taking the time to consult some expert advice on dishwasher installation troubleshooting will help you identify these subtle mechanical issues before they turn into major structural damage. Remember, a truly successful installation is one that protects both your kitchen floor and your warranty coverage for years to come.
When it comes to keeping your appliance running quietly and efficiently year after year, proper physical setup is only half the battle. Over time, the constant vibration, high temperatures, and chemical exposure can slowly degrade your system. Keeping your setup intact requires a proactive approach to maintenance and having the right tools on hand to address issues before they cause system-wide failures. To make sure you are selecting the correct components for long-term health, understanding parts to check when installing a dishwasher for long-term performance is the foundation of any reliable kitchen setup.
The Diagnostic Tool Every Homeowner Needs in Their Drawer
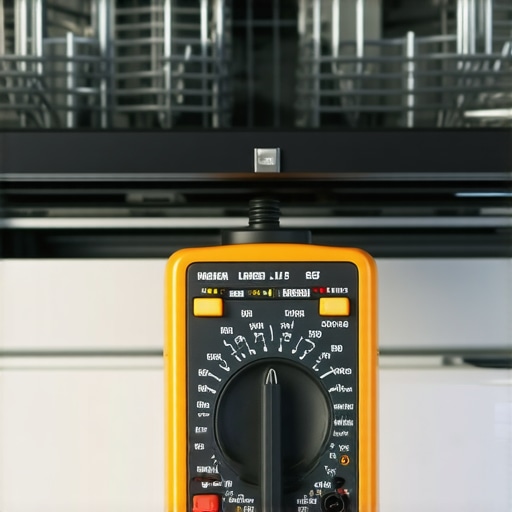
If you want to move past guesswork and start diagnosing problems like a certified technician, you need to stop relying on visual inspections alone. When my machine refused to heat during a winter cycle last year, I did not call a repair service right away. Instead, I pulled out my digital multimeter. Having a reliable multimeter is the absolute best way to check for electrical continuity in your heating element or thermal fuse. It takes five minutes to learn how to read resistance, and it prevents you from throwing expensive parts at a problem that might just be a tripped safety switch. If your unit refuses to power on at all, knowing how to test your thermal fuse with a basic multimeter will save you from an unnecessary and costly control board replacement.
How do I maintain my dishwasher’s mechanical performance over time?
To keep your machine running at peak efficiency, you must perform regular preventative checks on its moving and sealing components. According to the appliance engineering standards published by the Association of Home Appliance Manufacturers (AHAM), over 80% of premature pump failures are caused by debris bypassing the filter or structural misalignment. I make it a strict rule to inspect my spray arms every three months to ensure the tiny water jets are not clogged with calcium scale or seeds. Additionally, you should inspect your door seal for microscopic cracks that can slowly weep moisture onto your subfloor. Knowing when to replace dishwasher parts for optimal performance ensures that you tackle minor seal degradation before a major leak forces you to deal with kitchen remediation.
Where Appliance Engineering is Heading in the Next Decade
The days of simple mechanical timers and basic float switches are quickly coming to an end. We are moving rapidly toward a future where appliances are fully integrated with AI-driven diagnostic software. Within the next few years, your dishwasher will likely monitor its own internal water pressure and notify you via a smartphone app exactly which internal gasket is beginning to wear out before a single drop of water hits your floor. However, even with these smart advances, the physical connections—the brackets, the water lines, and the junction boxes—will always remain mechanical. This is why mastering the physical fundamentals of installation and understanding understanding dishwasher parts a key to effective maintenance will remain an essential skill for any savvy homeowner. If you want to put this knowledge to work immediately, I highly recommend testing your water inlet valve resistance this weekend with a multimeter to ensure your machine is pulling the correct heating load safely.
When we look at the big picture, a successful appliance setup is never just about getting the machine to run through its first cycle without dripping. It is about understanding how mechanical forces, electrical current, and water pressure interact over several years. By taking control of your installation details and choosing your hardware carefully, you turn what could be a stressful household chore into a masterclass in home maintenance.
The Hardest Lessons I Learned About Navigating Warranty Pitfalls and Cheap Hardware
If you want to keep your kitchen dry and your savings account intact, there are three hard-earned realities that every homeowner should take to heart before picking up a wrench:
- Generic hoses are a ticking time bomb: Using a bargain-bin braided line to save ten dollars is a massive gamble. High water pressure combined with hot sanitation cycles will degrade cheap rubber cores, leading to catastrophic failures when you least expect it.
- Your paper trail is your shield: Manufacturers love to deny claims based on unverified installations. Keeping dated receipts for high-quality, certified parts is the only way to prove you did not cause the failure yourself. This is why knowing why your warranty claim fails without an authorized receipt is critical before you call a technician.
- Vibration is a silent killer: If your machine is not anchored properly, the micro-movements of the wash cycle will slowly loosen water connections and electrical terminals behind your cabinets. Over time, this constant shaking can result in a slow, hidden drip or a short circuit.
My Essential Toolkit for Appliance Longevity
You do not need a garage full of specialized gear to keep your system running beautifully. These are the specific tools and resources I recommend to anyone serious about maintaining their own kitchen appliances:
- A Quality Digital Multimeter: Stop guessing whether a heater or thermostat is broken. A basic digital multimeter is safe, easy to use, and pays for itself the very first time it saves you from calling out a repair service.
- A Heavy-Duty Shop Vacuum: When a drain pump clogs, you do not want to scoop dirty water out with a cup. Knowing why a shop vac is the best way to clear a clog will save your floors and your sanity during a drainage emergency.
- The AHAM Appliance Standards Directory: This is my go-to professional resource for understanding water consumption, filtration efficiency, and the physics of modern washing cycles.
The Future of Your Kitchen Starts with One Smart Step
Taking ownership of your home maintenance might feel intimidating at first, but every master technician started exactly where you are today. By investing in professional-grade dishwasher parts and taking the time to secure your cabinet connections, you are doing more than just washing plates—you are protecting your home, preserving your peace of mind, and building skills that will serve you for a lifetime. Do not be afraid to pull off that kickplate, check your fittings, and make sure your system is built to last.
Have you ever had a cheap water line or a shaky mounting bracket cause a headache in your kitchen? Let me know in the comments below!
Related Posts
Why a 24-Inch Opening Isn’t Always Exactly 24 Inches
It was a frustrating weekend in my kitchen. I had…

Professional Installation vs DIY: Hidden Liability Factors for Renters
I vividly remember the moment I realized I had made…

Why Professional Installation is Often Required for Extended Coverage
I vividly remember the moment I realized I had made…