
Have you ever been in the middle of washing a pile of dishes, only to realize that your dishwasher isn’t cleaning as thoroughly as it used to? Frustration washes over me every time I dump out a load, and I spot stubborn food spots on my plates. It’s like my appliance has lost its edge—until I had my own lightbulb moment.
Why a Weak Spray Arm Might Be Costing You More Than Just Clean Plates
For years, I brushed off the idea that a few clogged or worn spray arms could be the culprit behind my dishwasher’s underperformance. I thought, “Maybe I just need to use more detergent or run a longer cycle.” But surprisingly, it wasn’t long before I learned that the real issue was water coverage. When the spray arm isn’t spinning freely, or the holes are clogged with mineral deposits, your dishwasher’s sprayers can’t do their job effectively. It’s like trying to wash your car with a garden hose that’s got a kink in it—no matter how much pressure you have, the water just doesn’t reach where it needs to.
After replacing my spray arm with a better-quality part and cleaning out those stubborn deposits, I saw an immediate improvement. Dishes came out cleaner, and I spent less time re-washing. That simple upgrade saved me money, frustration, and a stack of lemon-scented frustration.
Today, I want to share with you how you can do the same. We’ll explore the ins and outs of upgrading your spray arm, diagnose water coverage issues, and get your dishwasher back to peak performance. Trust me—after my own experience, I guarantee this can be a game-changer for your kitchen routine.
Will a new spray arm really make that much difference?
I’ll admit, I was initially skeptical. It seemed too simple. But I made a common mistake early on—ignoring the importance of properly diagnosing the root cause. Many folks just assume it’s time for a whole new dishwasher, but often, it’s a smaller fix that slashes costs and restores function. For expert tips, you might want to visit this resource.
Next, let’s dig into how to identify whether your spray arm is the culprit and what specific steps you can take to improve water coverage. Ready to get those dishes spotless again? Let’s jump in!
**Note:** If you’ve faced similar issues or have tried various fixes that didn’t work, I’d love to hear about your experiences. Sharing our stories can help all of us keep our appliances running smooth and our kitchens happy.
Remove the Old Spray Arm Safely
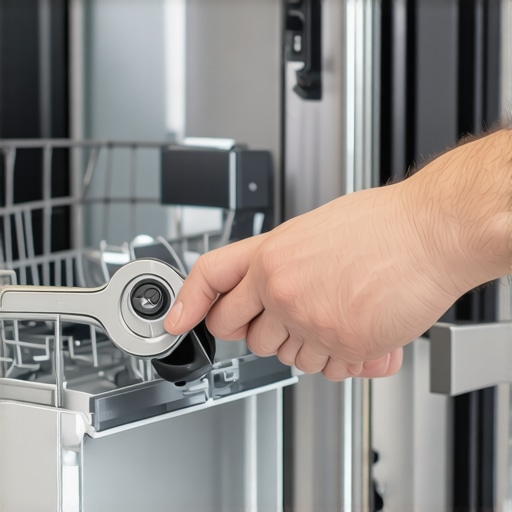
Start by disconnecting your dishwasher from power and water supply. Place a towel or small container beneath the spray arm to catch any residual water. Use a screwdriver or socket wrench to unscrew the central nut holding the spray arm in place. Gently lift it out, avoiding force that could damage surrounding components. I once forgot to turn off the water, which caused a small leak that I had to clean up afterward.
Clean the Spray Arm and Check for Clogs
Inspect the spray nozzles for mineral deposits or debris. Use a toothpick or small brush to clear any blockages. For stubborn deposits, soak the spray arm in a vinegar solution to dissolve hard water mineral buildup. During my first attempt, I discovered that clogged holes were causing uneven water spray, leading to residue on dishes.
Choose the Right Replacement Part
Refer to the dishwasher model number to find a compatible spray arm. Visit this guide for insights into selecting quality parts. Make sure the replacement has the same connection type and nozzle configuration for a proper fit. I once ordered a generic spray arm, which caused leaks; ensuring the correct part saved me time and additional costs.
Install the New Spray Arm Correctly
Align the spray arm’s hub with the central post and gently press it down. Secure it with the original nut, tightening it snugly but not over-tightening to avoid stripping threads. Confirm the spray arm spins freely without obstruction. I found that hand-tightening followed by a quarter turn with a wrench strikes the perfect balance.
Test Your Work
Reconnect the water supply and power. Run a short cycle without dishes to observe the spray action. Check for leaks and ensure the spray arm rotates uniformly. If errors or leaks occur, re-tighten or re-seat the part. My first test run revealed a slight wobble, which I resolved by re-tightening the nut.
If you encounter persistent issues or want professional assistance, contact a certified technician here. Regular maintenance and proper installation are key to prolonging your dishwasher’s lifespan and keeping your dishes spotless.
While many homeowners believe that warranty coverage simplifies dishwasher repairs, the reality is more nuanced. A common misconception is that parts covered under warranty are always the right choice, but selecting incompatible or incorrect parts can void your coverage and lead to costly damages. For example, choosing generic parts without verifying compatibility often results in improper fitment, which can damage internal components and invalidate warranty claims. **Expert tip:** Always consult your dishwasher’s manual or a professional before replacing parts, and consider reviewing [this guide](https://appliancedoctorz.com/parts-to-check-when-installing-a-dishwasher-for-long-term-performance) to ensure proper part selection.
Another misunderstood aspect is installation procedures. The assumption that DIY installation is straightforward and risk-free can be misleading. Incorrect installation not only affects performance but also risks warranty eligibility. Advanced mistakes such as improper water inlet connections or inadequate leveling can cause persistent leaks or operational failures. Many forget that certain warranty policies require professional installation or adherence to specific installation standards. For detailed steps, check out [this comprehensive installation guide](https://appliancedoctorz.com/diy-dishwasher-installation-step-by-step-guide).
A significant trap involves neglecting the fine print within your warranty policy. Homeowners often assume that any damage within the warranty period is covered, but in reality, warranties frequently exclude issues arising from improper installation, misuse, or undocumented repairs. As highlighted by industry experts, maintaining detailed records and following manufacturer protocols is crucial. To understand what your warranty covers and how to maximize it, review [this detailed resource](https://appliancedoctorz.com/understanding-dishwasher-warranty-policies-for-peace-of-mind).
Furthermore, over-reliance on warranty services can lull homeowners into complacency about regular maintenance. Small issues like clogged filters or mineral deposits often escalate into major problems if overlooked. Advanced users know that preemptive maintenance can extend appliance lifespan and preserve warranty validity. Regularly inspecting [common dishwasher parts](https://appliancedoctorz.com/essential-parts-every-dishwasher-owner-should-know-about) and cleaning critical components can save money and time.
**What most people get wrong about warranty and installation is underestimating the importance of precision and attention to detail.** Even a minor mistake, such as not sealing connections properly or choosing the wrong replacement part, can lead to warranty denial or permanent damage. Remember, warranties are designed to protect against manufacturing defects, not user errors. This nuance underscores the importance of professional guidance—don’t hesitate to consult experts. If you’re unsure, reach out to a certified technician [here](https://appliancedoctorz.com/contact-us).
**Have you ever fallen into this trap?** Share your experience in the comments and help fellow readers avoid these common pitfalls.
Maintaining your dishwasher’s optimal performance over the years requires more than just routine cleaning. Investing in the right tools and adopting proven methods can save you time, money, and frustration. One essential tool I rely on is a high-quality digital multimeter. It helps me quickly diagnose electrical issues, such as faulty door switches or control boards, without guesswork. I personally favor the Fluke 117 because of its durability and accuracy. Knowing how to use it properly allows me to identify voltage irregularities and prevent unnecessary part replacements.
Power Up with the Right Equipment
Alongside a multimeter, a set of precision screwdrivers with magnetic tips ensures I can safely remove panels and access internal components without slipping or damaging screws. My favorite set is the Wiha Precision Screwdriver Set, which offers a variety of sizes tailored for appliance repairs. Additionally, a flexible inspection camera has become invaluable for inspecting hard-to-reach areas like spray arms and water inlet valves. It provides a clear view without dismantling the entire unit, saving me hours during troubleshooting.
Scheduling Preventative Maintenance
Regularly inspecting parts like inlet valves, filters, and spray arms prevents small issues from escalating. I recommend setting a semi-annual reminder to examine these components. Using a replacement process outlined in this guide ensures you’re replacing parts before they fail unexpectedly. To keep parts functioning longer, I also advise applying a silicone-based lubricant to seals and hinges—just enough to keep things moving smoothly without attracting dirt.
Tools That Future-Proof Your Dishwasher
Smart diagnostics tools are gaining popularity. Devices like the iFixit Pro Tech Toolkit offer a comprehensive set of tools designed specifically for appliance repair. They include spudgers, anti-static wrist straps, and even torque screwdrivers calibrated for home use. These enhance your ability to correctly reinstall parts and avoid overtightening, which can damage threads.
Long-Term Results and Scaling your Maintenance Routine
Building a maintenance routine using these tools not only extends your dishwasher’s lifespan but also improves its efficiency. As models evolve with smarter features and complex electronics, familiar tools like multimeters and inspection cameras become even more critical. I predict that future advancements will include integrated diagnostic sensors accessible via smartphone apps, simplifying troubleshooting even further. In the meantime, mastering the tools available today provides a significant edge in maintaining your appliance’s health.
How do I keep my dishwasher working well over time?
Consistent inspection, prompt part replacement using guided procedures from this resource, and investing in quality repair tools are the keys. Don’t hesitate to try out a flexible inspection camera to identify hidden issues early. It’s a game-changer that reduces unexpected breakdowns. Remember, the more proactive you are, the longer your dishwasher will serve reliably—saving you money and hassle down the road. Learn more about selecting the right parts for lasting performance at this link and keep your appliance humming smoothly for years to come.
Lessons That Changed the Way I Approach Dishwasher Maintenance
- One of the most eye-opening lessons was realizing how overlooked small details in installation, like proper leveling or correct part fitting, can drastically impact performance and warranty validity. After my own mistake of ignoring these aspects, I learned the importance of double-checking every connection and reading the manufacturer’s instructions thoroughly.
- Another revelation was understanding that frequent preventive maintenance isn’t just a chore but a safeguard. Regularly inspecting nozzles, filters, and water inlet valves can prevent costly failures and preserve warranty coverage, saving both time and money in the long run.
- I also discovered that investing in quality tools, like a reliable multimeter and inspection camera, makes diagnosing issues much more straightforward. This shift from guesswork to data-driven troubleshooting has empowered me and can do the same for you.
- Lastly, I learned that clear documentation of repairs and professional consultation when needed can protect your warranty rights and ensure proper part selection. Being proactive and informed creates a smoother, more confident repair journey.
Tools and Resources That Made a Difference
- Fluke 117 Multimeter: Trusted for its accuracy and durability, it helps troubleshoot electrical issues without guesswork, preventing unnecessary part replacements.
- Wiha Precision Screwdriver Set: My go-to for safe, precise panel removals without damaging delicate components, ensuring repairs are neat and correct.
- Flexible Inspection Camera: Allows me to peek into tight spaces, spot deposits or blockages, and confirm water coverage — making troubleshooting more efficient.
- Expert Guides and Manuals: Relying on detailed resources like this guide helps me make informed decisions on parts and installation practices, extending appliance life and warranty.
Take Charge of Your Dishwasher Future
Remember, achieving peak performance from your dishwasher isn’t just about fixing problems as they arise — it’s about adopting a mindset of proactive care, informed part replacement, and understanding how each component plays a role. Embrace the tools and knowledge that can make repairs smoother, and don’t hesitate to seek professional help when needed. Your dedication today ensures spotless dishes and peace of mind tomorrow.
Have you ever encountered a subtle issue with your dishwasher that was easily fixed with the right diagnosis? Share your story below, and let’s learn from each other’s experiences. Together, we can keep our appliances running perfectly for years to come!
Related Posts

Why This $8 Zinc Leveling Foot Prevents Your Tub from Warping
I remember the moment I realized my bathtub was slowly…
The Easiest Way to Replace a Broken Bottom Rack Wheel
One morning, I open my dishwasher and find a side…

The Tiny Plastic Clip That Stops Your Rack from Falling
I remember the moment vividly—it was late at night, and…