Ever stood in your kitchen, eyes fixed on that gap between your dishwasher and cabinet, thinking, “Why does this look so off?” I’ve been there too. What started as a simple installation turned into a frustrating puzzle when I couldn’t get the toe-kick to sit flush. After hours of fiddling, I realized I’d overlooked a tiny but crucial detail: proper alignment of the toe-kick to match the surrounding cabinetry. That lightbulb moment changed everything, saving me from a future of crooked finishes and potential warranty headaches.
The Secret to a Smooth, Flush Dishwasher Finish
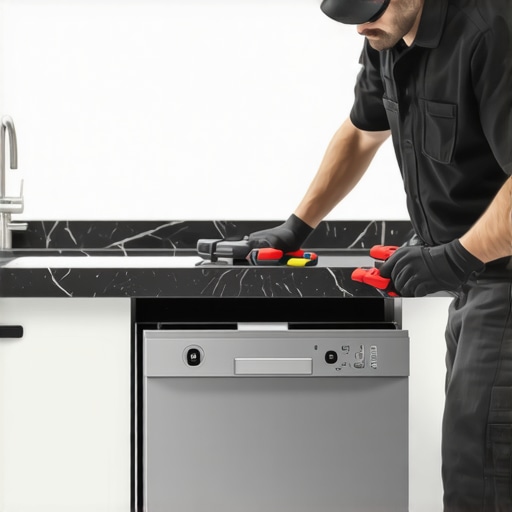
When installing a dishwasher, the little details can make or break the look and functionality. A toe-kick that’s out of alignment not only looks sloppy but can also cause issues down the line, like water splashes or creaky noises. In today’s post, I promise to guide you through the exact steps to align that toe-kick perfectly—so your dishwasher glides in seamlessly, just like the professionals do. Plus, I’ll share common pitfalls to avoid, backed by expert insights from appliance maintenance specialists, who note that improper installation can even void your warranty if not done correctly (see here).
Will This Fix Be Worth It? The Common Doubts
I remember thinking, “Is it really that important?” early in my DIY journey. Spoiler: Yes. A mistake I made was rushing through the process without double-checking the alignment, which led to uneven toe-kicks and squeaky panels. Taking the time to do it right saves you from rework and potential damage. If you’re worried about making mistakes or whether this level of detail really matters, trust me—small misalignments can cause bigger headaches, and understanding the positioning is well worth your effort. Want to avoid costly repairs? Make sure to check out additional tips on effective maintenance and ensure you’re starting with the right parts.
Now, are you ready to tackle your dishwasher’s toe-kick like a pro? Let’s get started with the tools and techniques that will ensure a perfect fit—and a beautiful, flush finish that lasts.
Secure the Dishwasher in Place
Start by leveling the dishwasher with a spirit level to ensure it’s perfectly upright. Use contractor shims under the cabinets if necessary. This initial step is critical; a tilting dishwasher makes aligning the toe-kick almost impossible. I remember when I installed mine, I had to fine-tune the leveling screws to prevent any wobbling, which greatly simplified subsequent steps.
Remove and Prepare the Toe-Kick Panel
Carefully detach the toe-kick panel from the dishwasher, typically by unscrewing the retaining clips or screws at the bottom. Clean the contact surfaces thoroughly to remove dust, grease, or old adhesive residue. Think of this like preparing a surface for wallpaper—you want a smooth, clean canvas for perfect adhesion and alignment. During my last install, I used a mild detergent to ensure the surface was spotless, which helped the panel sit flush without gaps.
Align and Test Fit the Toe-Kick
Before fastening, position the toe-kick under the cabinet opening to check fitment. Use a straight edge or level to verify that the top edge aligns with adjacent cabinetry. Imagine tuning a guitar string—you need to adjust gradually and check often. During my experience, I held the panel in place and stepped back to visually confirm flushness and symmetry, making small adjustments as needed.
Clamp for Stability While Adjusting
If available, clamp the panel temporarily to keep it aligned. This prevents shifting while securing it. Think of this like using a clamp when gluing; it maintains the position until the adhesive sets. I’ve found this technique invaluable when dealing with panels that want to slide out of alignment during fastening.
Secure the Toe-Kick Correctly
Fasten the panel using screws or clips, ensuring they are tight but not over-torqued to avoid cracking plastic or warping metal. Insert screws at each mounting point, gradually tightening in a cross pattern to maintain even pressure. Remember, overtightening can compress or distort the panel—like overtightening a bolt on a bicycle wheel, it may cause deformation and misalignment later.
Reattach and Final Check
Once secured, reattach the toe-kick to the dishwasher chassis. Double-check the alignment with your level and ensure that the panel sits flush with the surrounding cabinetry. Run your hand along the edges to feel for any uneven spots. During my last project, I discovered a slight misalignment after installation, which I corrected by loosening a screw and making a tiny pivot adjustment before retightening.
Ensure Proper Seal and Functionality
Inspect the perimeter for gaps that might allow water ingress or debris collection. Tight, flush fitment prevents squeaks and wobbling during operation. Remember, an improperly aligned toe-kick isn’t just about looks; it can cause water splashes, noise, or even damage to internal components. I once neglected this step, and it resulted in a squeaky operation that took extra effort to fix later, emphasizing the importance of proper alignment from the start.
Through meticulous attention to alignment and careful fastening, you can achieve a professional-level finish that enhances both the appearance and longevity of your dishwasher. Proper installation isn’t just about aesthetics; it safeguards your warranty and ensures seamless functionality, saving you from future headaches.
Many homeowners assume that following the basic installation steps guarantees long-term warranty coverage, but the reality is much more nuanced. A common myth is that all parts are created equal, and any generic component will do. In truth, using subpar or incorrect parts can jeopardize your warranty and lead to costly repairs down the line. For instance, selecting the wrong inlet valve or drain hose, which might seem minor, can cause leaks, malfunctions, or even void your warranty if it doesn’t meet manufacturer specifications. To avoid this, consult expert guides on parts for long-term performance and ensure you’re choosing components that are compatible with your model.
Another widespread misconception is that a DIY installation, if completed seemingly correctly, won’t affect warranty status. However, manufacturers often have strict installation requirements—like proper grounding, correct leveling, or specific hose routing—that, if not adhered to, can void your coverage. The warranty guide clarifies these nuances, emphasizing the importance of following exact procedures. Skipping or mishandling small details can lead to automatic denial of warranty claims, especially if a failure occurs due to improper setup.
Is Your Installation Setting You Up for Warranty Denial?
One sophisticated aspect that many overlook is the critical role of correct parts selection and installation environment—like ensuring the dishwasher’s water supply pressure and drainage setup meet manufacturer standards. A notable mistake is reusing old or incompatible drain hoses, which might cause siphoning or leaks that invalidate warranties. According to a study by appliance maintenance experts, improper parts are among the top causes of warranty claims being denied (see here).
Furthermore, not documenting the installation process with photographs, videos, or detailed logs can turn into a hidden trap. Manufacturers increasingly require proof of proper setup during warranty disputes. The importance of meticulous documentation cannot be overstated; it serves as your insurance against denial due to installation errors. Review guidance on warranty documentation to safeguard your coverage.
Remember, every small decision during installation—from tightening clamps to routing electrical wiring—accumulates into your overall warranty integrity. Mistakes like using non-suitable parts or neglecting environmental factors can silently sabotage your warranty rights. So, invest time and attention to detailed procedures and verify every component’s compatibility—this practice ensures your investment is protected.
Have you ever fallen into any of these traps? Let me know in the comments. For more insights, explore our comprehensive guides on understanding dishwasher parts and common parts and their installation roles to stay one step ahead.
Essential Tools for Long-Term Dishwasher Care
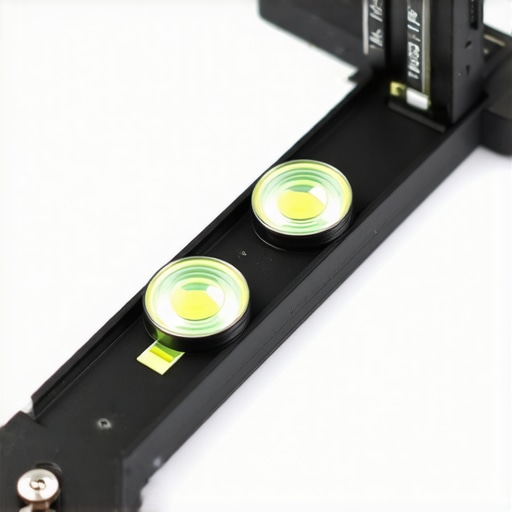
To ensure your dishwasher operates efficiently over the years, investing in specific, high-quality tools is crucial. I personally rely on a digital multimeter for diagnosing electrical issues, as it helps me quickly identify faulty wiring or sensors without guesswork. A high-quality cordless drill with multiple screwdriver bits streamlines the removal and reinstallation of panels, saving time and reducing frustration. For cleaning, I favor a soft-bristle brush and a non-abrasive cloth to gently clean filters and sensors, like the turbidity sensor here, which are vital for optimal performance.
The Importance of Accurate Diagnosis Tools
Beyond physical tools, software diagnostics can provide insights into your dishwasher’s health. Many modern units support Wi-Fi connectivity, allowing you to access error logs and operation history through manufacturer apps. This trend is heading toward increasingly integrated smart diagnostics, which makes routine maintenance and troubleshooting more efficient. Using an app to monitor error codes regularly helps catch issues early before they escalate into costly repairs or warranty claims. As appliance technology advances, prioritizing tools that can interface with your specific model will become even more essential.
Methods to Maintain Your Dishwasher Like a Pro
Routine maintenance goes beyond the initial installation. Regularly checking parts like the inlet valve, drain hoses, and filters—using guides like this resource—ensures everything remains in prime condition. A proactive approach involves scheduling bi-annual cleanings of filters and sensors, which prevents build-up that can impair function.
Another key practice is verifying access to all critical parts, especially those covered under warranty here. Keeping detailed records of part replacements and cleaning routines enhances your ability to diagnose issues swiftly and supports warranty claims if needed.
How do I maintain dishwasher parts over time?
Maintaining parts involves periodic inspections for wear and corrosion, especially in the water inlet and drain connections. Applying silicones or anti-corrosion sprays designed for appliance parts helps prolong their lifespan. Staying vigilant about environmental factors like hard water also plays a role; using water softeners or conditioners can prevent mineral buildup that causes clogs and sensor malfunctions. This comprehensive care approach ensures your dishwasher remains dependable and extends its functional life.
Looking ahead, the trend toward smart diagnostics and remote monitoring will make maintenance more predictive. Apps and sensor technology may alert you when parts need service or replacement, reducing downtime. To jumpstart your maintenance routine, try inspecting and cleaning your turbidity sensor—this simple step has personally saved me from unnecessary part replacements and kept my machine running smoothly.
By combining the right tools with disciplined maintenance routines, you pave the way for your dishwasher to perform reliably year after year. Remember, investing in quality parts and diagnostics now can save you significant money and hassle later.

The Hard Lessons That Changed My Approach to Dishwasher Installation
- Never underestimate the power of precise alignment; a small misstep can lead to multiple headaches down the line, from water leaks to warranty issues.
- Investing in quality parts and tools from trusted sources like this guide saved me from avoidable repairs and warranty denials.
- Document every step with photos or notes; I found that detailed records made all the difference during warranty claims, especially when experts questioned my setup.
- Double-check the manufacturer’s specifications for parts and installation environment; overlooking these can instantly void your warranty—trust me, I learned this the hard way.
- Take your time with leveling and securing the dishwasher; rushing these steps compromises both appearance and function, leading to squeaks, wobbling, and potential damage.
Tools and Resources That Elevate DIY Dishwasher Projects
- Digital Multimeter: Essential for diagnosing electrical issues early; I rely on mine to verify sensor and wiring health.
- Stainless Steel Braided Hoses: Their durability prevents leaks and complies with warranty standards; I prefer these for peace of mind.
- Manufacturer Diagnostic Apps: For modern dishwashers, staying connected allows me to catch errors before they cause bigger problems.
- Guides on Parts Compatibility: Knowledge is power. I check this resource before selecting components to ensure quality and warranty compliance.
Keep Your Dishwasher Running Smoothly and Worry-Free
Taking pride in a meticulous installation, combined with consistent maintenance like cleaning sensors and inspecting hoses, ensures your dishwasher remains reliable for years. Embrace the learning process—each project boosts your confidence and knowledge, making future installations even easier. Remember, your efforts now lay the foundation for warranty security and long-term performance. Stay proactive, stay informed, and enjoy the satisfaction of a job well done. Your journey to professional-level dishwasher maintenance starts with small, deliberate steps—don’t wait until problems arise to act.
How have you handled tricky parts of dishwasher installation or maintenance? Share your experience below—I’d love to hear your story!
,
Related Posts
The Case for Professional Leveling: Why a One-Degree Tilt Matters
It was the loud thud that finally made me realize…

3 Installation Steps Professionals Take to Avoid Slow Leaks
I remember the first time I ignored a small drip…
The Proper Way to Secure a Dishwasher Under Stone Countertops
I remember the moment vividly—my hands were trembling slightly, and…