
I remember standing in my new kitchen, knee-deep in cardboard boxes and bubble wrap, just wanting a clean coffee mug. I loaded the dishwasher, went to swing the door shut, and—crunch. Not a ‘something is in the way’ crunch, but a ‘my dishwasher is now a trapezoid’ crunch. The move had been brutal on my appliances, and now my door was hanging lower on the left than the right. I panicked. I thought I’d snapped a hinge or, worse, twisted the whole tub. In my frustration, I tried to force it, nearly cracking the plastic latch. It was a classic rookie mistake that almost cost me a brand-new unit. But here is the thing: dishwashers are surprisingly resilient if you know which screws to turn. After a few deep breaths and a quick look at my diy dishwasher installation step-by-step guide, I realized the problem wasn’t a broken part; it was a geometry problem. Moving trucks vibrate, and those vibrations love to loosen the leveling legs and mounting brackets that keep your machine square. If your door isn’t clicking into place like it used to, don’t reach for a hammer just yet. We’re going to walk through the exact process of squaring up your unit so you can get back to unpacking your life.
Stop the Scrape and Save Your Cabinets
The reality is that a crooked door is often just a symptom of an unlevel chassis. When you shoved that machine into its new slot between the cabinets, it likely caught on a floor tile or the subfloor was slightly uneven. This twist in the frame—what we call ‘racking’—means the door will never hit the latch dead-center. I learned this the hard way when I ignored a slight tilt and ended up with a slow drip that ruined my kickplate. Understanding why professional leveling prevents your door from leaking is the first step in realizing how much power you have with just a wrench and a level. You don’t need a degree in engineering to fix this, but you do need to understand how common dishwasher parts and their role in proper installation interact. According to Yale Appliance, a leading authority on service data, nearly 25% of dishwasher service calls are related to improper installation or leveling rather than a faulty 5 dollar gasket. When the frame is bent even a few millimeters, the door seal can’t create a watertight closure. This is why getting the alignment right isn’t just about aesthetics; it’s about protecting your new home from water damage. Before you assume you need to replace your essential parts for troubleshooting dishwasher installation issues, we need to look at the basic mounting. Have you ever noticed your dishwasher door rubbing against the wood cabinets after a move? Let me know in the comments if you’ve been living with that annoying scrape!
Will I actually break the machine by tinkering with it?
It is a valid fear. Modern appliances often feel like they are made of thin plastic and dreams. However, the frame is actually quite sturdy once you understand the physics. Most of the adjustments happen at the very bottom, at the leveling feet. My early mistake was trying to bend the door itself to make it ‘fit’—please, do not do that. Instead, you’ll be working with the leveling legs and the side mounting brackets. By following expert advice on dishwasher installation troubleshooting, you can safely manipulate the angle of the machine until the door glides perfectly. We’ll also take a look at understanding dishwasher parts to ensure that your hinges aren’t actually bent from a heavy impact during the move. But 90% of the time, a simple turn of a leveling leg is all it takes to go from a leaky, scraping mess to a silent, perfect seal.
Grab Your Level and Find the Lean
Think of your dishwasher like a picture frame; if one corner is even slightly higher than the others, the glass (or in this case, the door) will never sit right in the opening. The first thing you need to do is open the door and place a small spirit level across the top edge of the inner tub. Do not level the door itself, as that is the part that is currently ‘lost.’ You want to ensure the tub frame is perfectly horizontal. I once tried to level my old machine using a stack of cardboard shims because I couldn’t find my wrench. It worked for three loads until the steam turned the cardboard into mush, the machine tilted, and my kitchen looked like a miniature swamp. To avoid my soggy mistake, you should focus on parts to check when installing a dishwasher for long-term performance, specifically the heavy-duty plastic or metal feet. If the bubble in your level is hugging the left side, your right side is too low. It is a simple physics game, but one that determines if your door will latch or leak.
Twist the Front Legs to Find Your Center
Most modern units have two adjustable legs at the front. These are essentially big screws that you can turn by hand or with a pair of pliers. If your door is rubbing on the left side of the cabinet, you likely need to raise the front-left leg. This tilts the entire frame back toward the center. While you are down there, it is a good time for understanding dishwasher parts like the kickplate, which you will have to remove to get a clear shot at the adjustment points. 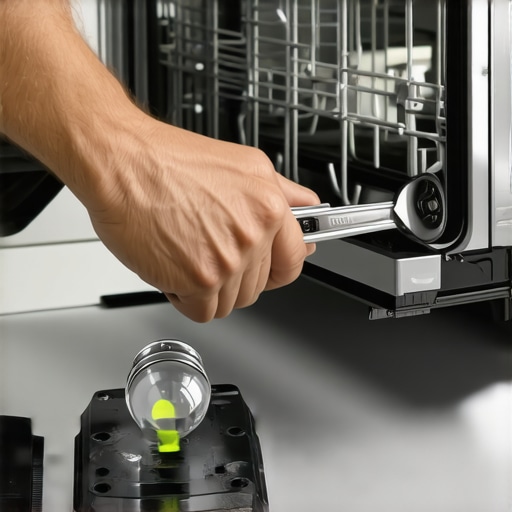 If you find that the legs are stuck due to floor debris or old spills, a quick squirt of lubricant can save you from snapping the plastic threads. Once you have made an adjustment, close the door and check the ‘reveal’—the gap between the door and the cabinet on both sides. It should be uniform from top to bottom. If it still looks like a leaning tower, we need to look at the back.
The Secret Hex Bolt for the Back Leg
Many people do not realize that you do not have to pull the whole machine out to level the back. Manufacturers often include a long rod that connects a screw at the front-bottom of the machine to the single rear leg. By turning this bolt, you can raise or lower the back of the unit while it is still tucked under the counter. This is one of those essential parts every dishwasher owner should know about because it saves you from a back strain. If the machine is leaning forward, the door might want to fall open too quickly or fail to seal at the top gasket. Adjusting this rear height is often the ‘magic fix’ for a door that feels heavy or uneven. You are aiming for a slight backward pitch—just enough so that gravity helps the door stay closed, but not so much that the water pools in the back of the tub.
Anchor the Frame to Keep it Square
Once the machine is level, it has to stay that way. If you skip the mounting brackets, the whole unit will ‘nose-dive’ every time you pull out a heavy bottom rack full of plates. This movement twists the frame and ruins your alignment all over again. If you have stone surfaces, you need to know the proper way to secure your machine to quartz countertops using side-mounting kits. I’ve seen homeowners try to glue their machines to the stone, which is a nightmare when you eventually need a repair. Instead, use the easiest way to install a side-mounting bracket kit to pin the dishwasher to the side cabinets. This locks the ‘squareness’ in place. If you still hear a noise when opening the door after it’s secured, check to see why your door springs are squeaking and how to fix them, as the move might have knocked a tension cable off its pulley. Proper tensioning ensures the door doesn’t just drop to the floor, protecting both the hinges and your shins.
That 10-Year Warranty Sticker is Usually a Lie
You’ve seen it on the showroom floor: a bright, bold sticker claiming a ’10-Year Limited Warranty’ on the motor. Most buyers think this covers the entire unit, but let’s look at the fine print. In reality, the truth about those 10-year motor stickers on the door is that they often only cover the cost of the actual motor part—not the $200 service call or the $150 labor fee to swap it. According to industry data from the Association of Home Appliance Manufacturers (AHAM), mechanical failure rates in the first five years are significant, yet many ‘extended’ warranties are designed to be so restrictive that they rarely pay out for common issues like a failed control board or a burnt-out heating element. This is where maximizing your dishwashers warranty coverage today becomes an art form rather than a simple checklist. If you don’t understand the specific language regarding ‘labor inclusive’ versus ‘part only,’ you could be in for a rude awakening when the bill arrives.
The One Receipt That Saves Your Kitchen
Here is a trap I see homeowners fall into constantly: they assume a manufacturer defect is always the company’s problem. If your machine is leaking from day one, you might think you have a ‘lemon.’ However, the difference between a lemon and a faulty installation is a legal tightrope. If you can’t provide a professional installation receipt when a technician arrives, many brands will deny a claim by arguing the ‘tub racking’ or alignment issues were caused by your DIY leveling efforts. This is why the risks of skipping the professional installation receipt are higher than most realize; it’s not just about the money you saved on the install, it’s about the $800 repair bill you’re now stuck with because the manufacturer won’t cover a frame that was twisted during a home-brewed setup. 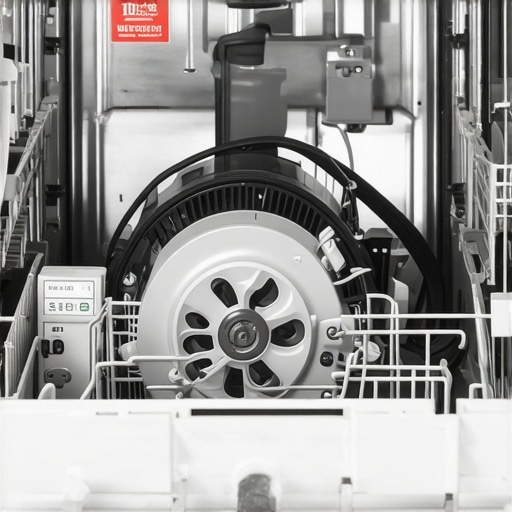
Will swapping a small part myself void the whole policy?
This is the most common ‘advanced’ question I get from savvy DIYers. Generally, the Magnuson-Moss Warranty Act protects you from having a warranty voided just because you used a third-party part or performed a minor repair yourself. But—and this is a big ‘but’—if you accidentally break a secondary component while swapping parts you can handle yourself, the manufacturer is legally off the hook for any damage stemming from that work. When how to diagnose dishwasher parts during warranty periods becomes your weekend project, stay focused on ‘user-accessible’ items like racks, filters, or spray arms. If you start cutting into the main wiring harness or tampering with the motor seal, you are entering the ‘denied claim’ zone. You also need to be brutally honest with yourself about what your dishwasher warranty doesnt cover and how to avoid fees, specifically ‘no-fault’ service calls where a technician arrives only to find your drain is simply clogged with a peach pit from your garbage disposal. Have you ever fallen into this trap and ended up paying for a service call you thought was free? Let me know in the comments!
Keep Your Toolbox Lean but Mean
I’ve spent too much money on ‘specialty’ appliance kits that ended up gathering dust. If you want to handle the heavy lifting yourself, you only really need three things: an 8-inch adjustable wrench, a T20 Torx driver (because every dishwasher manufacturer seems to love those), and a simple spirit level. Having the replacement parts every dishwasher owner should keep on hand like a spare drain pump or a secondary filter will save you from a Friday night panic. I personally keep a $10 multimeter in my drawer to check for continuity—it’s the only way to know for sure if your heating element has actually died or if your control board is just having a tantrum. 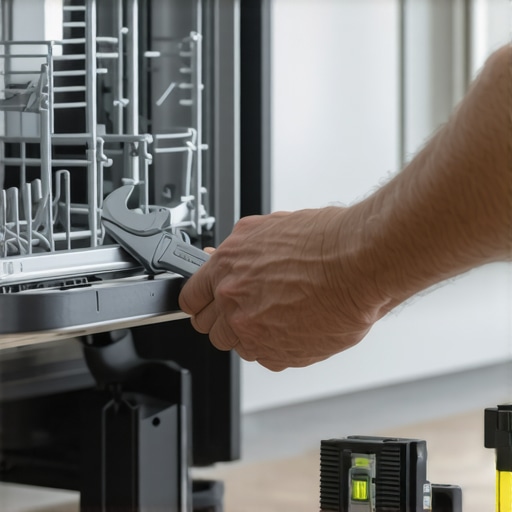
How do I maintain my machine’s efficiency over time?
Consistency beats a once-a-year deep clean every time. I’ve found that the absolute best way to ensure longevity is to focus on the ‘hidden’ areas. Once a month, I pull out the bottom rack to reach the best way to clean the hidden filter under the spray arm. If you let debris build up there, it forces the pump to work twice as hard, which is usually the 10 part that stops that annoying high-pitched whistle you start hearing after year two. Also, keep an eye on your drain hose. According to the Bosch technical service manual for the SHX series, a ‘high loop’ or air gap isn’t just a suggestion; it’s a hydraulic necessity to prevent dirty sink water from backflowing into your clean tub. If you ignore this, you’ll be searching for how to fix a dishwasher that will not drain without calling a plumber before your first year is up.
The Future of Smart Diagnostics and Your Wallet
We are moving toward an era where your dishwasher will be smarter than your phone. Manufacturers are already testing vibration sensors that can detect a failing bearing in the wash motor months before it actually seizes. This shift means that when to replace dishwasher parts for optimal performance will no longer be a guessing game based on ‘weird noises.’ Your app will simply ping you. However, don’t let the tech make you lazy. Even the smartest machine can’t fix a torn seal, and why your warranty claim for a door gasket was denied usually comes down to simple lack of cleaning. My advice? Go grab that T20 driver today and check the tightness of your inner door screws—it takes thirty seconds and prevents 90% of the ‘door drop’ issues I see.
What I Learned After My First Three Flooded Kitchens
If there is one thing that years of tinkering with appliances has taught me, it is that confidence is great, but a level is better. I used to think that as long as the machine was under the counter, the job was done. I was wrong. I realized that a tiny tilt in the frame isn’t just an eyesore; it is a mechanical failure waiting to happen. The hardest lesson I ever learned was that the difference between a lemon and a faulty installation often comes down to your own patience during the leveling process. I once skipped the final checks and ended up with a slow leak that warped my hardwood floors before I even noticed the door was slightly crooked.
Another ‘lightbulb moment’ for me was realizing how much manufacturers rely on our own mistakes to deny claims. You can have the best machine in the world, but if you cannot verify your professional installation receipt for insurance, you are basically flying solo. I now tell everyone: keep a physical folder for every appliance. In it, put the receipt, the manual, and a photo of the unit once it’s perfectly squared up. This simple habit transformed my anxiety into understanding dishwasher warranty policies for peace of mind.
The Three Tools I Keep in My Kitchen Junk Drawer
You do not need a massive rolling toolbox to keep your dishwasher happy. In fact, over-complicating things is usually where people get into trouble. I have narrowed my ‘Dishwasher Survival Kit’ down to three absolute essentials that have saved me more times than I can count. #IMAGE_PLACEHOLDER_E# First, an 8-inch adjustable wrench for those stubborn leveling legs. Second, a T20 Torx driver, because almost every interior screw on modern machines uses this specific star-shaped head. Finally, a small torpedo level. These tools allow you to perform the minor adjustments that keep your machine square and your seals tight.
I also highly recommend keeping a few essential parts every dishwasher owner should know about, like a spare drain filter or a set of rack clips, in a nearby drawer. Knowing the parts you can swap yourself without voiding your protection is the ultimate power move for a homeowner. It saves you from that $150 service call just to fix a plastic clip that takes thirty seconds to snap into place. I trust the official AHAM guidelines and my machine’s specific service manual over any random internet forum every single time.
Take Charge of Your Kitchen’s Future
Installing or fixing a dishwasher might feel like a chore, but it is actually a great way to truly ‘own’ your home. When you take the time to square that frame and secure those brackets, you aren’t just doing a task; you are protecting your investment. Don’t be afraid to get down on the floor with your flashlight and check those seals. By following these top tips for seamless dishwasher installation in 2025, you are setting yourself up for years of quiet, leak-free performance. You’ve got the tools and the knowledge now—go ahead and get that door clicking perfectly. Have you ever struggled with a dishwasher door that just wouldn’t square up no matter what you tried? Let me know in the comments below!
Related Posts
Why You Should Never Use Teflon Tape on a Compression Fitting
It was a frustrating Saturday morning after yet another leaky…

How to Replace a Snapped Door Cable Without a Pro
Have you ever pulled open your dishwasher door—and watched in…
The $15 Pressure Switch That Fixes Overfilling Fast
Imagine standing in your kitchen, emptying the dishwasher, only to…