
I was kneeling on my kitchen tile at midnight, damp towel in hand, listening to a sound that resembled a blender full of pebbles. That’s the moment I realized my it’ll be fine attitude toward a broken wine glass was a total lie. I’d seen the glass shatter during the cycle, but I figured the filter would handle it. Instead, a tiny, jagged fragment bypassed the screen and wedged itself right into the heart of the pump. It’s a sickening noise, isn’t it? That rhythmic crunch-grind-thump that tells you your expensive appliance is currently eating itself. I’ve been there, and honestly, the panic of thinking I’d destroyed a expensive machine over a cheap glass was real. Today, I am going to show you exactly how to fish that fragment out without losing your mind or your security deposit.
The Night My Wine Glass Fought My Dishwasher
I’ve made plenty of mistakes in my time, but my biggest facepalm moment was trying to pry a shard out with a metal screwdriver while the unit was still plugged in. Not only did I risk a shock, but I actually nicked the plastic impeller. If you hear the drain pump noise that means you have something stuck, don’t just keep running the cycle hoping it will wash away. It won’t. In fact, the Association of Home Appliance Manufacturers (AHAM) notes that mechanical blockages are a leading cause of motor burnout. You need to act before that tiny shard turns into a massive repair bill. Most people think they need to call a pro immediately, but you can actually handle the parts you can swap yourself without voiding your protection if you are careful and methodical.
Is doing this myself actually worth the risk?
Many folks worry that poking around near the motor will ruin their coverage, but as long as you aren’t hacking at wires, clearing a simple blockage is basic maintenance. When I first started DIYing my repairs, I didn’t even know common dishwasher parts and how to replace them effectively, and I still managed to save my pump. It’s about having the right light, a pair of needle-nose pliers, and a lot of patience. Before we dive into the guts of the machine, I have to ask: have you ever had to fish something weird out of your drain? Tell me I’m not the only one who found a literal penny in there once!
Why a Tiny Shard is a Massive Headache
When glass gets past the filter, it usually settles in the volute, which is the housing around the pump’s spinning blades. Even a piece the size of a grain of rice can stop those blades from turning. This leads to standing water, bad smells, and eventually, a dead motor. Understanding the relationship between common dishwasher parts and their role in proper installation can help you see why a clear drainage path is so vital. We are going to get that water out and that glass cleared today, step by step.
Stop Everything and Kill the Power Immediately
Before you even think about touching the water, you have to cut the power. I’m not just talking about hitting the ‘off’ button. Reach under the sink and unplug the unit, or better yet, flip the breaker in your basement. Working in standing water with a live electrical component is a recipe for a bad Tuesday. I learned this the hard way when I felt a faint, tingly vibration through my wet fingertips—a friendly reminder that water and electricity are a dangerous duo. While you are down there, it’s a good time to keep understanding dishwasher warranty policies for peace of mind so you know exactly what is and isn’t covered if you accidentally snap a clip.
Strip the Interior Down to the Sump
To get to the glass, you have to clear the decks. Remove the bottom rack and set it aside. Next, you need to tackle the spray arm. Most people don’t realize how to replace your spray arm without using any tools, but usually, it just unscrews or pops off with a firm tug. Once that’s out, you’ll see the filter assembly. This is the ‘sump’ area, and it’s where all the action happens. Unlock the cylindrical filter and pull it out. You’ll likely find a soup of old food particles and grey water. Don’t be grossed out; this is just the reality of the machine’s anatomy. Identifying these essential parts every dishwasher owner should know about makes the whole process feel less like surgery and more like a simple puzzle. 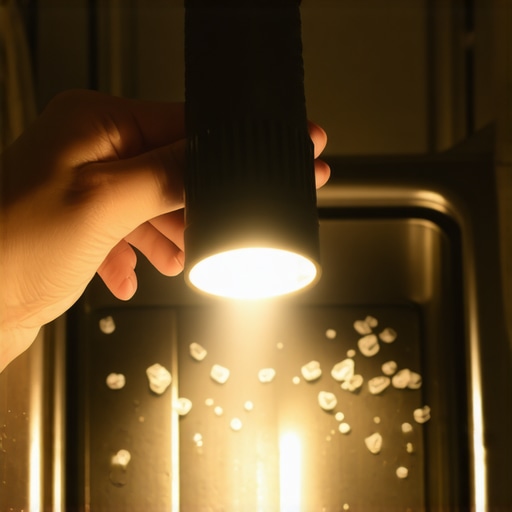
Use Suction to Grab What You Can’t See
Here is the professional secret: don’t reach in with your bare fingers. Even if you think you’ve cleared the big pieces, the tiny slivers are the ones that slice you. I once tried to ‘sweep’ the bottom with my index finger and ended up needing three stitches. Now, I always use a wet/dry shop vac. If you don’t have one, a turkey baster or a large sponge will work to get the water out so you can actually see the bottom. Learning the best way to clean the hidden filter under the spray arm is only half the battle; you have to bone-dry that sump area to spot the clear glass fragments reflecting in your flashlight.
Why That Tiny Sump Cover is Your Best Friend
Most modern units have a small, often T-20 Torx screw or a plastic clip holding a cover over the drain pump impeller. This is the gatekeeper. Once you remove this cover, you are looking directly at the fan-like blades of the pump. This is where my wine glass shard was hiding. It was wedged perfectly between two blades, acting like a parking brake. I used a pair of needle-nose pliers to gently wiggle it free. If it feels stuck, don’t force it—give the impeller a tiny nudge in the opposite direction. Knowing how to fix a dishwasher that will not drain without calling a plumber usually comes down to this specific five-minute task. It’s a messy, wet job, but the moment you hear that ‘click’ of the glass popping out, you’ve just saved yourself a $200 service call.Now that you’ve hopefully fished out that shard, you might be looking at a nicked impeller or a motor that still hums but won’t turn. This is where most people make their second biggest mistake: they head straight to a discount site and buy the first ‘universal’ pump that pops up. I’ve seen this play out a dozen times, and it almost always ends with a leak six months later. There is a specific reason why OEM pumps outlast cheap alternatives every time. The tolerances in modern high-efficiency machines are so tight that a millimeter of difference in a generic gasket can lead to a slow, silent drip that rots your subfloor. I always tell my readers: saving $20 on a part is never worth spending $2,000 on new hardwood floors.
Don’t get fooled by those flashy 10-year warranty stickers
Speaking of parts, let’s talk about that shiny decal on the front of your machine. You know the one—the ‘10-Year Limited Warranty’ on the motor. In my experience, this is one of the biggest marketing distractions in the industry. The truth about those 10-year motor stickers on the door is that they rarely cover the labor, the travel fees, or the ‘wear and tear’ components that actually fail first. If a shard of glass breaks the impeller, that’s often considered ‘user-induced damage,’ not a manufacturer defect. According to data from the National Association of Home Builders (NAHB), while dishwashers are rated for a 9-year average lifespan, many fail much earlier due to poor maintenance or subtle installation errors that go unnoticed until the motor burns out. 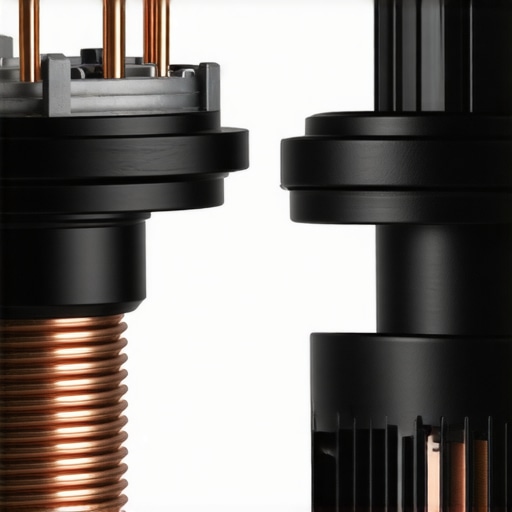
Can a simple DIY drainage fix actually void my whole coverage?
This is the question I get asked most by the more experienced DIY crowd. The short answer is: usually not, but there’s a trap. Many manufacturers allow you to perform basic maintenance—like clearing a clog or cleaning the filter—without penalty. However, if you have to replace a major component, you need to be extremely careful. I’ve seen plenty of cases explaining why your warranty claim for a door gasket was denied simply because the owner didn’t have a record of professional installation or used a non-certified part. The ‘oops’ factor here is often the paperwork. If you ever have a major leak that causes insurance-level damage, the first thing an adjuster will ask for is a professional installation record. The risks of skipping the professional installation receipt are real if you aren’t keeping meticulous records of your own work. If you’re replacing parts yourself, take photos of the process and document the part numbers. This proves you followed the correct procedure. Have you ever fallen into this trap where a ‘simple’ fix ended up complicating a future claim? Let me know in the comments.I’ve spent years tinkering with these machines, and if there is one thing I’ve learned, it’s that your toolkit doesn’t need to be huge, but it does need to be specific. Most people reach for a standard Phillips head and get frustrated when they realize manufacturers love those star-shaped Torx bits. I personally keep a dedicated T-20 driver in my kitchen drawer just for the dishwasher. It’s the only way to safely remove the sump covers without stripping the heads. Along with that, a pair of 6-inch needle-nose pliers is non-negotiable for reaching those deep-seated glass shards that your vacuum might miss. I also keep a small telescoping mirror handy; it sounds like overkill until you’re trying to see if there’s a crack in the rear manifold without pulling the whole unit out of the cabinetry. Having the right common dishwasher parts and how to replace them effectively is useless if you don’t have the reach to get to them properly.
Why I refuse to use plastic water lines ever again
If you are upgrading or installing a new unit, please, for the sake of your flooring, skip the plastic tubing that often comes in those ‘all-in-one’ kits. I only use the most durable braided steel hoses for long-term safety. I’ve seen too many plastic lines get brittle and snap after five years of intense heat cycles. It’s one of the most common mistakes professional installers see when they are called in to fix a flooded kitchen. Spending an extra $15 on a high-quality braided hose is the cheapest insurance policy you will ever buy for your home. 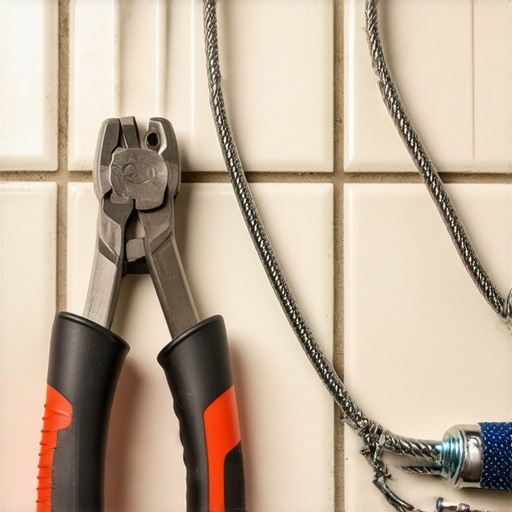
How do I keep my dishwasher running like new for a decade?
The secret isn’t some expensive chemical cleaner; it’s consistency and technical awareness. You need to be when to replace dishwasher parts for optimal performance before they actually break and cause collateral damage. For me, that means a quarterly check of the spray arm ports and the drain line connection. I also pay close attention to parts to check when installing a dishwasher for long-term performance, specifically the mounting brackets and the leveling legs. If the machine isn’t perfectly level, the door gasket wears unevenly, leading to those annoying ghost leaks that only appear during the high-pressure heavy cycle.
The future of dishwashing is looking surprisingly smart
As we move toward 2025 and beyond, I’m seeing a massive shift toward predictive diagnostics in the appliance world. We are moving away from ‘it is broken’ toward ‘it is about to break.’ Some high-end European models now use vibration sensors to detect the specific frequency of a failing motor before it even starts making audible noise. While it sounds high-tech, it often just means the real reason your smart app cant find your dishwasher might be because the control board is preoccupied with a minor error log. According to the International Plumbing Code (IPC) Section 802.1.6, proper air gap installation remains the gold standard for preventing backwash, but I predict we will see smart solenoid valves replacing mechanical air gaps entirely in the next few years. As machines become more efficient and use less water, they paradoxically become more prone to fatty deposits, making your choice of the best low-phosphate detergents for modern smart machines more important than ever. If you want to stay ahead of the curve, I challenge you to pull out your lower spray arm this weekend and check the very bottom of the sump for any tiny white flakes; catching that calcium early will save your heating element from an early grave.
What My Wet Kitchen Floor Taught Me About DIY Repairs
One of the hardest lessons I learned while kneeling in a puddle at midnight is that a $10 tool and ten minutes of patience is always better than a panic-induced repair bill. I realized that understanding dishwasher parts a key to effective maintenance isn’t just for professionals; it is about respecting how your machine drains and operates. I also learned that force is almost never the answer when dealing with shards. If a piece of glass is wedged, don’t yank it; instead, gently wiggle the impeller to change the angle of pressure. Finally, keeping a simple digital folder with photos of your work can be a lifesaver for insurance or if you forget common dishwasher parts and how to replace them effectively during reassembly.
The Three Tools I Keep in My Kitchen Junk Drawer
I do not believe in owning a massive workshop to maintain a household, but a few specific items are non-negotiable for anyone who owns a dishwasher. I keep a dedicated kit containing a T-20 Torx driver, a pair of long-reach needle-nose pliers, and a bright LED headlamp. It is also smart to research the replacement parts every dishwasher owner should keep on hand, like an extra sump cover screw or a spare filter. If you clear the glass and the machine still won’t start, you should also know the most reliable way to test a thermal fuse to see if the motor’s struggle tripped a safety circuit. Having these basics ready turns a potential disaster into a minor weekend project.
Moving Beyond the Fear of the Sump
It is easy to feel intimidated when you start taking things apart, but once you fish out that first shard of glass, the mystery of the machine disappears. You are no longer just a user; you are the one in charge of your kitchen’s performance. By mastering these essential parts every dishwasher owner should know about, you are doing more than just clearing a clog—you are extending the lifespan of your appliance. Don’t let a little crunching noise ruin your week. Take it slow, keep the power off, and trust your ability to handle the fix. Have you ever found something completely bizarre, like a stray coin or a child’s toy, stuck in your drain pump? Let me know in the comments below!
Related Posts

How to Replace a Snapped Door Spring in Ten Minutes
Ever had that gut-wrenching moment when you open your dishwasher…

How to fix a dishwasher that will not drain without calling a plumber
Ever had that sinking feeling when your dishwasher finishes its…
Stop Using Too Much Detergent: The Gasket Killer
Ever had that sinking feeling when your brand-new dishwasher starts…