
I remember the exact moment I realized that my old dishwasher was more than just a kitchen eyesore— it was a ticking environmental time bomb. It was a gloomy Saturday, and as I struggled to fit yet another broken rack into the trash, a lightbulb flickered in my mind. I wondered, “Is tossing it really the best option?” That thought sparked a journey into finding eco-friendly methods to recycle my appliance rather than harm the planet.
The Hidden Impact of Disposing Old Appliances
Many of us don’t consider what happens after an appliance leaves our home. Discarding old dishwashers in landfills can lead to environmental damage due to hazardous materials like metals and plastics slowly leaching into the soil and groundwater. Moreover, manufacturing new ones consumes significant energy, contributing to carbon emissions. According to the Environmental Protection Agency, e-waste, including appliances, accounts for about 70% of the toxic waste in landfills.
If you’re like me, you’re probably asking, “How do I get rid of my old dishwasher responsibly?” Fortunately, there are practical and eco-conscious ways to handle this. Today, I’ll walk you through proven strategies to recycle your dishwasher while reducing your environmental footprint.
Is Recycling an Old Dishwasher Really Worth It?
Early in my journey, I made the mistake of thinking that just leaving my old dishwasher on the curb was enough. Turns out, that’s not only bad for the environment but also potentially illegal. Recycling properly ensures hazardous parts are handled safely, and valuable materials are reused. Plus, some local programs even offer cash incentives for appliance recycling—an added bonus!
In fact, many communities have specialized e-waste recycling programs designed to process appliances safely. You can often find certified facilities that disassemble and reclaim metals, plastics, and electronic components, preventing harmful substances from polluting the environment. Interested in how the process works? Check out our detailed DIY dishwasher installation guide for insights into proper handling and disposal.
Before diving into recycling, it’s essential to identify the right methods for your situation. Do you know if your local waste management includes appliance pick-up? Or do you need to take your dishwasher to a designated recycling center? This is where planning makes all the difference. In the next sections, I’ll clarify these options and share tips to maximize your eco-friendly efforts.
Getting rid of your old dishwasher responsibly isn’t just about compliance; it’s about making a positive impact. Ready to learn the practical steps? Let’s explore how you can recycle your appliance without harming the environment!
Prepare Your Dishwasher for Dismantling
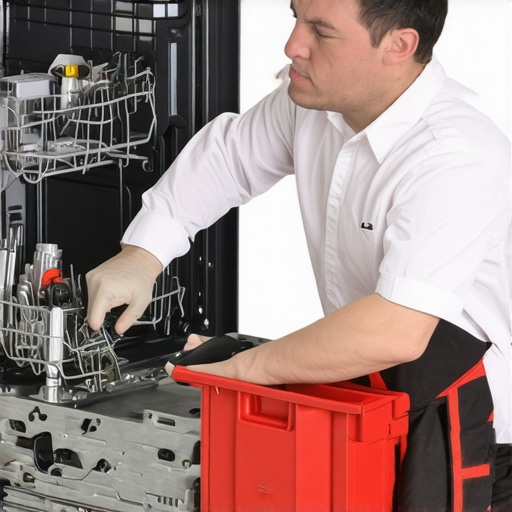
First, unplug the appliance from its power source to prevent electrical hazards. Remove the lower panels and access the internal components. Use a screwdriver to detach the toe kick panel, which usually covers the bottom front of the unit. During this process, I once forgot to disconnect the power, leading to a tiny spark that reminded me to prioritize safety. Keep all screws and small parts organized to avoid losing anything.
Identify and Safeguard Hazardous Parts
Dishwashers contain metals, plastics, and electronic components. Locate the electronic control board, heating elements, and metal reservoirs. To prevent environmental contamination, carefully disconnect and remove electronic parts wearing gloves. For example, I replaced the circuit board, ensuring I didn’t break the delicate solder joints, which made the recycling process smoother later.
Remove Reusable and Valuable Components
Some parts, like the spray arms, racks, and door handles, can be salvaged and reused or sold. Detach the spray arms by unscrewing the mounting nuts. The racks can often be resold if still in good condition, reducing waste. During my cleanup, I visually inspected and replaced worn-out spray nozzles with new ones from top-rated parts, enhancing performance even after recycling the appliance.
Disassemble the Frame and Body Properly
Next, carefully dismantle the outer shell using appropriate tools. Be cautious of sharp edges—wear heavy gloves. Once the shell is removed, extract the internal insulation, which may contain fiberglass; handle with care for safety and environmental reasons. Remember, proper disassembly prevents metal and plastic contamination, facilitating recycling. I often use a saw or pliers to cut through stubborn welds, taking care to avoid damaging recyclable metal parts unnecessarily.
Sort Parts for Recycling
Organize metals, plastics, and electronic waste separately. Metal components like the tub, frame, and motor can be taken to scrap metal recycling centers. Plastics, particularly the sump and door panels, should go to designated plastic recycling facilities. Electronics, such as control boards and wiring, require special electronic waste processing. In my case, I delivered these to a certified e-waste recycler, ensuring hazardous substances like circuit residues are safely handled.
Verify Local Recycling Programs and Regulations
Check your local waste management guidelines to confirm disposal procedures. Some municipalities offer pickup services for large appliances, while others have drop-off centers. For example, I scheduled a pickup through the city’s recycling program, ensuring my dishwasher was processed responsibly. Don’t forget to remove any residual water from hoses or internal compartments to prevent leaks during transport.
Document Your Recycling Efforts
For warranty purposes or personal records, document the dismantling process with photos or receipts from recycling centers. This helps ensure your efforts are recognized and can serve as proof of eco-conscious disposal. I keep a digital log to track my recycling activities, which also keeps me accountable for reducing waste.
By following these steps, you actively contribute to environmental preservation while responsibly disposing of your old dishwasher. Each action, from disassembly to proper recycling, ensures hazardous materials are handled safely and valuable resources are reclaimed efficiently.
 Many homeowners assume they understand their dishwashers thoroughly, but in reality, some widespread beliefs and practices can lead to costly mistakes. Let’s dig deeper into these misconceptions to help you make smarter choices and avoid common pitfalls.
**Challenging the Myth of Universal Compatibility**
A frequent error is assuming that all replacement parts are interchangeable across different dishwasher models. In truth, using generic or incompatible parts can compromise performance or void warranties. For example, selecting non-OEM parts without verifying specifications can lead to leaks or damage. Always consult reputable guides like [top tips for selecting the right parts](https://appliancedoctorz.com/top-tips-for-selecting-the-right-parts-for-dishwasher-installation) to ensure compatibility.
**Overlooking the Nuances of Proper Installation**
Many believe that installation is straightforward—simply connect the water supply, electrical outlet, and drain. However, minor oversights like incorrect leveling or improper sealing can cause persistent leaks, reduce efficiency, or trigger error codes. The [comprehensive installation guide](https://appliancedoctorz.com/diy-dishwasher-installation-step-by-step-guide) emphasizes precise leveling and secure fittings, which are often overlooked but crucial for optimal performance.
**The Hidden Trap of Ignoring Warranty Fine Print**
Homeowners frequently assume that their warranty covers all repairs or parts replacements without exception. Yet, many warranties require that professional installation, specific part brands, or registered service procedures are followed to maintain coverage. For instance, installing a dishwasher with non-brass fittings might void certain warranty clauses, as brass is more durable and often mandated for warranty validation. Dive into [warranty policies](https://appliancedoctorz.com/understanding-dishwasher-warranty-policies-for-peace-of-mind) to understand these nuances.
**Advanced Mistakes That Could Cost You**
One overlooked nuance is neglecting regular maintenance, especially inspecting and replacing worn parts like door seals or spray arms. Failing to do so can lead to inefficient cleaning, higher energy bills, or even damage to internal components. An advanced pro tips include monitoring wear indicators and referencing [when to replace dishwasher parts](https://appliancedoctorz.com/when-to-replace-dishwasher-parts-for-optimal-performance) before failure occurs.
**Why Your Choice of Parts Influences Warranty and Longevity**
Opting for cheap, third-party parts might save money initially but can jeopardize warranties and longevity. Certified parts with proper specifications ensure your dishwasher remains in warranty and performs optimally over its lifespan. The [most popular dishwasher parts](https://appliancedoctorz.com/the-most-popular-dishwasher-parts-and-how-they-improve-performance) article offers insight into choosing durable, compatible components.
**A Warning About DIY Repairs and Installations**
While DIY can be rewarding, some tasks—like electrical wiring or water connections—are best left to professionals. Incorrect installation or repair can accidently void warranty terms and pose safety risks. Consult [expert advice on troubleshooting and installation](https://appliancedoctorz.com/expert-advice-on-dishwasher-installation-troubleshooting) to recognize when professional help is necessary.
Have you ever fallen into this trap? Let me know in the comments. Remember, understanding these nuances empowers you to extend your dishwasher’s life, stay within warranty, and avoid unnecessary expenses.
Tools I Recommend for Long-Term Dishwasher Care
Maintaining a dishwasher over the years requires precision and the right equipment. One of my go-to tools is a high-quality digital multimeter. I use it regularly to check voltage across electronic components like control boards and sensors, ensuring they operate within specifications. My personal choice is the Fluke 117, renowned for its accuracy and durability, making troubleshooting more straightforward and reliable. Understanding your dishwasher parts becomes easier when you can verify electrical continuity and voltage without guessing.
Another essential is a set of precision screwdrivers—preferably magnetized—to disassemble components without losing tiny screws. For removing stubborn mineral deposits, a white vinegar spray bottle combined with a soft-bristled brush works wonders. It helps restore spray arms and filters, improving water flow and cleaning efficiency. I suggest using a silicone grease, like Super Lube, for lubricating door seals during routine maintenance. Proper lubrication prevents leaks and maintains sealing integrity, prolonging your appliance’s lifespan.
Adopting Effective Maintenance Routines
Consistent cleaning and inspections are key. I recommend inspecting the gasket and spray arms monthly, looking for cracks, mineral buildup, or wear. Regularly cleaning the filter with warm water and a brush prevents drainage issues. For deeper cleaning, running a cycle with a dishwasher cleaning tablet every three months keeps internal components free from grease and grime. Remember, replacing worn parts promptly ensures your dishwasher operates at peak efficiency.
How do I maintain my dishwasher over time?
To keep your dishwasher performing optimally, monitor water hardness levels and install a water softener if necessary. This reduces mineral deposits that can clog spray arms and damage seals. Also, routinely check the drain hose for kinks or clogs; a simple visual inspection can prevent leaks and overflows. Upgrading to brass inlet valves, recommended for durability, can also reduce maintenance needs and extend warranty coverage. For detailed advice on installing these components, refer to our DIY installation guide.
Future Trends in Dishwasher Maintenance
Looking ahead, I believe smart diagnostic tools integrated into dishwashers will become standard, enabling real-time alerts for component wear or blockages via smartphone apps. This proactive approach will drastically reduce downtime and costly repairs. As technology advances, I recommend staying updated with software firmware updates from manufacturers, which often improve efficiency and fault detection. A good example is how firmware updates can enhance smart sensors for temperature and turbidity, ensuring optimal cleaning cycles.
Speaking of maintenance, I encourage you to try calibrating your smart sensors if your dishwasher supports it. Proper calibration can significantly impact cleaning quality and energy efficiency, as discussed in our sensor calibration guide. Keeping tools, routines, and knowledge current will ensure your dishwasher remains reliable for years to come.
Investing in the right diagnostic tools and adhering to routine maintenance schedules is a practical way to extend the appliance’s life. For instance, removing mineral buildup from spray arms using a vinegar soak or replacing aging parts *before* they fail can save you money and frustration. Remember, consistent care and upgrading your toolkit are the best bets for a long-lasting dishwasher that keeps your dishes spotless. For advanced tips, don’t hesitate to explore our in-depth popular parts guide to see which upgrades can further improve performance.
Avoid the Pitfalls: What I Wish I Knew Sooner About Dishwasher Maintenance and Warranties
One of the toughest lessons I learned was that not all parts are created equal—cutting corners on quality can cost you dearly in the long run. I once replaced a control board with a cheap, generic alternative, only to find myself troubleshooting recurrent errors and voiding my warranty inadvertently. That experience taught me the value of choosing standard, certified parts for durability and warranty compliance.
Another insight was the importance of meticulous installation. Rushing through a DIY setup led to leaks and water damage that could have been easily prevented with professional assistance or thorough guidance. Remember, proper leveling and sealing aren’t just suggestions—they’re critical for your dishwasher’s health and warranty coverage. Check out our DIY installation guide for expert tips.
Lastly, I underestimated how crucial it is to understand warranty fine print. It’s not enough to simply register your appliance; knowing what’s covered and what voids your warranty can save you from unexpected expenses. The warranty guide shed light on these nuances, helping me make informed decisions on parts and repairs.
Tools That Became My Best Friends in Dishwasher Care
The right tools can make all the difference in maintenance and troubleshooting. My digital multimeter, like the Fluke 117, is invaluable for verifying electrical components without guesswork. For precision disassembly, a set of magnetized screwdrivers keeps tiny parts in check. When dealing with mineral deposits, a vinegar soak accompanied by a soft brush restores spray arms and filters effectively. And for sealing, high-quality silicone grease ensures longevity and prevents leaks. These tools empower me to tackle minor repairs confidently, extending my dishwasher’s lifespan.
Moreover, routine inspections using these tools, combined with DIY cleaning routines, keep my dishwasher running smoothly. Regularly checking for mineral buildup and replacing worn parts before failure is a game-changer. For deeper insights, our articles on knowing when to swap parts and selecting the best parts for installation are invaluable resources.
Take Charge and Protect Your Investment
Remember, your dishwasher is more than just an appliance; it’s an investment that benefits your daily routine and the environment. Regular maintenance, informed parts selection, and understanding warranty details are your best tools for ensuring it lasts longer and performs optimally. Embrace proactive care—you’ll not only avoid costly repairs but also enjoy cleaner dishes and peace of mind.
Are you ready to apply these insights and become a more confident DIYer? Share your experiences or ask questions below—I love hearing how you’re extending your dishwasher’s life!
Related Posts
Why Modern Machines Use Less Water Than Your Kitchen Sink
It was strike of genius—or maybe stubbornness—that led me to…
Why This Specific Detergent Pod Is Ruining Your Seals
It started with a tiny leak under my dishwasher that…

The Secret to Using Vinegar Without Damaging Your Rubber Seals
Imagine this: You’re trying to give your dishwasher a good…