
I’ll never forget the afternoon I opened my dishwasher and was greeted not by gleaming, spotless dishes, but by a strange, slimy film coating everything inside. At first, I thought it was just a stubborn residue, but it turned out to be a frustrating cycle of discovery—the Eco-Mode setting I had activated was actually causing more harm than good. Like many homeowners, I didn’t realize that what seemed like an energy-efficient choice could be sabotaging my dishwasher’s performance.
How a Simple Setting Can Turn Your Dishwasher Into a Slime Factory
Many of us aim to save a few bucks on energy bills and reduce our carbon footprint by enabling Eco-Mode. But what happens when that eco-friendly feature starts causing issues? It turns out, Eco-Mode can lead to less effective rinsing and cleaning, especially if your dishwasher isn’t calibrated properly. The result? Residual soap scum, mineral deposits, and a slimy film that stubbornly clings to your dishes and the machine’s interior. That slimy buildup isn’t just unsightly; it can harbor bacteria and impact your family’s health.
Is Eco-Mode Actually Worth All the Hype?
Before you dismiss your energy-saving options, let me share an mistake I made early on: I thought that just switching to Eco-Mode was enough to keep my dishwasher running efficiently. But I didn’t realize that some models require specific maintenance routines or part checks to truly benefit from eco-settings. Without proper maintenance, Eco-Mode can result in incomplete rinses and, ultimately, that disgusting slime. To avoid this, I recommend reviewing your dishwasher’s manual and performing regular checks—like inspecting the spray arms and filters—since these directly influence cleaning efficacy. For more on choosing the right parts and maintaining your dishwasher, this article offers valuable insights: [Top Tips for Selecting the Right Parts for Dishwasher Installation](https://appliancedoctorz.com/top-tips-for-selecting-the-right-parts-for-dishwasher-installation).
Now, if your goal is to keep your dishwasher performing at its best—and keep your dishes sparkling—it’s time to understand how settings like Eco-Mode can actually affect your appliance’s cleanliness. In the next sections, I’ll guide you through practical steps to prevent slime buildup, identify warnings early, and maintain your dishwasher long-term. Ready to dive into the details? Let’s get started!
,
Inspect and Clean Shower Arms Regularly
The spray or shower arms are crucial for distributing water evenly during cycles. Over time, mineral deposits and debris clog the tiny holes, reducing water flow and leading to residue buildup. I learned this firsthand when my dishes started coming out less clean; a quick removal and soak of the arms in vinegar dissolved the deposits. To do this, first remove the spray arms according to your model’s manual—typically by unscrewing or unclipping them—and then soak them in a solution of equal parts vinegar and water for about 30 minutes. Rinse thoroughly before reattaching. Regular cleaning ensures maximum water pressure and prevents residue accumulation that stagnates and turns slimy.
Replace Clogged Filters Promptly
The filters trap food particles and prevent them from recirculating. When clogged, they cause poor drainage, lingering residue, and slime formation. I once neglected this step, and my dishwasher developed a foul smell. By locating the filter (usually at the bottom of your machine), removing it, and soaking it in hot water with a bit of dish soap, I restored proper flow. Use a soft brush to scrub away buildup, then rinse thoroughly and reinstall. Making filter checks a weekly habit significantly cuts down on slime buildup and improves overall cleaning performance.
Ensure Proper Drain Hose Installation
An improperly installed drain hose can cause water to pool, stagnate, and foster bacterial growth—leading to slimy residue. A key mistake is not creating a sufficient high loop or air gap, which prevents backflow and standing water. I once realized my drain hose was kinked behind the machine, restricting flow. To fix this, I removed the hose, checked for kinks, and reinstalled it with a proper upward loop 20-30 inches above the floor—a technique that greatly improved drainage. Always verify your hose’s position using this guide to avoid water pooling and subsequent slime formation.
Maintain and Replace Seals and Gaskets
Damaged or worn door seals allow moisture to escape, which can contribute to mold and slime accumulating around the edges. I had to replace mine after noticing mold spots near the door, which an easy gasket replacement eliminated. Carefully inspect the gasket for tears or hardening. If needed, order a replacement using this resource. Applying a thin layer of silicone lubricant around the gasket can improve sealing and prevent leaks, reducing moisture that fosters slimy residues.
Run Hot Water Cycles Before and After Cleaning
Running hot water through your dishwasher helps dissolve grease and biofilms that harbor bacteria. I often run an empty hot cycle once a week, adding a cup of vinegar or a commercial cleaning agent designed for dishwashers. This process flushes out accumulated residues and prevents slime formation. Ensuring your water heater is set to at least 120°F (49°C) maximizes cleaning efficacy. Remember, consistent maintenance like this keeps your machine fresh and free from unpleasant buildup.
Schedule Professional Maintenance When Needed
If despite these steps, slime persists, or your dishwasher makes unusual noises, it’s time for professional intervention. Technicians can perform thorough inspections, including testing parts like the inlet valve (see this guide), and replacing worn components. Regular tune-ups also include checking for mineral deposits in hard water areas—installing water softeners if necessary can drastically reduce mineral buildup, which contributes to deposits and slime. Investing in scheduled maintenance ensures your dishwasher operates efficiently and remains hygienic over the long term.
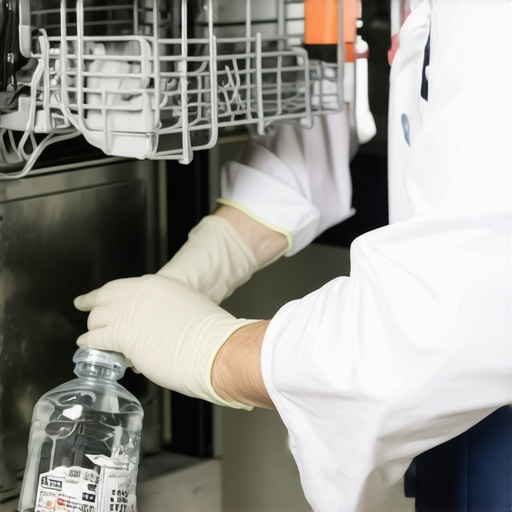 When it comes to maintaining your dishwasher, many homeowners fall prey to myths that can lead to costly mistakes. One prevalent misconception is that a warranty will cover all repairs regardless of how the appliance was installed or maintained. In reality, manufacturer warranties often exclude damages caused by improper installation or use of incompatible parts, which underscores the importance of understanding the nuances detailed in resources like this guide. Similarly, there’s a belief that replacing generic or aftermarket parts won’t affect your warranty, but using substandard components can void coverage as highlighted in this article.
Advanced homeowners often overlook the significance of precise installation practices. For instance, misaligning the dishwasher or failing to secure correct water supply connections can cause leaks that aren’t covered under warranty, even if the part itself is new and functioning. To prevent this, meticulous adherence to installation guidelines is essential.
A common trap is assuming all parts are equal, but the reality is that different models require specific components for optimal performance. Installing an incompatible spray arm or gasket can lead to poor cleaning or damage, which might not be covered. In fact, selecting the right parts through expert advice can extend your appliance’s life and preserve warranty rights, as discussed in this resource.
Furthermore, many miss the critical detail that warranty claims often hinge on documentation—such as professional installation receipts or proof of proper maintenance. Without proper records, manufacturers may deny coverage, emphasizing the need for diligent record-keeping. Learn more about this process in this article.
Have you ever fallen into this trap? Let me know in the comments. Digging into these nuances reveals that proactive, informed decisions protect your investment much better than relying on assumptions or myths about warranties and parts.
How do I maintain my dishwasher over time?
Maintaining your dishwasher’s performance requires the right combination of tools, routine practices, and a bit of technical knowledge. Over the years, I’ve honed my toolkit to ensure every component remains in peak condition, preventing costly repairs and extending the lifespan of my appliance. One key tool I regularly use is a quality multimeter. I rely on it for testing electrical components like thermostats and heating elements, which are common failure points. Investing in a reliable multimeter, such as the , has empowered me to diagnose issues early, saving time and money.
Another indispensable item is a set of precision screwdrivers. Many dishwasher parts, including spray arms and gaskets, are secured with small screws that require careful handling. Using a screwdriver with a magnetic tip minimizes the risk of dropping tiny components into hard-to-reach areas. I prefer brands like Wiha for their durability and precision.
In addition to hardware, I leverage specialized cleaning solutions designed for dishwasher maintenance. For routine cleaning, I prefer enzyme-based cleaners that break down biofilms and mineral deposits without damaging parts. Regularly running an empty cycle with a cup of commercial cleaner, like Affresh, keeps the internal workings free from slime and scale buildup. Combining this with manual inspections—checking spray arms for clogs and filters for debris—creates a comprehensive maintenance routine.
Looking ahead, I predict that the trend will shift towards smart diagnostic tools integrated with home Wi-Fi networks. Future appliances may provide real-time alerts for impending failures, reducing downtime and preserving warranties. Already, some models offer app-based diagnostics, but I believe this will become standard, allowing homeowners to perform maintenance more proactively.
What’s the best way to keep my dishwasher functioning smoothly long-term?
Developing a consistent maintenance schedule is crucial. I recommend checking and cleaning the parts involved in installation, such as hoses, filters, and seals, every six months. Additionally, use tools like a wire brush to clear mineral deposits from spray arms, ensuring optimal water flow. This easy step not only boosts cleaning efficiency but also prevents buildup that causes slime.
If you haven’t yet, try upgrading to a digital endoscope camera for internal inspections. This device allows you to peer inside compartments non-invasively, identifying corrosion or lodged debris before they become major issues. Incorporating advanced diagnostics into your routine can dramatically improve longevity and performance.
By maintaining a well-equipped toolkit and staying vigilant with regular inspections, you extend your dishwasher’s warranty coverage and avoid unexpected failures. For detailed guidance on identifying specific parts that may need replacement, review this resource. Take control of your appliance’s health today, and your future self will thank you for it!
Uncover the Costly Mistakes I Didn’t See Coming
One of the most eye-opening lessons I learned was the importance of precise installation and choosing the right parts. A simple mistake, like not securing the drain hose properly or using incompatible replacement parts, can void your warranty and lead to unexpected failures. I realized that manufacturer warranties are often more fragile than they seem—they hinge on proper maintenance, correct part selection, and adherence to installation guidelines. This understanding pushed me to dive deeper into professional best practices, which I now wish I had known earlier, saving myself from costly repairs and frustration.
Must-Have Tools and Resources for Every Dishwasher Owner
Over the years, I assembled a toolkit that transformed how I care for my dishwasher. A reliable multimeter helps me diagnose electrical issues, while a set of precision screwdrivers makes replacing gaskets or spray arms a breeze. For troubleshooting and parts selection, this guide became my go-to resource. Additionally, regular use of enzyme-based cleaners and inspections saves me from slime buildup, extending the life of my machine and keeping warranties intact. These tools and tips are worth every homeowner’s investment if you want to prevent unnecessary expenses.
Taking Control of Your Dishwasher’s Future
The journey to a clean, reliable dishwasher involves proactive steps and informed decisions. Prioritize thorough installations, select quality parts, and develop a routine that includes inspections and proper cleaning. By understanding how warranties work and recognizing warning signs early, you empower yourself to avoid costly breakdowns. Remember, the effort you put into routine maintenance today ensures your dishwasher serves you well for years to come. Start implementing these practices now, and enjoy the satisfaction of a smoothly running appliance.
What’s your biggest challenge when it comes to maintaining your dishwasher or ensuring warranty coverage? Share your experiences below—I’d love to hear your story!
Related Posts

The Environmental Impact of Choosing Plastic vs Stainless Steel Interiors
It was a humid Tuesday evening when I heard that…

The Best Eco-Friendly Detergents for Modern Smart Machines
It was a Saturday morning when I first noticed it—my…

Why Phosphate-Free Detergents Leave That White Film
I remember the exact moment I realized something was off…