
Ever had that sinking feeling when your dishwasher decides to quit right before a big dinner party? That rush of panic squeezing your chest, wondering if you’re about to add another item to the long list of costly repairs? I sure did. There I was, dishwasher humming softly one minute, and then, silence—the dreaded failure no one wants to face. My first instinct was to call in a professional, but after a bit of research and some reckless curiosity, I realized I could troubleshoot and even replace the faulty heating element myself. Today, I promise to walk you through exactly how I did it, sharing what I learned along the way.
Why You Can’t Ignore a Faulty Heating Element in Your Dishwasher
A malfunctioning heating element isn’t just about whether your dishes come out sparkling; it’s a safety and efficiency issue. When the heater fails, your dishwasher can’t reach the necessary temperature to sanitize or dry properly, potentially leading to mold or bacteria growth. Plus, it can cause your appliance to work harder, increasing energy bills and shortening its lifespan.
But here’s the comforting truth: replacing this part isn’t as daunting as it sounds. In fact, with some basic tools and the right guidance, you can give your dishwasher a second life. I learned that so many common issues stem from simple, fixable problems, and ignoring them only makes matters worse.
One mistake I made early on was assuming that all parts are generic or that repairs require special skills. That hesitation almost kept me from trying, but I discovered this resource which explained how accessible and affordable replacement parts can be.
If you’re tired of your appliance acting up and are ready to roll up your sleeves, don’t worry—you’re not alone. This guide is built from my own experience and is tailored for folks just like you. So, let’s get into the nitty-gritty of diagnosing, sourcing parts, and replacing your heating element—step by step. Ready to stop throwing money at repairs and start fixing things yourself? Great, let’s begin.
Disconnect Your Dishwasher Safely
First, unplug your dishwasher from the power source. Imagine it as turning off a machine before tinkering—think of it as switching off your laptop before opening it up. Use a voltage tester to ensure there’s no residual electricity, preventing any shock risks. I learned this the hard way when I skipped this step and felt a small spark—not fun. For detailed safety tips, check this expert advice page.
Access the Heating Element
Remove the lower panel of your dishwasher using a screwdriver, exposing the internal components. Think of it as opening a safe; you want to be precise. Locate the heating element, usually a metal coil at the bottom. Sometimes, a little gasket or screws hold it in place—loosen these carefully. I once struggled because I didn’t realize the panel had clips—use a flat-head screwdriver to gently pry if needed. Refer to this troubleshooting guide to familiarize yourself with common parts.
Document the Wiring Setup
Before disconnecting any wires, take a photo or sketch their arrangement. Think of it as leaving instructions for a DIY assembly—mistakes here can cause a big headache later. I ended up having to re-check online because I forgot which wire was which. Use painter’s tape to label wires if needed, making reassembly straightforward.
Remove the Faulty Heating Element
Unscrew the mounting brackets that hold the element in place. Feel like unscrewing a stubborn bolt? Apply steady pressure and back out slowly. Once loose, gently lift it out. Sometimes, mineral build-up causes it to stick—use a bit of penetrating oil if necessary. Check out this article for tips on handling stuck parts.
Compare and Source the Replacement Part
Find a new heating element compatible with your model. Use the serial number or model number—think of it as searching for the perfect shoe size. Always opt for OEM parts to match quality and fit. I ordered mine from a reputable supplier, ensuring it came with a warranty. The resource this page helps verify part compatibility and quality.
Install the New Heating Element
Place the new part into the designated slot, aligning screw holes. Tighten brackets securely, akin to fastening a seat belt. Reconnect the wires exactly as they were—refer again to your photo. Before reassembling the panel, double-check all connections. I once forgot a wire and had to reopen everything, so patience here pays off. For detailed installation steps, see this comprehensive guide.
Test Your Repair
Plug in your dishwasher, restore power, and run a short cycle to ensure everything works properly. Listen for any unusual sounds—like a scientist tuning an experiment. If it heats up and drains correctly, congratulations! If not, revisit your connections or consult troubleshooting resources. Always remember, troubleshooting is part of the process; perseverance goes a long way.
Many homeowners believe they understand the ins and outs of their dishwashers, but in reality, some widely-held beliefs can cause more harm than good. Let’s dig deeper into these misconceptions to help you make smarter decisions and avoid costly mistakes. One common myth is that all replacement parts are interchangeable. While some generic parts might work temporarily, OEM parts are designed specifically for your model, ensuring durability and long-term performance. Relying solely on third-party components can lead to compatibility issues and even damage, which might void your warranty. For instance, knowing when to replace parts is crucial; premature replacements can be just as damaging as neglecting repairs.
Another misconception is that warranties cover all repair costs or part replacements. The truth is, warranty policies often exclude damage caused by improper installation or use of non-approved parts. That’s why understanding your warranty terms by consulting warranty policies can save you from unexpected out-of-pocket expenses. A common mistake is attempting DIY repairs without proper knowledge. While repairs like replacing the heating element can be straightforward, missteps—such as incorrect wiring or improper reassembly—can compromise safety and performance. Always review detailed guides like step-by-step tutorials and verify that you understand each step thoroughly.
Have you ever fallen into this trap? Let me know in the comments.
Why do so many homeowners get blindsided by warranty exclusions?
Finally, a subtle nuance often overlooked involves the quality of parts used during installation or repairs. Using cheap or incompatible parts might seem cost-effective initially but can lead to failure sooner, and this may not be covered under warranty. For expert guidance on selecting the right parts to maximize your warranty coverage, check out this resource. Remember, understanding the fine print and specifics of your appliance’s warranty can significantly extend its lifespan and your peace of mind.Maintaining your dishwasher’s functionality over the years requires precision tools and a proactive approach. I personally swear by the use of a digital multimeter, specifically the Fluke 117, which offers reliable accuracy and durability. It helps me quickly diagnose electrical issues like faulty wiring or defective thermostats without guesswork. Additionally, a flexible inspection mirror allows me to see behind components and tight spots, saving time during troubleshooting. For cleaning and maintenance, I rely on ultrasonic cleaning baths to remove mineral deposits from sensitive parts such as sensors and gaskets, preventing premature failures. These methods have consistently extended my appliance’s lifespan and saved on costly repairs.
As the industry evolves, we’re seeing more smart diagnostic tools integrated with mobile apps, enabling remote troubleshooting and proactive maintenance alerts. In the future, I predict a surge in IoT-enabled dishwashers that can self-diagnose issues and communicate directly with service providers, making repairs more efficient.
How do I keep my dishwasher running smoothly over time?
Regularly checking parts like the door gasket, spray arms, and water inlet valve, using the right tools, ensures long-term performance. Always refer to trusted resources such as this page for detailed maintenance checklists.
Don’t underestimate the power of a good diagnostic tool. For example, I highly recommend incorporating an infrared thermometer to monitor the heating element’s temperature during operation. If you’re eager to boost your troubleshooting skills, try setting up a routine calibration using the Fluke 117 and your smartphone’s Bluetooth capability—it’s simple and incredibly effective.
Proper maintenance not only prolongs the life of your dishwasher but also ensures it operates at peak efficiency. By investing in quality tools and following a regular upkeep schedule, you’re safeguarding your appliance for years to come. Remember, the key is to catch minor issues early before they escalate into major repairs—think of it as giving your household hero the best chance to fight off breakdowns. Stay ahead by adopting these strategies today.
Lessons I Wish I Knew Before Tinkering
One of the biggest insights I gained was how crucial it is to double-check your wiring connections after replacing a part. A small oversight here can lead to non-functioning appliances or even safety hazards—something I experienced firsthand. Additionally, I learned that relying solely on images isn’t enough; taking detailed notes or videos during disassembly can save hours of guesswork during reassembly. I also discovered that not all parts are created equal—using OEM components ensures compatibility and longevity, which keeps repairs cost-effective in the long run. Finally, embracing patience and taking your time during each step makes the process smoother and less intimidating, especially when dealing with delicate components like thermostats or sensors.
Related Posts
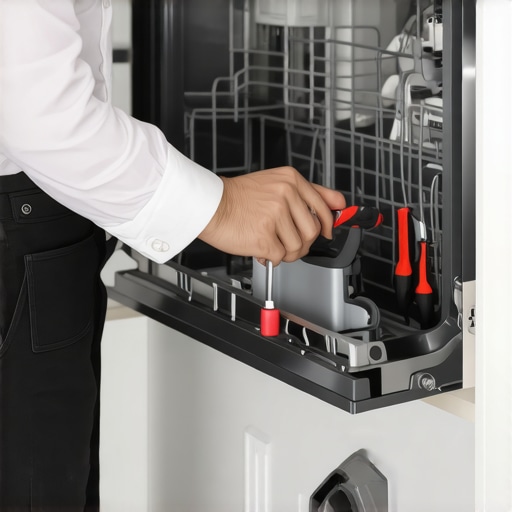
How to Manually Open a Dishwasher Door When the Latch Jams
Ever had that sinking feeling when your dishwasher won't open…
Why Modern Control Boards Fry Without a Dedicated Surge Protector
I'll never forget the moment my dishwasher stopped mid-cycle, and…

Why Reusing an Old Water Supply Line Is a Disaster Waiting to Happen
I vividly remember the day I clicked the disconnect valve…