
Ever had that sinking feeling when your dishwasher finishes its cycle, but instead of sparkling clean dishes, you’re greeted with a puddle of dirty water at the bottom? I’ve been there, and let me tell you—nothing is more irritating. One day, after a particularly frustrating load, I realized I wasn’t alone in this struggle. According to Appliance Repair Experts, drain issues are among the top reasons dishwashers fail to function properly, often caused by simple clogs or misplaced parts rather than expensive repairs (source).
Why Ignoring That Drain Problem Can Cost You More
When your dishwasher refuses to drain, it’s not just an inconvenience. Standing water can lead to mildew, foul odors, and even damage to your kitchen flooring. The worst part? Many assume it’s a complex fix needing professional intervention. But often, the culprit is something I can help you troubleshoot yourself—saving time, money, and the hassle of waiting for a service appointment. Today, I’m going to walk you through the steps I used to fix my own dishwasher drain issue, and I promise, it’s easier than you think.
Have You Faced This Drain Dilemma? You’re Not Alone
If you’ve ever found yourself scooping out water from your dishwasher only to see it fill right back up, you know exactly how disheartening it can be. Trust me, I’ve made that mistake early on—ignoring a minor clog thinking it would resolve itself, only to end up with a bigger problem. Early on, I also overlooked simple things like checking the filter or drain hose, which are often the root causes of drainage problems. Remember, the key to fixing your dishwasher without a plumber often lies in understanding the common parts involved, like the filter, pump, or drain hose. To learn more about these essential components, check out our article on [common dishwasher parts and how to replace them](https://appliancedoctorz.com/common-dishwasher-parts-and-how-to-replace-them-effectively).
So, let’s dive into how you can take control of this frustrating issue and restore your dishwasher’s performance. It’s surprisingly straightforward once you get the hang of it—and I’ll be with you every step of the way.
Unplug and Prepare Your Workspace
Before diving in, ensure your dishwasher is unplugged to prevent electrical hazards. Move the appliance slightly away from the wall, giving you room to access the underside. I once neglected this step and accidentally knocked over a glass of water, shorting the outlet—learning the hard way that safety comes first. Gather your tools: screwdrivers, pliers, a bucket, and old towels for drips.
Access the Drain Components
Remove the kickplate or lower panel beneath the door—usually held by screws. Use a screwdriver to take out the screws, and carefully pull the panel away. This exposes the sump, pump, and drain hose. Think of it as opening a treasure chest; everything’s right there, waiting to be checked. Remember, some panels may have clips instead of screws. For detailed steps, check out our step-by-step guide.
Inspect and Clear the Drain Hose
Locate the drain hose connected to the pump and leading to the sink drain. Detach it carefully using pliers, and check for kinks, clogs, or debris. Once removed, run water through it to verify it’s clear. I once found a build-up of soap scum blocking the hose completely; cleaning it restored proper drainage immediately. When reattaching, ensure clamps are tight to prevent leaks.
Clean the Filter and Pump Area
Next, inspect the filter located at the bottom of the tub—usually a round or flat piece that can be unscrewed. Remove any hair, food particles, or grease buildup. A clogged filter is like a clogged artery—restricting flow and causing backups. If the pump impeller (the small propeller-like part) is jammed with debris, gently turn it to free it. For detailed filter replacement tips, visit this resource.
Test the Drain Pump
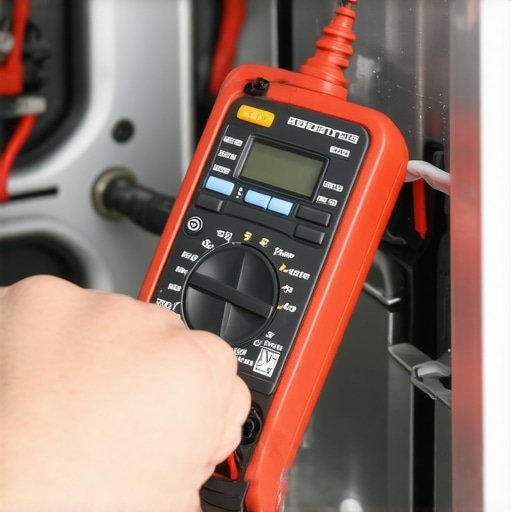
Using a multimeter, check the pump’s electrical continuity. If it’s faulty, replacing it is straightforward, but remember to disconnect power first. When I replaced my pump, I labeled all wires to prevent misconnection—a simple trick that saved me troubleshooting later. If you’re unsure about testing, consult a professional or review this guide for detailed diagnostics.
Reassemble and Test
Once all components are cleaned and checked, reassemble the panels, reconnect the power, and run a short cycle. Watch for water draining correctly without leaks or clogs. I recommend staying nearby to catch any issues early. Troubleshooting drainage might seem complicated, but breaking it down into these steps makes it manageable and cost-effective.
Prevention Tips to Keep Water Flowing
To avoid future issues, regularly clean your filter, check for kinks in the drain hose, and ensure your appliance isn’t overloaded. Remember, proper maintenance extends the life of your dishwasher and keeps it running smoothly. For tips on selecting the right replacement parts or understanding warranty policies, explore this page. When in doubt, consulting with a professional can save you headaches and money in the long run.Many homeowners assume that installing a dishwasher is as simple as plugging it in and running a cycle, but the reality is far more complex. A common misconception is that all parts are created equal; in reality, choosing the right component and understanding its nuances can significantly impact performance and warranty coverage. For example, not all replacement parts are covered by warranty, especially if third-party or generic parts are used, which can void your guarantee and lead to costly repairs later. Furthermore, a frequent trap is misinterpreting warranty terms—many believe warranties cover all damage, but they often exclude issues caused by improper installation or use of incompatible parts.
Did you know that some warranties require professional installation or the use of manufacturer-approved parts to remain valid? Skipping these guidelines can leave you unprotected during a repair claim. Additionally, advanced homeowners often overlook the importance of understanding warranty expiration dates versus the lifespan of certain parts. Rushing to replace a component without verifying compatibility or warranty status can result in early failure, costing more in the long run.
Let’s clear up a common myth: that all parts sold online are equivalent to OEM (Original Equipment Manufacturer) components. In fact, using non-OEM parts might be cheaper initially, but they often don’t fit perfectly or may cause damage that voids your warranty. To avoid these pitfalls, I recommend reviewing the detailed guidelines on [understanding dishwasher warranty policies](https://appliancedoctorz.com/understanding-dishwasher-warranty-policies-for-peace-of-mind) and consulting trusted sources for parts compatibility before making any replacements.
Navigating these nuances requires a keen eye and a bit of insider knowledge—so next time you’re tempted to DIY a repair or replacement, ask yourself: Am I sticking to manufacturer recommendations? Is this part covered under warranty? Have I considered the long-term implications of my choices? Remember, a well-informed approach not only prolongs your dishwasher’s lifespan but also safeguards your warranty benefits.
**A Hidden Trap to Watch Out For**: Many forget that improper installation techniques, such as poor sealing or incorrect hose routing, can void warranty coverage even if the parts are OEM. Always use recommended procedures and consider professional help if unsure. For a comprehensive overview on installation best practices, check out our guide on [top tips for seamless dishwasher installation in 2025](https://appliancedoctorz.com/top-tips-for-seamless-dishwasher-installation-in-2025).
Have you ever fallen into this trap? Let me know in the comments.
Invest in Quality Tools for Long-Term Success
Having the right tools makes all the difference when maintaining or repairing your dishwasher. I personally rely on a digital multimeter, such as the Fluke 117, because it provides fast, accurate readings for checking electrical components like the drain pump or heater element. Using a reliable multimeter helps me diagnose issues quickly without guessing, saving both time and money. Additionally, I keep a set of precision screwdrivers, including Phillips and flat-head, to handle various fasteners without stripping screws or damaging panels. Pliers with insulated handles are essential for disconnecting hoses and clamps securely, especially when dealing with stubborn fittings.
Use Diagnostic Software for Future-Proof Maintenance
As technology advances, I see a trend towards integrating diagnostic apps into smart appliances. For now, I manually test components like the water inlet valve and temperature sensors following manufacturer guidelines, but in the near future, expect software updates and remote diagnostics to become standard. Tools like smartphone-connected multimeters or WI-FI enabled diagnostic modules can alert you to issues before they become serious. This proactive approach extends your dishwasher’s lifespan and maintains warranty compliance, especially since some manufacturers require diagnostic logs for warranty claims.
Predicted Future of Dishwasher Maintenance
Looking ahead, I believe DIYers will increasingly adopt smart diagnostics and AI-powered tools for maintenance. Imagine an app that can interpret multimeter readings and suggest the exact replacement part needed, streamlining repairs further. This evolution promises greater longevity of appliances and less stressful troubleshooting, especially for those who aren’t technicians by trade.
How do I maintain my dishwasher over time?
Regularly inspecting and cleaning components like filters, spray arms, and gaskets is key. I recommend scheduling a detailed check at least every six months, which includes verifying the wiring connections and testing electrical components with your multimeter. Also, consider replacing worn parts preemptively using guides from this resource to prevent unexpected breakdowns. Remember, paired with the right tools and some know-how, your dishwasher can serve you reliably for years.
To stay ahead, I suggest trying out a professional-grade multimeter or a diagnostic app compatible with your appliance’s smart features. Not only will this empower you to fix minor issues yourself, but it also preserves your warranty and improves overall performance. For example, regularly checking the impedance of your heating element with a multimeter prevents overheating or failure, which can be costly (source).
Lessons Behind the Lumps in My Dishwasher Journey
One of the toughest lessons I learned was the importance of verifying warranty coverage before attempting DIY repairs. Early on, I replaced a pump part without checking if it was OEM or if my warranty would be voided—costing me more money in the end. Another insight was the significance of keeping detailed maintenance logs, which proved invaluable when navigating warranty claims. Finally, I discovered that understanding the intricacies of your dishwasher’s components, like the water inlet valve or spray arms, can save you from costly professional repairs and extend your appliance’s lifespan.
The Tools and Resources That Changed My Repair Game
- Multimeter: I trust the Fluke 117 for electrical testing—precision makes all the difference in diagnosing pump or heater issues.
- Official Parts Guides: The comprehensive resources at this link help me choose compatible replacement parts, ensuring warranty adherence.
- Diagnostic Apps: Staying updated with smart appliance diagnostics empowers me to pre-empt problems before they escalate.
- Maintenance Checklists: Regular inspections, guided by trusted checklists, keep my dishwasher running smoothly and warranty-valid.
Keep This Hope Alive for Your Dishwasher’s Future
Empower yourself with knowledge about the specific warranty policies affecting your appliance. Remember: informed decisions about parts and maintenance not only prolong your dishwasher’s life but also safeguard your warranty coverage. With the right tools, resources, and mindset, you can tackle most issues confidently—and enjoy sparkling dishes without the stress. Are you ready to take control of your dishwasher repairs and unlock its hidden potential? Share your experiences or questions below to start the conversation!
,
Related Posts
Stop Using Too Much Detergent: The Gasket Killer
Ever had that sinking feeling when your brand-new dishwasher starts…
How to Spot a Failing Drain Pump Before Your Kitchen Floods
Ever had that sinking feeling when you open your dishwasher…

How to test your water inlet valve for failure
I remember the exact moment it hit me—my dishwasher suddenly…