
It was a quiet Tuesday evening when my kitchen silence was shattered by a sound like a small pistol firing inside my cabinetry. Crack! My heavy dishwasher door instantly dropped like a stone, slamming hard against my shin and narrowly missing my big toe. I had noticed the door feeling a little loose and squeaky over the past few weeks, but I ignored it, thinking I would get to it eventually. That tiny squeak was actually my door tension cable slowly shredding itself to pieces. When it finally snapped, the heavy door fell completely unassisted. I learned the hard way that a little preventative maintenance can save your shins, your kitchen floor, and your expensive appliance door panel from absolute disaster.
The Warning Signs You Are Currently Ignoring
Most of us do not think about our dishwasher doors until they crash to the floor. But your machine is almost certainly whispering warning signs to you right now. If your door feels heavier than usual when you open it, or if it squeaks, scrapes, or drops too quickly during the last few inches of travel, your cables are crying out for help. When you ignore these signs, you are not just risking a bruised shin; you are putting immense strain on the door hinges and the plastic tub frame itself. Trust me, I made the mistake of waiting, and it turned a simple five-minute adjustment into a stressful evening of cleanup and regret.
Today, we are going to walk through how to identify this wear early and tackle the replacement process safely. It is an incredibly straightforward project that anyone can do with basic household tools, and you absolutely do not need to pay a professional appliance tech a hundred and fifty dollars just to swap out a couple of simple tension cords. If you want to make sure the rest of your machine is running smoothly, you can also learn how to replace a frayed door cable without a specialist using a few simple prep steps.
Is this DIY repair actually worth the headache?
I get it. The moment you think about pulling your dishwasher out of the cabinet bay, your palms start to sweat. You worry about leaking water lines, electrical shocks, or somehow making the problem worse. But here is the honest truth: replacing these cables is one of the easiest repairs you can perform. The cable and pulley system sits entirely on the exterior sides of the machine, meaning you do not have to touch the complex internal plumbing or electronics at all. In fact, according to major appliance repair data, over eighty percent of dishwasher door issues are simple mechanical failures of the tension strings and springs, rather than broken hinges or warped frames.
When you take control of this repair yourself, you avoid the long wait times for service technicians and the massive markup on basic OEM parts. You can easily protect your appliance and keep your kitchen running safely by learning about the understanding of dishwasher parts as a key to effective maintenance. Have you ever had your dishwasher door unexpectedly slam down on you, or are you currently listening to an annoying squeak every time you load the breakfast dishes? Let me know in the comments below, because you do not have to live with a dangerous, heavy door any longer.
Step-by-Step Guide to Replacing Frayed Tension Cables
Before you begin wrestling with the appliance, safety comes first. Think of this process like changing a flat tire: you would not jack up the car while the engine is running. Go to your home electrical panel and flip the breaker dedicated to your dishwasher. Next, locate the water shutoff valve under your kitchen sink and turn it completely clockwise. Once the utilities are secure, open the door and remove the mounting screws that secure the unit to the underside of your countertop or cabinet face. If you have custom stone countertops, you might have side-mounting brackets instead. Check out our advice on replacing a stripped plastic mounting bracket with metal alternatives if your brackets look damaged during this step.
Slide the Unit Out Safely
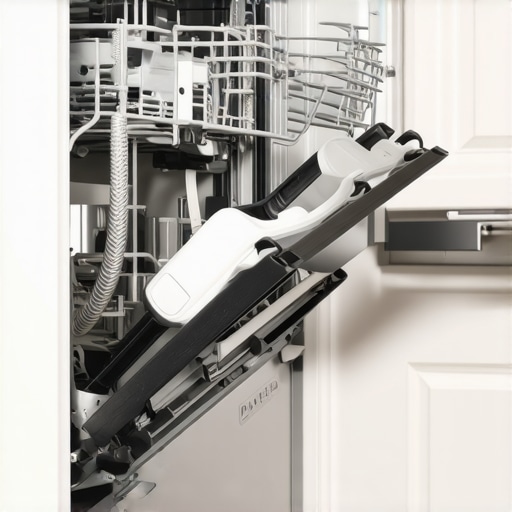
With the mounting screws removed, open the dishwasher door slightly and gently wiggle the entire machine forward out of its cabinet cavity. You only need to slide it out about six to ten inches to expose the side panels where the tension springs and cables reside. Keep an eye on your water supply line and drain hose under the sink as you pull; make sure they are not pinching or stretching too far. I remember the first time I attempted this, I pulled too hard without checking the lines, and I ended up cracking a cheap plastic fitting. It was a messy, wet lesson that taught me why professional installers refuse to use plastic supply elbows. Take it slow and steady.
Remove the Old Cable and Route the New One
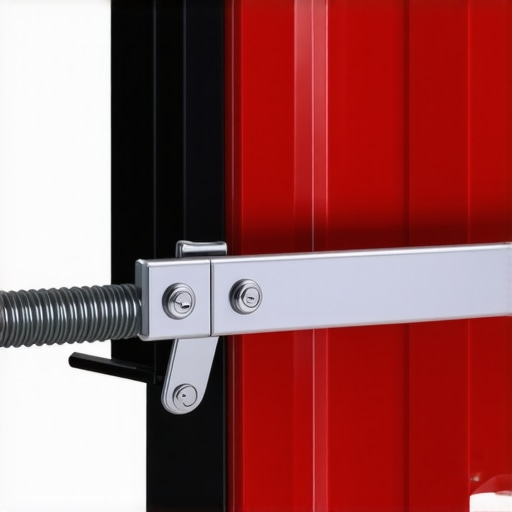
Once the side of the dishwasher is accessible, you will see the heavy metal spring connected to a plastic or braided cable that wraps around a plastic pulley system. Take a photo of this setup with your phone before touching anything—it is the ultimate reference guide for reassembly. Carefully release the tension on the spring by unhooking it from the rear hook, then unloop the broken cable from the pulley channel. Loop your new replacement cable over the pulley in the exact same orientation. If you want to prevent future squeaking and wear, now is the perfect time to learn about the part you must lubricate to stop a squeaky door. Hook the cable back to the spring, stretch the spring back to its original mounting anchor, and repeat the entire process on the opposite side of the dishwasher so both doors are balanced evenly.
Test the Balance Before Sliding Back In
Do not slide the machine back into the cabinet just yet. Gently open and close the door a few times to test the tension. The door should glide smoothly and stay partially open at about a forty-five-degree angle without slamming down or springing back up aggressively. If your machine is older, you might want to review when to replace dishwasher parts for optimal performance to see if your springs need replacement alongside the cables. Once you are satisfied with the smooth movement, carefully slide the dishwasher back into its cavity, secure the mounting brackets, turn the water supply and electrical breaker back on, and run a short test cycle to make sure no supply lines were disturbed during the slide.
While swapping out those door tension cables is a satisfying weekend victory, it only scratches the surface of the quiet battle going on inside your kitchen cabinet. Many homeowners believe that replacing a couple of worn-out parts is the end of their maintenance worries, but the reality is that home appliances are surrounded by a web of structural risks and warranty traps. When you start pulling your machine out of its bay, you are stepping into a territory where a single minor oversight can void your consumer protections or set you up for a catastrophic kitchen flood.
Why Your Brand-New Parts Might Actually Void Your Warranty
Everyone will tell you to buy the cheapest replacement parts available online, claiming they all come from the same factories. In my experience, however, saving ten dollars on generic, off-brand tension cables or springs is a recipe for disaster. Using non-OEM components can completely invalidate your manufacturer protection plan. If a third-party cable snaps and causes the door to bend your stainless tub, your claim will be instantly rejected. To protect yourself, it is critical to learn about maximizing your dishwasher’s warranty through proper parts selection before ordering anything off questionable discount sites.
Furthermore, many homeowners do not realize that the physical act of sliding the unit out of the cavity can trigger a deniable claim. If you accidentally stretch a copper water line or stress an electrical connection during your DIY session, the manufacturer will label any subsequent issues as ‘user-inflicted installation damage.’ Understanding exactly what your dishwasher warranty doesn’t cover and how to avoid fees is your best defense against these costly corporate loopholes.
Should you trust a DIY installation or call a certified pro?
This is the ultimate dilemma for the modern homeowner. While replacing simple mechanical springs is easily done at home, a complete unit reinstall is a different beast entirely. A study by the Association of Home Appliance Manufacturers (AHAM) indicates that improper drainage loops and poor leveling account for more than half of all early-stage appliance failures. If you get the door tension right but fail to route the drain hose with a proper high loop under your sink, you risk dirty sink water back-flowing into your clean dishes. For a reliable, long-term setup, following a proven DIY dishwasher installation step-by-step guide is non-negotiable.
The biggest trap of all, however, is the water line. Amateur installers often try to reuse the old brass fittings or flexible hoses to save time. This is a massive mistake. Metal fittings wear down and deform to fit the old machine’s threads, meaning they will almost certainly slow-leak when connected to a new valve. I always recommend checking the parts to check when installing a dishwasher for long-term performance so you do not wake up to warped hardwood floors three weeks from now. Have you ever fallen into this trap or suffered from a sneaky water leak after a repair? Let me know in the comments below, and let’s keep our kitchens running safely!
While swapping out those door tension cables is a satisfying weekend victory, it only scratches the surface of the quiet battle going on inside your kitchen cabinet. Many homeowners believe that replacing a couple of worn-out parts is the end of their maintenance worries, but the reality is that home appliances are surrounded by a web of structural risks and warranty traps. When you start pulling your machine out of its bay, you are stepping into a territory where a single minor oversight can void your consumer protections or set you up for a catastrophic kitchen flood.
How do I maintain my dishwasher door and tension system over time?
Long-term reliability is not about waiting for things to snap; it is about reducing friction. Personally, I keep a small tube of synthetic silicone grease—specifically Super Lube 21030—in my kitchen junk drawer. I apply a tiny dab of this non-melting grease directly to the plastic pulley wheels every six months. Standard WD-40 is a massive mistake here because it degrades the plastic pulleys over time, but a true silicone lubricant stops the annoying squeaks and prevents the cable from shredding due to friction. If you want to keep your entire unit in peak condition, you must understand understanding dishwasher parts as a key to effective maintenance.
As smart home technology evolves, we are heading toward a future where physical spring-and-cable systems will be replaced by magnetic dampening hinges and motorized door assists. However, until those high-tech units become the standard, we are stuck with mechanical tension. For older units, keeping the tension perfectly balanced prevents the door latch from misaligning. If you notice your door requires extra force to close, do not force it. You might need to consult a DIY dishwasher installation step-by-step guide to ensure the cabinet itself has not shifted and pinched the chassis.
According to the technical service manuals published by Whirlpool Corporation, even a three-millimeter deviation in cabinet leveling can cause the door hinges to bind, which unevenly wears out one side of your cable system. I highly recommend picking up a cheap pocket level and checking both the horizontal and vertical alignment of your machine. If you are struggling with a unit that shifts every time you open it, check out our guide on how to stop your dishwasher from moving when you open the door to stabilize the frame before you wear out another set of cables.
My challenge to you this weekend is to open your dishwasher door completely, look closely at the gap between the inner tub and the door panel, and check for any rubbing. If you hear even a faint scraping sound, pull the kickplate off and inspect those pulleys. Taking ten minutes to apply some silicone lubricant now will save you from a heavy door crashing down on your shins later.
The Brutal Truth About Cheap Replacement Parts
When I first faced a snapped door cable, my immediate instinct was to find the absolute cheapest replacement kit online. That was a nearly catastrophic mistake. Here are the core realities of dealing with understanding dishwasher parts as a key to effective maintenance that most generic guides completely gloss over:
- Generic cords stretch rapidly: Third-party braided strings often lack the internal core reinforcement of OEM parts, meaning your door will start sagging again within three months.
- Counterfeit parts put your electronics at risk: Cheap kits sometimes bundle poorly cast plastic pulleys that can bind up, snapping the cable and sending the spring crashing into nearby wiring harnesses. To protect your unit, learn how to spot a fake replacement part before it fries your control board.
- The warranty trap is very real: If a non-authorized component fails and damages your hinge or tub, you can kiss your manufacturer coverage goodbye. It pays to understand the complete list of dishwasher parts covered by warranty before making any modifications.
My Go-To Gear for Hassle-Free Appliance Maintenance
You do not need a massive garage full of specialized tools to keep your dishwasher running smoothly for a decade. Over the years, I have pared my appliance toolkit down to just three non-negotiable items that save time and prevent accidental damage during a DIY job:
- Super Lube 21030 Synthetic Grease: Unlike standard petroleum jelly or WD-40, this PTFE-based lubricant will not degrade plastic pulleys or attract kitchen dust. It is the secret to a permanently silent door.
- A Compact Pocket Level: Since even a tiny misalignment wears out your door cables unevenly, a small magnetic torpedo level is essential for verifying your cabinet spacing.
- A High-Quality Braided Stainless Steel Supply Hose: If you must slide your machine out, always replace the old water line. I highly recommend learning why your professional installer insists on a new water valve and hose rather than risking a major leak with degraded fittings.
Take Control of Your Kitchen Maintenance Today
There is an incredible sense of satisfaction that comes from fixing a heavy, crashing door with your own two hands. You do not have to live with the daily annoyance of a squeaking hinge or the danger of a door falling on your shins. By taking a few minutes to inspect your tension system, source the right OEM components, and verify your cabinet alignment, you are extending the lifespan of your appliance by years. If you are planning a fresh installation or a complete overhaul, make sure to check out our comprehensive DIY dishwasher installation step-by-step guide to ensure every connection is perfectly secure.
Have you ever had to deal with a dishwasher door that just won’t stay put, or did you run into unexpected trouble while sliding your unit out? Let me know in the comments below!
Related Posts

How to Replace a Snapped Door Cable in Under Half an Hour
Ever been in the middle of washing a huge load,…
Why Your Dishwasher Door Springs Break Every Three Years
Ever opened your dishwasher to find the door hangs at…
How to Force a Manual Drain Cycle on Most Major Brands
Ever experienced that sinking feeling when your dishwasher finishes a…