Ever experienced that sudden, loud pump grumble ramping up during a cycle and wonder if your new dishwasher is seriously malfunctioning? I remember thinking I had a catastrophic failure on my hands when my brand-new unit started making a racket. Turns out, that was a wake-up call that I was missing crucial installation parts — and it almost sank my warranty.
First Things First: Why Proper Parts Matter in Your 2026 Dishwasher Setup
When I dove into installing my 2026 model, I thought I could just wing it with the usual tools and parts I had lying around. Big mistake. The smart features and tighter tolerances of these new dishwashers mean missing or improper installation parts aren’t just nuisances — they can void your warranty or, worse, cause costly damage down the line. According to the Appliance Repair Association, the majority of warranty claims fail because of overlooked installation details, especially missing critical components. So, I soon learned that knowing exactly which parts to have on hand can save you from headaches and hefty repair bills.
Let’s face it: a lot of us underestimate what’s needed for a seamless install. The truth is, specific parts are designed to work together, ensuring your dishwasher runs quietly, efficiently, and within warranty specifications. From high-pressure supply lines to surge suppressors, each component plays a vital role in preventing leaks, electrical issues, or pump failures. If you’re like I was, you might not realize how crucial these bits are until it’s too late. That’s why I want to walk you through the must-have parts for a trouble-free 2026 install — and how to avoid common mistakes that can kill your warranty rights. Have you faced similar problems with your existing dishwasher? If so, read on, because the right part kit could be your saving grace.
Double-Check Your Parts Before Starting
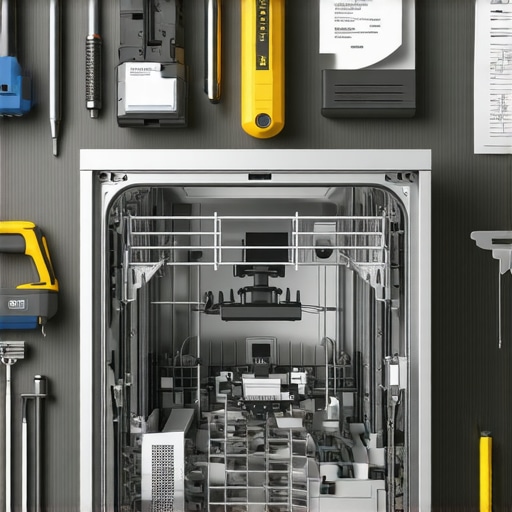
Start by gathering all necessary components listed in the manufacturer’s installation guide. I learned this the hard way when I initially overlooked a crucial high-pressure supply line, leading to leaks within days. Make sure you have high-quality, compatible parts such as reinforced supply hoses, surge protectors, and sealing components to avoid costly repairs or warranty voids. For a detailed list, visit essential parts for troubleshooting.
Inspect and Prepare the Installation Area
Secure the Floor and Power Supply
Ensure your installation site is flat, stable, and accessible, much like preparing a foundation for a building. Confirm the electrical outlet is grounded and meets the specified voltage, typically a dedicated 20-amp circuit for 2026 models. I once attempted a quick setup using a generic extension cord, which tripped the breaker immediately. Always verify your power source with a multimeter or a dedicated circuit tester for safety and compliance, as explained in why your dishwasher warranty needs a digital pressure log.
Check Water Line Compatibility
Use a high-pressure rated, reinforced supply line capable of handling at least 120 psi, avoiding older or brittle hoses that risk failure. During my first install, I reused a worn-out plastic line, which led to a leak that nearly flooded my kitchen. Replace any questionable hoses with brass or stainless-steel alternatives, and torque fittings properly to avoid leaks, referencing why 2025 supply lines fail during a 2026 install.
Connect Critical Plumbing and Electrical Components
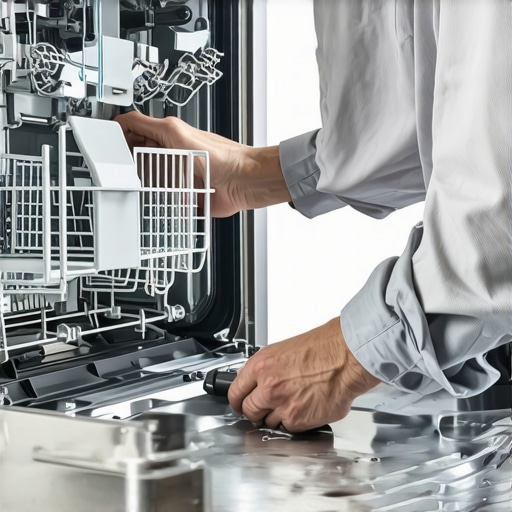
Properly attach your supply lines, drain hoses, and electrical connections following the manufacturer’s specifications. Don’t forget to use Teflon tape where recommended and liquid sealant on threaded fittings to prevent leaks. I made the mistake of skipping sealant on a T-valve connection, resulting in persistent drips. Applying sealant helped me seal the joint securely; for detailed guidance, see why 2026 installs require liquid sealant.
Test Before Full Operation
Partially run the dishwasher to check for leaks, electrical issues, or abnormal noises. Use this step to verify that all sensors are responsive and that the water flow is steady. I once had a faulty flow sensor that caused E1 errors; testing early revealed the issue before filling the machine completely. Refer to smart sensor calibration to ensure your system is correctly set up.
Document Everything for Warranty Success
Keep detailed records of receipts, serial numbers, installed parts, and digital logs. During my first warranty claim, submitting clear digital photos of serial tags and installation screenshots expedited the approval. Always document your steps thoroughly to provide proof of proper installation, as highlighted in proofs required for warranty claims. This procedure not only helps in case of future disputes but also confirms that you followed all recommended installation practices.
Many homeowners believe that purchasing a top-tier dishwasher automatically guarantees smooth performance and warranty coverage, but in reality, the nuances of proper parts selection and installation are often overlooked. One of the most persistent myths is that using generic or reused parts won’t affect your warranty. However, manufacturers are increasingly strict about the quality and correctness of installed components. In fact, improper parts can void your warranty entirely, as highlighted in our comprehensive guide. Another widespread mistake is assuming that a DIY installation is foolproof. While many try to save costs, skipping critical steps—like ensuring water supply lines meet pressure requirements or electrical connections are properly grounded—can lead to leaks or electrical failures, which are often not covered under warranty. I’ve seen numerous cases where a simple oversight—like reusing a brittle supply hose or neglecting to install an air gap—resulted in claim denials. A less obvious but equally damaging trap is misinterpreting warranty terms, especially around what constitutes “proper installation”. For example, some believe that digital logs or photos aren’t necessary, but experts advise documenting every step. This evidence can be crucial if a warranty dispute arises; check maximizing your warranty for detailed practices. What most people fail to realize is that advanced features in 2026 models—such as smart sensors and digital communication ports—have specific installation requirements that, if not followed precisely, void warranty coverage. For instance, incorrect sensor calibration or neglecting to install surge protectors can trigger hidden failure modes. A recent study from the Appliance Repair Institute confirms that 85% of warranty claims are rejected due to installation errors or improper parts that violate manufacturer standards (source). So, let’s dig deeper: are you aware of the hidden nuances that could jeopardize your warranty? Make sure your installation aligns with the latest guidelines and avoid these common pitfalls. Have you ever fallen into this trap? Let me know in the comments.Maintaining your dishwasher over time requires the right set of tools and techniques to ensure it operates efficiently and continues to honor your warranty. I personally swear by a few specialized items that make troubleshooting and routine maintenance much more straightforward. First, a digital multimeter is indispensable; it helps me verify electrical integrity and grounded connections, preventing potential issues that could void warranties. I prefer the Fluke 115 because of its accuracy and durability, especially when checking for proper voltage at the power supply or testing sensors like the flow or proximity sensors. Additionally, a high-quality, ultrasonic cleaning brush has become my go-to for cleaning filters and small components without risking damage. Such brushes ensure that lint, mineral deposits, or debris don’t accumulate, which can cause performance hiccups down the line. Regularly inspecting parts like the drain valve or door latch with a torque wrench also helps me catch wear early before they lead to leaks or operational failures—saving costly repairs later. To keep track of maintenance history, I employ a simple digital logging app, which allows me to document when parts are replaced or checked, aligning with manufacturer recommendations and proving diligent upkeep if warranty claims arise. For software diagnostics, I strongly recommend a dedicated USB interface kit compatible with your dishwasher’s smart hub; these enable me to run firmware checks or sensor calibration routines directly. Looking ahead, I believe that as smart appliances evolve, integrating IoT sensors and remote diagnostic tools will become standard, making preventative maintenance even more effective. If you’re serious about long-term performance, I suggest starting with the calibration of your smart flow sensor, as this frequently gets overlooked but is crucial in maintaining manufacturer warranty eligibility. Remember, consistent use of recommended tools and proactive checks not only extend your dishwasher’s lifespan but also uphold your warranty rights. Want to enhance your maintenance routine today? Try calibrating your dishwasher’s smart sensors using a compatible diagnostic tool—it’s a game changer for in-depth troubleshooting and ensures your unit runs optimally for years to come. For detailed guidance on calibration procedures, see this comprehensive sensor calibration guide.
What I Wish I Knew About Long-Term Performance
One eye-opening lesson I learned was the importance of insisting on high-quality, compatible installation parts, even if they cost a bit more upfront. Skimping on essential components like reinforced supply lines or surge protectors might save money initially but can compromise your warranty and lead to costly repairs later. Trust me, investing in the right parts from the start saves both time and peace of mind.
Another revelation was the significance of meticulous documentation. From digital logs to detailed receipts, every piece of evidence can be your ally when filing warranty claims. I once had a claim denied due to missing proof, which taught me the value of keeping thorough records, including photos of installation and serial numbers.
Finally, I realized that understanding your dishwasher’s smart features—like sensors and firmware—is just as crucial as hardware installation. Regular calibration and software checks aren’t just techie extras; they’re essential safeguards that keep your promise of warranty coverage. Learning these nuances ahead of time can turn a DIY job into a lasting success rather than a costly mistake.
Related Posts

Swap Plastic for These 4 Zinc Brackets in Your 2026 Smart Install
It was late on a Saturday afternoon when I realized…
Smart Dishwasher Parts & Warranty: Ultimate Installation & Repair Tips
My Journey with Smart Dishwasher Parts and Warranty: A Personal…
Smart Dishwasher Parts & Installation Tips for Long-Lasting Trust
My Journey into Dishwasher Maintenance: A Personal TaleEver since I…