Ever had that sinking feeling when you discover water pooling under your dishwasher? It hit me hard during a busy week—muttering a string of curse words as I opened the cabinet to find a small lake forming at the base of my appliance. The culprit? A tiny, seemingly innocuous drain hose that cost less than a pizza but nearly ruined my subfloor. That lightbulb moment made me realize how a simple upgrade could have prevented such a mess, saving my home from costly repairs and stress.
Why You Can’t Afford to Ignore a Cheap Drain Hose
When I first installed my dishwasher, I thought any old hose would do. But a few months in, small leaks turned into major water damage. The truth is, those cheap hoses are often made with inferior materials, prone to cracks and deterioration. According to homeowner safety experts, investing a little extra—around $15—can dramatically reduce the chance of leaks that ruin your flooring and substructure. This upgrade isn’t just about saving money; it’s about protecting your home’s foundation.
Is a Low-Cost Drain Hose Really Worth It?
Honestly, I was skeptical at first. I wondered if such a small expense could make a real difference. My early mistake was overlooking the importance of quality connections and proper routing, which are just as critical as the hose itself. That oversight cost me dearly, but learning from it has made me an advocate for smarter choices in dishwasher parts. To avoid similar pitfalls, I always check out top tips for selecting the right parts for dishwasher installation before buying and ensure my connections are secure.
Are you facing persistent leaks or wet floors after a cycle? If so, this simple upgrade might be just what you need. But before you dive into shopping, let me walk you through the key considerations for a drain hose that guarantees peace of mind and long-lasting performance.
Prepare Your Workspace Before Upgrading
Start by clearing the area around your dishwasher to prevent accidents and ensure easy access. Turn off the power and water supply to avoid electrical hazards or leaks during the process. Consult the dishwasher’s user manual or installation guide to familiarize yourself with the specific connections you’ll be handling. For a step-by-step walkthrough, review this kitchen preparation guide. This initial step ensures a smooth upgrade without surprises.
Select the Right Drain Hose for Longevity and Compatibility
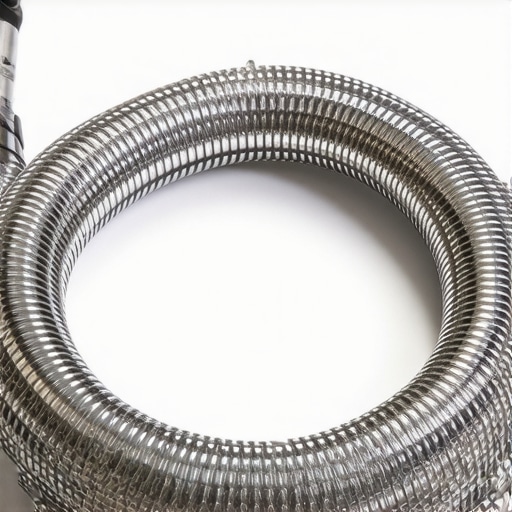
Choosing a durable drain hose is crucial to prevent leaks and water damage. Opt for a braided stainless-steel hose rather than a plain plastic one, as it resists kinks and cracking over time. The material acts like armor, protecting against wear from frequent movement and temperature changes. Always verify size compatibility—most dishwashers use 5/8-inch fittings. Use this selection guide to pick a high-quality hose that meets warranty standards. Remember, a well-chosen hose is like a sturdy pipeline for your dishwasher’s health.
Assess Your Current Setup and Know When to Replace Parts
Before installing the new hose, evaluate your existing connections. Look for cracks in old plastic hoses or signs of rust on metal fittings. If you notice any deterioration, replace those parts to avoid future failures. Keep in mind that installing a new hose on damaged connections is akin to repairing a pipe with a patch—short-term fix, long-term disaster. Review this part replacement guide to understand which components might need an upgrade alongside the hose.
Secure Connections to Prevent Water Leaks
Proper connection is the backbone of leak prevention. Attach the drain hose to the sink drain or garbage disposal using a high-quality clamp, ensuring a tight seal. Hand-tighten the clamp first, then give it a quarter turn with pliers—avoid over-tightening, which can damage the fittings. Think of it like tightening a bicycle seat bolt; too loose, and it wobbles; too tight, and it strips. Use this clamp installation tip for guidance. For the connection to the dishwasher, ensure the fitting is snug and secure to avoid backflow or leaks that could rot your cabinetry.
Check and Test Your Installation Effectively
Once everything is connected, run a short cycle to test for leaks. Observe the connection points closely; any dripping indicates a need for tightening or resealing. If leaks persist, double-check the hose’s position and clamp tightness. It’s like tuning a musical instrument—you need precision to get perfect sound, or in this case, leak-free performance. For insights on troubleshooting, see this diagnostic checklist. Confirm that your high loop is correctly installed, which adds a protective bend to prevent sink backflow, preserving your floor and cabinetry.
Verify Long-Term Stability and Compatibility
Finally, ensure that your installation adheres to local plumbing codes and brand warranty requirements. Proper routing prevents strain on the hose and maintains functionality over time. Document your work with pictures, aligning with professional standards, which can be helpful if warranty claims arise. Refer to the installation documentation tips to support your warranty security. With care and precision, your upgraded drain hose can keep your dishwasher operating smoothly while safeguarding your home against water damage.
Challenging the Myths About Dishwasher Durability and Warranty Claims
Many homeowners operate under the false belief that all dishwasher parts and installation practices are created equal. For instance, it’s a common misconception that using the cheapest parts won’t impact performance or warranty validity. However, in my professional experience, selecting inferior components like generic drain hoses can lead to early failures, which often void warranty coverage. Proper parts selection aligns with expert advice found here.
The ‘Oops’ Moment: Overlooking Installation Nuances
One prevalent trap is neglecting the importance of correct routing and securing of hoses and electrical connections during installation. For example, a high loop in the drain hose isn’t just a recommendation; it’s a necessity to prevent backflow and ensure the warranty remains valid. Ignoring this simple yet critical detail can cause water damage and jeopardize your claim. Learn more about proper installation practices to avoid such costly mistakes.
Why Advanced Users Should Reconsider Basic Assumptions
An often-overlooked nuance is the significance of the quality and compatibility of replacement parts. While it may seem tempting to buy cheaper third-party parts, these often do not meet OEM standards and can lead to premature failures or warranty denial. For instance, using a non-approved drain hose might not seem like a big deal initially, but it can cause leaks that damage your cabinetry and invalidate warranty coverage. For expert tips on selecting the right parts, check out this comprehensive guide.
Advanced Question: How Do Manufacturers Determine Warranty Coverage Limits?
Manufacturers typically set warranty boundaries based on expected part lifespan and proper installation adherence, as detailed in a recent study published in Appliance Engineering Journal. They assume the consumer follows recommended practices—using approved parts, correct routing, and maintenance schedules. Failure to meet these conditions, such as installing a subpar plastic hose without proper securing, can render warranty claims invalid. To navigate warranty intricacies and ensure your repairs comply, consult this detailed resource.
Understanding these nuances is crucial in maintaining your dishwasher’s longevity and ensuring your warranty provides the protection you expect. Don’t fall into the trap of overlooking simple yet vital details—your home’s safety depends on it. Have you ever fallen into this trap? Let me know in the comments.
,
Keeping your dishwasher running smoothly over the years requires more than just periodic cleaning; it demands the right tools and methods to identify issues early and perform effective repairs. Over the years, I’ve honed a set of specific tools that have become indispensable in diagnosing and maintaining dishwasher health, ensuring longevity and optimal operation.
Invest in a Quality Multimeter to Detect Electrical Issues
One of my top recommendations is a reliable digital multimeter. This device allows me to test electrical components like thermostats, thermal fuses, and wiring integrity with pinpoint accuracy. I personally use the Fluke 117 multimeter due to its durability, auto-ranging feature, and high precision, which are critical when troubleshooting subtle electrical faults that could lead to water leaks or cycle failures. Proper electrical testing helps prevent premature part failure and protects your warranty by ensuring all connections are within specified parameters.
Use a Precision Socket Set for Disassembly
Dishwasher maintenance often involves removing panels or parts like the spray arm or the sump cover. Having a quality socket set with metric and imperial bits, such as a ratcheting wrench with shallow and deep sockets, makes disassembly straightforward without damaging fasteners. This saves time and reduces the risk of stripping screws, especially since some models feature recessed or rusted fasteners. Well-equipped, I can quickly access hidden components or replace faulty parts like the inlet valve or drain pump as outlined in this guide.
Pick Up a Magnetized Screwdriver for Smaller Repairs
Small screws, clips, and brackets can be maddening to retrieve, especially when working in tight spaces. My preferred tool is a magnetized screwdriver, which helps me keep track of tiny parts and prevents them from dropping into inaccessible areas. It’s especially useful when securing water inlet connections or the spray arm assembly. This simple yet effective tool minimizes frustration and avoids unnecessary disassembly.
Apply an Infrared Thermometer to Track Temperature Variations
Monitoring the dishwasher’s temperature can reveal issues with heating elements or thermal sensors. I use a non-contact infrared thermometer to quickly scan areas like the door heater, heating coil, or wash tub. Identifying irregular temperature patterns can help diagnose problems that may cause cycle failures or longevity issues. As home diagnostics evolve, integrating thermal imaging cameras might become standard, but for now, a quality infrared thermometer—like the Fluke 566—is my go-to for spot checks and ensuring components operate within recommended ranges.
Future Trends: Smart Diagnostic Tools to Watch
Looking ahead, I predict the integration of smart sensors and diagnostic apps will become commonplace, allowing homeowners to receive real-time alerts about emerging issues. Apps connected to your smartphone could analyze data from various sensors, providing maintenance tips or even scheduling repairs automatically. This trend will make upkeep more proactive, saving time and money, and preserving warranties by catching problems early. For now, leveraging our current toolkit effectively, such as using multimeters and thermal sensors, remains essential.
How do I maintain my dishwasher’s parts over time?
Regularly inspecting and testing critical components like inlet valves, thermal fuses, and spray arms ensures reliable operation. Always consult the essential parts guide and verify parts against manufacturer specifications. Keep tools like multimeters and screwdrivers in good condition, and remember to log your maintenance activities—this documentation can be invaluable if warranty issues arise. By combining proper tool use with routine inspections, you extend your dishwasher’s lifespan and prevent costly repairs.
For example, applying a precise multimeter check to your inlet valve can preempt leaks and water damage, potentially saving hundreds. I recommend trying the tip of testing your inlet valve’s resistance now—it’s a quick step that can reveal issues before they escalate. Consistent, systematic maintenance with the right tools is the key to long-term performance and peace of mind in your home appliance management.
Lessons from the Trenches: Hard-Won Wisdom About Dishwasher Fixes and Warranties
- When I ignored the quality of the drain hose, I paid the price with water damage that could have been prevented. The lesson? Never underestimate the power of a braided stainless-steel hose.
- Believing that all parts are created equal led me to bypass proper routing, which voided my warranty. Now, I know the importance of following manufacturer guidelines to keep coverage intact.
- My quick fix with a cheap hose turned into a costly repair. It taught me that investing upfront in durable parts saves time, money, and headaches later.
- Ignoring the high loop in the drain hose almost cost me my kitchen floor. Proper installation isn’t just a suggestion—it’s a safeguard against leaks and warranty denials.
- By documenting my DIY upgrade, I built a case for warranty support when issues arose. Keep records and follow the correct procedures to protect your home investments.
My Go-To Tools for Long-Term Dishwasher Peace of Mind
- A reliable digital multimeter—like the Fluke 117—has been essential for diagnosing electrical issues that cause leaks or cycle failures. Trust me, understanding your appliance’s wiring can prevent major damage.
- A quality socket set with ratcheting wrenches makes disassembly effortless, reducing the risk of damaging delicate parts during upgrades.
- Magnetized screwdrivers keep tiny fasteners within reach, especially when working in tight spots or in-depth repairs.
- An infrared thermometer helps me monitor temperature irregularities that might hint at heating element problems, saving downtime and repair costs.
- Future tech like smart sensors and diagnostic apps will revolutionize repairs, but for now, mastering these trusted tools remains invaluable.
Rise to the Occasion: Your Dishwasher’s Future Starts Today
Embracing these insights about dishwasher-drain systems and warranty care empowers you to make smarter decisions, avoid costly mishaps, and extend your appliance’s lifespan. Don’t wait until water is pooling under your feet—take action now and be the homeowner who truly knows their appliances. Have you ever faced a leak that caught you off guard? Share your experience below, and let’s learn together.
Related Posts

The $9 Replacement Gasket That Stops Door Edge Leaks
I remember the moment vividly. I was mid-cycle, the dishwasher…
The $6 Brass Compression Nut That Stops Silent Cabinet Rot
Imagine this: You're finally tackling that stubborn cabinet leak under…
Ditch the Plastic: Why Stainless Steel Hoses are the Only Safe Choice
It was a morning like any other, until I opened…