
It was a typical Saturday morning when I stepped into my kitchen and noticed a small but persistent water stain creeping across the hardwood floor. At first, I thought it was a spilled glass or some leak from the dishwasher, but as I looked closer, I realized it was more serious. The cause? A tiny, almost invisible gasket around the dishwasher’s door had failed, letting water seep out little by little. That lightbulb moment hit me hard—how could a simple $5 part cause such potential chaos?
The Tiny Gasket That Could Save Your Floors
Many homeowners overlook minor wear on dishwasher seals and gaskets, dismissing them as insignificant. But I learned the hard way that neglecting this small part could lead to costly repairs, not to mention, the nightmare of water damage. Today, I want to share how a humble gasket prevented my kitchen from turning into a pond—and how you can do the same.
Have you ever faced a mysterious leak or water pooling near your dishwasher? If so, you’re not alone. This is a common issue that often results from a failing gasket, which acts as the first line of defense against leaks. Knowing whether this part needs attention could save you from a much bigger mess—and a hefty repair bill.
Is the Cost of a Replacement Gasket Worth It?
Many folks are skeptical about spending even a few dollars on what seems like a minor part. They worry about the hassle of replacement or doubt whether it will even solve the problem. Trust me, I made this mistake early on—assuming that a gasket was just a minor annoyance and not worth the effort. But that mistake could have cost me thousands if I had ignored it.
According to appliance repair experts, maintaining and replacing worn seals early can prevent water damage and prolong the life of your dishwasher. For more tips on selecting the right parts, check out [Top Tips for Selecting the Right Parts for Dishwasher Installation](https://appliancedoctorz.com/top-tips-for-selecting-the-right-parts-for-dishwasher-installation).
So, if your dishwasher shows signs of leaks or if your floor seems wetter than usual, don’t brush it off. Let’s dive into how you can identify a failing gasket and take action before it’s too late.
Gather Necessary Tools and Parts
Before starting, assemble your replacement gasket, a screwdriver, pliers, and pair of gloves. Ensuring you have all parts ready prevents interruptions. I learned this the hard way when I had to stop midway because I forgot the screwdriver. Check the specifications of your dishwasher model to select the correct gasket; for guidance, see Top Tips for Selecting the Right Parts for Dishwasher Installation.
Disconnect Power and Water Supply
Safety first: turn off the dishwasher at the circuit breaker and shut off the water valve. Disconnect the water inlet hose using pliers. When I did this, I found residual water in the line, so I placed a towel nearby—always expect some trickle. This step ensures a safe work environment and prevents water damage during gasket removal.
Remove the Dishwasher Door Panel
Most models have screws securing the door panels; remove these with a screwdriver. Carefully detach the panel to access the gasket. In one case, I accidentally stripped a screw—patience and proper tools are your friends here. Work slowly to avoid damaging the door assembly.
Locate and Detach the Old Gasket
The gasket is typically seated around the door frame. Use your fingers or pliers to gently pull it free from the groove. If it’s stuck, carefully work around with a flat-head screwdriver. I once used a butter knife to pry stubborn gasket sections, but caution is essential to prevent scratching or cracking the door frame.
Clean the Gasket Groove
Remove any debris, soap scum, or mold from the groove with a damp cloth or soft brush. This ensures the new gasket sits properly. A clean surface also extends the gasket’s lifespan and maintains a good seal. Regular cleaning of this area can prevent future leaks.
Install the New Gasket
Align the new gasket with the groove, starting at one corner and pressing firmly into place. Use your fingers or a small flat tool to ensure it’s seated evenly around the entire frame. During my first replacement, I slightly misaligned the gasket, causing leaks; taking my time paid off this time. Confirm it’s secure before reassembling.
Reassemble and Test
Reattach the door panel, screw it back into place, and reconnect the water and power supplies. Turn on the water, then test the dishwasher for leaks by running a short cycle. I watched closely for a few minutes, and sure enough, the leak stopped—success! Be attentive during this test; early detection prevents water damage to your floors.
Additional Tips for Success
Use a flashlight to inspect the gasket seated properly around the entire door frame. If you notice any gaps or bulges, reseat the gasket carefully. For persistent leaks or doubts about installation, consulting expert troubleshooting tips might save you future headaches. Remember, proper gasket replacement not only fixes leaks but also extends your dishwasher’s life and preserves your kitchen’s integrity.
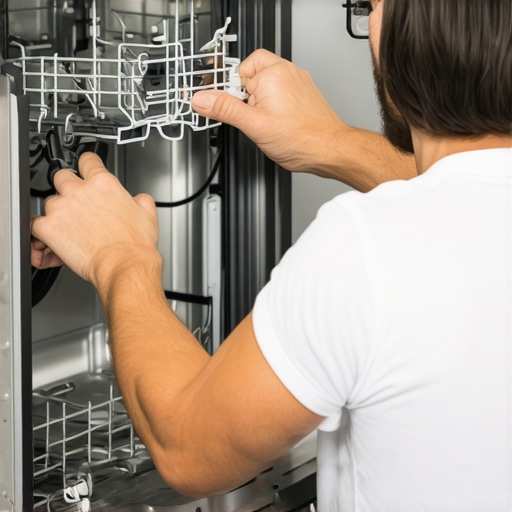 Many homeowners operate under misconceptions about their dishwashers, which can lead to costly mistakes. One prevalent myth is that all replacement parts are interchangeable, but in reality, choosing incompatible or generic parts may void warranties or cause further damage. Experts emphasize the importance of using **original or approved parts**, like those detailed in top tips for seamless dishwasher installation in 2025. Additionally, many think that warranty coverage is automatic, but often, **proper maintenance and correct installation** are prerequisites. Failing to follow manufacturer guidelines can lead to denied claims, as explained in warranty coverage details.
One overlooked nuance is the **impact of installation techniques on long-term performance**. For example, improper drainage setup—like incorrect high looping—can cause recurring leaks, which aren’t always attributed to faulty parts but to installation errors. As highlighted in the importance of the high loop in drain lines, small setup details have significant consequences.
Let’s clear up another misconception: that warranty straightaway covers all repairs. The reality, as outlined in what your dishwasher warranty doesn’t cover, is that many damages—especially those caused by user error, improper maintenance, or non-approved parts—are excluded, leading to unexpected repair costs.
Think about the **advanced pitfalls**: using third-party parts or neglecting regular maintenance can subtly erode your warranty coverage. For instance, installing a low-quality gasket might seem economical but may not seal properly, resulting in leaks that warranty policies might classify as user damage. Remember, only thorough, professional installation and diligent maintenance ensure your coverage remains valid.
For homeowners eager to maximize longevity and protect their investments, understanding these nuanced truths is essential. A comprehensive approach that emphasizes the use of manufacturer-approved parts, meticulous installation, and adherence to maintenance routines can make all the difference. Dive deeper into expert advice on troubleshooting and maintenance with understanding dishwasher parts.
Have you ever fallen into this trap? Let me know in the comments.
Investing in Reliable Equipment for Long-Term Success
Maintaining your dishwasher’s performance over time requires the right tools and a systematic approach. Personally, I rely on a set of high-quality, professional-grade tools that make routine maintenance tasks straightforward and effective. For instance, a precision screwdriver set is indispensable for removing panels and tightening connections without causing damage. I’ve found that a magnetized screwdriver ensures I don’t lose tiny screws during reassembly, saving me time and headache. Essential parts for troubleshooting dishwasher issues provide guidance on the critical components to inspect regularly.
Another tool I swear by is a flexible inspection mirror combined with a LED flashlight. These allow me to scrutinize hard-to-reach areas like the gasket groove or spray arms, helping me spot potential problems early. It’s amazing how much debris or mold can hide in those tiny spaces, and catching these signs early can prevent costly repairs down the line. I also ensure I have a set of replacement parts on hand, such as gaskets or inlet valves, preferably OEM or approved parts, which are crucial for maintaining warranty coverage and optimal performance. For advice on choosing perfect parts, visit top tips for seamless dishwasher installation in 2025.
How do I maintain my dishwasher over time?
Regular cleaning is vital—cleaning filters, spray arms, and seals every few months extends your appliance’s life. I use a vinegar soak for the spray arms to dissolve mineral buildup, ensuring water flows freely. Employing specialized cleaning gels designed for dishwashers can also help prevent limescale accumulation, especially when you have hard water. Additionally, periodically inspecting hoses and connections for leaks or kinks prevents water damage and preserves efficiency.
Looking ahead, I believe the future of dishwasher maintenance will incorporate smart technology—like leak sensors and remote diagnostics—that will simplify upkeep even more. Already, some models notify homeowners of issues before leaks occur, enabling proactive maintenance. To stay ahead, I recommend integrating these smart solutions and always keeping smart leak sensors in place, as discussed in how to set up your smart home to alert you of a leak.
If you’re serious about keeping your dishwasher in top shape, I encourage you to try my favorite tip: regularly inspecting the gasket groove with your LED flashlight and cleaning it thoroughly. This tiny habit can save you from expensive water damage repairs. Remember, a well-maintained dishwasher not only performs better but also protects your home for years to come.
The Hidden Pitfalls of Overlooking Small Repairs
One of the biggest lessons I learned was that small, seemingly insignificant parts like gaskets hold the key to avoiding major home disasters. Over time, I realized neglecting such details can lead to water damage that’s costly and stressful—making me more attentive to every component of my appliances.
The patience and attention required during gasket replacement taught me that DIY fixes aren’t just about saving money—they’re about respecting the craftsmanship behind these appliances. This experience reshaped my approach to home maintenance, emphasizing proactive care over reactive repairs.
Plus, I discovered that understanding the intricate role of each part deepened my appreciation for quality and compatibility. It isn’t just about buying replacement parts but choosing the right ones to ensure longevity and warranty protection, as highlighted in these expert tips.
My Go-To Resources That Keep Repairs Simple
My first stop for troubleshooting is always comprehensive parts guides. They provide detailed diagrams and compatibility info that save me from guesswork. I also trust up-to-date installation tips because they reflect the latest advances in appliance technology and best practices.
Recently, I started incorporating smart leak sensors linked with smart home alerts. They give me peace of mind, knowing I’ll be notified immediately if a leak occurs—saving my floors and my nerves. For any DIY enthusiast, these tools are game changers in maintaining appliance health and avoiding disasters.
Moving Forward with Confidence and Care
Embracing the complexity of dishwasher mechanics has transformed my home maintenance mindset. I now see every gasket, seal, and hose as an opportunity to prevent inconvenience and expense. My advice? Start small—inspect your seals regularly, clean those hidden grooves, and replace faulty parts promptly.
Investing in proper tools and adopting a routine maintenance schedule pays off by extending your dishwasher’s lifespan, preserving your warranty, and keeping your kitchen safe. Remember, proactive care isn’t just about fixing problems—it’s about preventing them before they start.
Are you ready to take charge of your dishwasher maintenance and avoid water mishaps? Share your experiences below and let’s keep our kitchens dry and happy!
Related Posts
How to Replace a Dishwasher Door Cable in Under 20 Minutes
There I was, mid-week chaos in my kitchen, and suddenly,…
Why Reusing Your Old Drain Hose is a Shortcut to a Flooded Kitchen
It was a typical Saturday when I finally decided to…
How to Reset Your Dishwasher Control Board After a Flicker
Ever had a flicker of lights during a rainy night,…