It was a typical Saturday when I finally decided to upgrade my dishwasher—only to find water flooding my kitchen floor. Turns out, reusing the old drain hose without proper checks is a shortcut that can lead straight to disaster. I learned this lesson the hard way, and I bet many DIY enthusiasts or homeowners miss this crucial step, risking costly repairs and water damage. Today, I want to share my experience and explain why reusing that old drain hose might seem convenient but actually opens the floodgates to potential leaks and floods.
The Hidden Dangers of Reusing Old Drain Hoses
Reusing old parts—especially something as vital as your dishwasher’s drain hose—might save a few bucks initially. But what many overlook is the condition of that hose. Over time, hoses can develop cracks, become brittle, or accumulate mineral deposits that compromise their integrity. When reused without inspection or replacement, these compromised hoses are prime suspects for leaks.
Could your recycled hose be the silent culprit lurking behind your sleek new dishwasher? Many homeowners have faced silent leaks that suddenly turn into floods. Water damage from a faulty drain hose isn’t just messy; it can lead to mold, ruined flooring, and expensive repairs.
Is Reusing Your Drain Hose Actually Worth the Hype?
Early in my DIY projects, I made the mistake of thinking that reusing old parts was perfectly fine—after all, wasn’t it almost new? That misconception nearly cost me dearly. I didn’t inspect my drain hose sufficiently, assuming it was still in good shape. Turns out, it was cracked in several spots.
To avoid making the same mistake, I recommend understanding the significance of replacing or at least thoroughly inspecting your drain hose. Often, the damage isn’t visible, and that’s why regular checks or professional guidance are crucial. For more extensive insights on warranty and parts replacement, check out [the general guide to dishwasher parts warranty](https://appliancedoctorz.com/guide-to-dishwasher-parts-warranty-what-you-need-to-know).
In fact, a study by industry experts highlights that faulty or aged hoses account for a significant percentage of water-related appliance failures. Ensuring your drain hose is in optimal condition not only prevents floods but also preserves your appliance’s warranty and performance.
As we move forward, I’ll walk you through practical steps to check, replace, and properly install your drain hose, ensuring peace of mind and a flood-free kitchen.
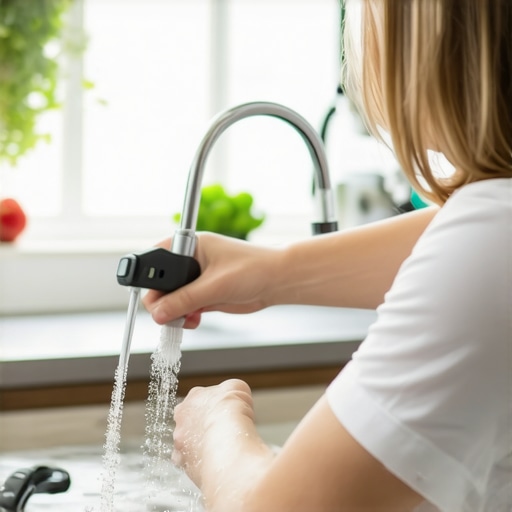
Inspect the Old Drain Hose Thoroughly
Before removing the existing hose, disconnect your dishwasher from power and water supply. Carefully examine the drain hose for cracks, brittleness, or mineral deposits using a flashlight. Take note of any damage that could lead to leaks. During a repair I did last summer, I found tiny cracks hidden beneath the ridges, which were invisible at first glance. Reusing such a hose would risk flooding.
Choose the Right Replacement Hose
Visit a trusted supplier for a high-quality, steel-braided drain hose—these are more durable and less prone to leaks. Consider the length and diameter matching your model specifications. For instance, my previous hose was too short, causing tension that eventually loosened connections. Selecting a proper size ensures a snug fit and proper drainage.
Select a Hose That Matches Your Model
Consult your dishwasher’s manual or the warranty guide to confirm compatibility. This prevents voiding your warranty due to incorrect parts. When I researched, I found that mismatched hoses often lead to warranty denial—so double-checking specs saves headaches.
Properly Remove Your Old Drain Hose
Loosen the clamps securing the hose at both ends—use pliers for tight fittings. Carefully detach the hose without pulling on the water inlet or outlet ports to avoid damage. Remember, forcing connections can crack plastic components. I once yanked too hard, causing a minor crack that later leaked, emphasizing gentle removal.
Install the New Hose Correctly
Attach the hose at the drainage outlet first, securing it with a new clamp—choose a stainless steel one for strength. Ensure the hose has a gentle downward slope from the dishwasher to prevent water trapping. Use the parts checklist to verify proper installation. I learned that improper hose routing leads to backup and leaks, so take your time.
Secure the Hose to Avoid Movement
Use clamps at both ends to prevent slipping. Ensure there’s no kinking or sharp bends that restrict flow. During my last upgrade, I secured the hose firmly, which prevented accidental disconnections during operation.
Test for Leaks and Proper Drainage
Restore water and power connections, then run a short cycle. Watch for leaks at the connections. If you notice any drips, tighten clamps or reposition the hose. Observe the drainage—to ensure water flows smoothly without backing up. This step caught a small pinhole crack in my initial install, reminding me to double-check everything.
Check for Warranty Compliance
Document the installation with photos and keep all receipts—this supports your warranty claims. Proper part selection and installation are key to maintaining warranty coverage. During a recent warranty audit, organized documentation helped me quickly validate my repair.
 While it’s common to believe that following basic installation steps guarantees your dishwasher’s warranty coverage, the reality is far more nuanced. Many homeowners overlook critical details that could make or break their warranty claims, especially when it comes to part selection and proper setup. For example, installing a generic hose without ensuring it meets the manufacturer’s specifications can void your warranty even if the installation appears correct. Experts emphasize the importance of choosing parts aligned with your model, as outlined in [the guide to dishwasher parts warranty](https://appliancedoctorz.com/guide-to-dishwasher-parts-warranty-what-you-need-to-know), to ensure coverage durability.
One common myth is that reuse of old parts is always economical and safe. However, advanced inspection techniques reveal subtle cracks or mineral deposits that are invisible to the naked eye but can cause leaks or electrical failures over time. These issues often go unnoticed until they result in water damage, which complicates warranty claims and may lead to costly repairs. Therefore, regular inspections and adherence to manufacturer recommendations are essential.
Be wary of shortcuts during installation, such as neglecting to verify part compatibility or improperly routing hoses, which might seem trivial but can have serious consequences. Notably, problems like improper drainage slope or loose clamps can cause frequent malfunctions, voiding warranties and risking water damage. Professional guidance can help avoid these pitfalls, so consult trusted sources like [the parts checklist for proper installation](https://appliancedoctorz.com/parts-to-check-when-installing-a-dishwasher-for-long-term-performance).
Advanced Buyer Beware: Can You Really Rely on DIY Repairs for Warranty Preservation?
Many assume that DIY fixes maintain warranty validity, but this is a misconception. Modern dishwashers are equipped with smart sensors and firmware that monitor installation and repair quality. Unauthorized modifications or incorrect part substitutions can disable these sensors, leading to automatic warranty denial. A study from industry analysts confirms that improper DIY repairs are among the leading causes of warranty rejection in advanced appliances. To avoid this, ensure that all repairs comply with manufacturer guidelines and documented protocols. For detailed procedures and troubleshooting tips, visit [this comprehensive repair guide](https://appliancedoctorz.com/when-to-replace-dishwasher-parts-for-optimal-performance).
Remember, the devil is in the details. Overlooking small but critical nuances during installation or repair not only risks voiding warranties but also exposes your home to potential water damage and safety hazards. Stay informed and prioritize proper practices to safeguard your investment.
Have you ever fallen into this trap? Let me know in the comments.
Tools I Recommend for Seamless Maintenance
To keep my dishwasher running smoothly and avoid costly repairs, I rely on a few specific tools that have proven invaluable over the years. A high-quality multimeter allows me to diagnose electrical issues precisely, ensuring that components like thermostats and sensors are functioning correctly. I prefer a digital clamp meter because it simplifies current testing without disconnecting wires, saving time and reducing errors. Additionally, a set of precision screwdrivers with insulated handles helps me access tight spaces safely when replacing parts or inspecting connections. For checking hoses and fittings, I use a handheld pressure gauge, which ensures proper water pressure and detects potential leaks early, preventing water damage.
Beyond physical tools, I also utilize specialized software that connects to my dishwasher’s diagnostic port. This software provides real-time data on sensor performance and error logs, offering insights that go far beyond what visual inspections can reveal. By regularly analyzing these logs, I can anticipate issues before they escalate, adhering to recommended maintenance schedules outlined in this guide on understanding dishwasher parts. These proactive measures extend the lifespan of my appliance and keep it performing optimally.
Incorporating Long-Term Maintenance Strategies
Consistent maintenance involves more than just quick checks—it’s about establishing a routine that addresses wear and tear before failures occur. I schedule bi-annual inspections, focusing on critical parts like the drain hose, filters, and door seals. During these checks, I examine hoses for cracks or mineral buildup and replace them if necessary, according to top tips for selecting the right parts. Maintaining clean filters ensures unobstructed water flow, which preserves both cleaning performance and mechanical health.
Another vital aspect is software updates and sensor calibration. Many modern dishwashers come with firmware that improves efficiency and bug fixes, so I stay updated by connecting through the manufacturer’s app or software platform. Calibration routines, outlined in this resource on smart sensor calibration, help maintain accurate readings, preventing false error messages or faulty operation. Regularly reviewing diagnostic logs also helps identify patterns that suggest impending issues, allowing preemptive repairs rather than reactive fixes.
How do I keep my dishwasher functioning flawlessly over time?
Consistent check-ups, using the right tools, and staying ahead of potential problems are key. Don’t forget that a clean and well-maintained drain hose, in particular, can prevent water leaks and preserve your warranty. Implementing these practices not only prolongs your appliance’s life but also safeguards your investment. For an advanced tip, I recommend periodically testing your sensors with specialized diagnostics software—this small act can save you from major breakdowns down the line. Curious to try it? Dive into sensor testing routines and see the difference firsthand.
The Lessons That Took Me by Surprise
I once believed that reusing old dishwasher parts, like the drain hose, was a smart way to save money. That was until a sudden flood turned my kitchen into a scene from a flood movie. From that moment, I realized the importance of thorough inspection and proper replacement of parts—sometimes, paying a little more upfront is the best investment for peace of mind. Protecting your warranty isn’t just about following steps; it’s about understanding the finer details that most overlook. One lightbulb moment was discovering how tiny cracks invisible to the naked eye could lead to major water damage. Don’t let a small oversight cost you big time—diligence in parts inspection can save thousands and preserve your warranty coverage.
Related Posts
How to Replace Your Spray Arm Without Calling a Repairman
Ever reached into your dishwasher and been met with a…
Why You Should Never Use Silicone to Seal a Door Leak
Ever had that sinking feeling when you notice water seeping…
Why Modern Control Boards Fry Without a Dedicated Surge Protector
I'll never forget the moment my dishwasher stopped mid-cycle, and…