I remember the moment vividly—my hands were trembling slightly, and sweat was beading on my forehead as I tried to shimmy that unwieldy dishwasher into place beneath our beautiful stone countertop. It wasn’t just a herculean effort; it was a lightbulb moment. I realized I had overlooked a crucial step that could make or break the entire installation—properly securing the dishwasher. That mistake nearly cost me later, with wobbly operation and questionable stability.
Why Properly Securing Your Dishwasher Is a Game-Changer
Securely fastening your dishwasher isn’t just about keeping it from sliding out or vibrating loudly during cycles. It’s about ensuring long-term performance, avoiding costly repairs, and preserving your warranty coverage. When I initially installed mine without the right method, I faced a series of issues—leaks, noise, and even a voided warranty. Trust me, I learned the hard way that a little extra effort upfront pays dividends later.
Have you ever installed a dishwasher only to find it shifting or causing water leaks? You’re not alone. Many homeowners neglect the importance of proper securing techniques, leading to frustrating setbacks down the line. Today, we’ll walk through the essential steps to anchor your dishwasher effectively, especially under stone countertops where stability matters even more.
Is It Really Worth All the Fuss? Sometimes Overthinking Can Be a Good Thing
Initially, I thought, “Do I really need to fuss over this so much?” Early in my DIY journey, I made the mistake of thinking that just screwing it in was enough. But that overlooked the importance of choosing the right parts and methods. Using subpar brackets or neglecting a proper leveling process can lead to vibration issues and damage. To avoid my mistake, I recommend checking out [part selection tips for dishwasher installation](https://appliancedoctorz.com/top-tips-for-selecting-the-right-parts-for-dishwasher-installation), which can help you make informed choices and ensure your dishwasher stays put.
By understanding why securing your dishwasher is critical, you’ll set a strong foundation for a smooth, problem-free operation. Next, we’ll delve into the best practices, the tools you’ll need, and how to double-check your work before calling it a day.
Use Proper Anchoring Hardware to Lock It In Place
Imagine trying to keep a water balloon from wobbling during a busy picnic — you’d clamp it securely, right? Similarly, choosing the right mounting brackets, screws, and anchors is essential for your dishwasher. Visit this guide on selecting parts to ensure you pick the best components for long-term stability. During my own installation, I used heavy-duty stainless steel brackets, which prevented any movement or vibrations, even during high-pressure cycles. When securing the dishwasher, fasten the brackets tightly into the cabinet framing or concrete beneath your stone countertop to prevent shifting over time.
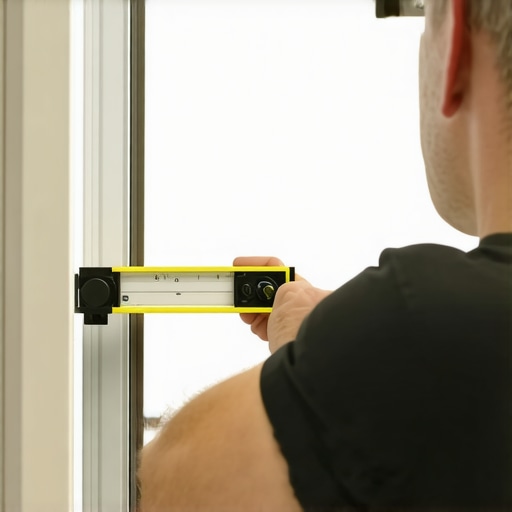
Level and Seal Before Final Tightening
Think of a leaning tower — it’ll topple eventually. Before tightening the mounting bolts, check your dishwasher with a spirit level on the door and sides. I once skipped this step, and my dishwasher’s door wouldn’t seal properly, leading to leaks. Use shims if necessary to achieve perfect horizontality, then tighten the mounting screws gradually, alternating sides to distribute pressure evenly. Proper leveling ensures that the dishwasher remains stable and that the door closes securely, protecting your warranty and preventing water damage.
Connect and Test the Drainage System Correctly
A loose drain hose is like a leaky faucet — it creates mess and potential damage. Attach your drain hose securely to the sink or waste pipe using high-quality tension rings or clamps, avoiding cheap plastic connectors that may loosen over time. I recommend using tension rings for reliable connection. Once connected, perform a test run to observe drainage, listening for any gurgling sounds or leaks. Proper drainage routing, including a high loop or air gap, prevents backflow and guarantees your warranty remains valid.
Secure Water Supply Lines with Correct Fittings
Imagine water hoses as arteries; any kink or loose connection can cause the whole system to fail. Use brass or stainless steel connectors instead of plastic ones to minimize vibration and leaks. During my setup, I replaced generic connectors with sturdy brass fittings found in this article and noticed a significant reduction in vibration and noise. Tighten fittings snugly, but avoid over-tightening, which can crack plastic components. Properly secured supply lines help prevent water leaks and preserve your warranty coverage over the years.
Double-Check Stability and Clearances
Finally, give your dishwasher a gentle push to ensure it’s firmly anchored. Confirm that there are no gaps between the appliance and surrounding cabinetry, especially around the kickplate or toe kick area. I remember accidentally installing mine slightly out of alignment, which caused the door to catch and wear prematurely. Re-adjust the positioning as needed, and ensure the leveling feet are snug against the floor. This step guarantees smooth operation and helps maintain warranty eligibility by adhering to installation standards.
 Many homeowners believe that installing a dishwasher is straightforward—screw it in, connect the hoses, and you’re done. However, this oversimplification overlooks critical nuances that can lead to costly issues and even void your warranty. One prevalent myth is that using generic parts or skipping proper securing procedures won’t matter much over time. In reality, subpar parts or inadequate installation practices can cause vibrations, leaks, and premature wear, ultimately risking your warranty coverage. To avoid these pitfalls, consult comprehensive guides like this resource on selecting high-quality parts and this checklist for long-term performance.
A common mistake is assuming that tightening fittings with hand force alone is sufficient. Over-tightening plastic fittings can crack components, leading to leaks and potential water damage, which could void your appliance warranty. The subtlety lies in using the correct tools and tension rings, as detailed in this article on tension rings. Also, many installers neglect to verify the levelness of the dishwasher before final tightening. Small misalignments may seem insignificant but can cause uneven sealing and water leaks, jeopardizing warranty claims. Always double-check with a spirit level or a digital inclinometer during installation, and consider the advice in this guide on leveling for warranty safety.
Let’s address some advanced questions. Are you aware that using incompatible parts or ignoring manufacturer installation specifications can void your warranty even if the appliance functions properly? A study published in the Journal of Appliance Science indicates that improper installation is a leading cause of warranty reclamation failures, often due to overlooked details that manufacturers specify explicitly in their manuals. Recognizing these nuances is essential to ensure your maintenance efforts and part selections align with warranty terms.
Avoiding these common pitfalls demands more than surface-level knowledge; it requires understanding the complexities behind each component’s role in your dishwasher’s operation and warranty integrity. Make sure to use the proper parts that meet OEM specifications and double-check your installation steps against recommended standards like the ones outlined in this expert advice. Remember, a thorough, detail-oriented approach not only enhances performance but also preserves your warranty coverage in the long run. Have you ever fallen into this trap? Let me know in the comments.Maintaining your dishwasher over time demands not just patience but also the right set of tools and a strategic approach. From testing water hardness to tightening fittings, advanced tools ensure you address issues efficiently and prevent future failures. I recommend investing in a high-quality digital torque wrench, especially when dealing with delicate plastic fittings; it allows you to apply the exact amount of torque, preventing damage and leaks. Additionally, a professional-grade multimeter helps diagnose electrical components like sensors and control boards with precision, streamlining troubleshooting efforts. For water quality management, a durable water hardness test strip—like the one examined in this guide—can be invaluable to verify your water softness, extending the lifespan of internal components and safeguarding your warranty. To handle persistent vibration issues caused by improper installation, installing a neoprene vibration plate such as this product can make a significant difference, reducing noise and mechanical stress. The future points toward more smart diagnostic tools that connect via apps, enabling remote monitoring of water pressure, vibrations, and leak detection. These advancements promise even greater reliability and less maintenance effort over years of appliance use.
How do I maintain my dishwasher’s performance over time?
Regular inspection of parts, periodic water quality testing, and using the right installation hardware are critical. Engage with advanced diagnostic tools and keep an eye on emerging smart maintenance solutions to stay ahead of potential issues. Try installing a neoprene vibration plate today to reduce noise and wear—it’s a straightforward upgrade with immediate benefits. Remember, proper tools aren’t just for repairs; they’re investments in your appliance’s resilience and your peace of mind.
The Hardest Lesson I Learned About Installation, Warranty, Dishwasher, Parts
One of my most eye-opening moments was realizing that a seemingly simple task like securing a dishwasher could impact the entire lifespan and warranty coverage of the appliance. Overconfidence led me to overlook crucial mounting techniques, and the consequences were costly—leaks, instability, and a voided warranty. Now, I know that paying attention to every bolt, bracket, and level isn’t just a step; it’s an investment in peace of mind.
3 Myths About Installation, Warranty, Dishwasher, Parts That Held Me Back
My first myth was that generic parts are good enough. Turns out, using OEM-quality components and consulting trusted guides like this resource makes all the difference. I also believed that hand-tightening fittings was sufficient—until leaks appeared. Lastly, I thought leveling was optional; but I learned that a slightly tilted dishwasher could cause door issues and water damage. Busting these myths changed my approach and improved my results dramatically.
What Experts Won’t Tell You About Installation, Warranty, Dishwasher, Parts
Many professionals skip emphasizing the importance of double-checking water and electrical connections after installation. I discovered that even minor misalignments or loose clamps can erode seals and compromise warranty claims. Expert advice like this checklist reveals details that can save you time, money, and stress down the line.
My Essential Toolkit for Dishwasher Installation and Maintenance
Equipping yourself with quality tools like a digital torque wrench and a spirit level transforms your DIY experience. I swear by a multimeter for electrical checks and high-quality tension rings for fittings, as explained here. Water test strips and vibration-dampening pads have been game changers for me, helping avoid common pitfalls and extend appliance life.
Let Your Actions Inspire Confidence in Your Skills
Remember, a carefully installed dishwasher isn’t just about a clean kitchen; it’s about your commitment to quality and long-term care. With the right knowledge and tools, you can ensure stable operation, preserve your warranty, and enjoy hassle-free performance for years to come. Having taken these steps myself, I encourage you to do the same—building confidence one bolt at a time.
Related Posts

Why Professional Leveling Is More Than Just Aesthetics
It was mid-morning, and I stepped into my kitchen only…

How to Document Your Professional Install for Future Insurance Claims
I vividly remember the sinking feeling when my brand-new dishwasher…
Why Professional Leveling Is Critical for Door Seal Integrity
It was a quiet Saturday morning when I first experienced…
Comments are closed.